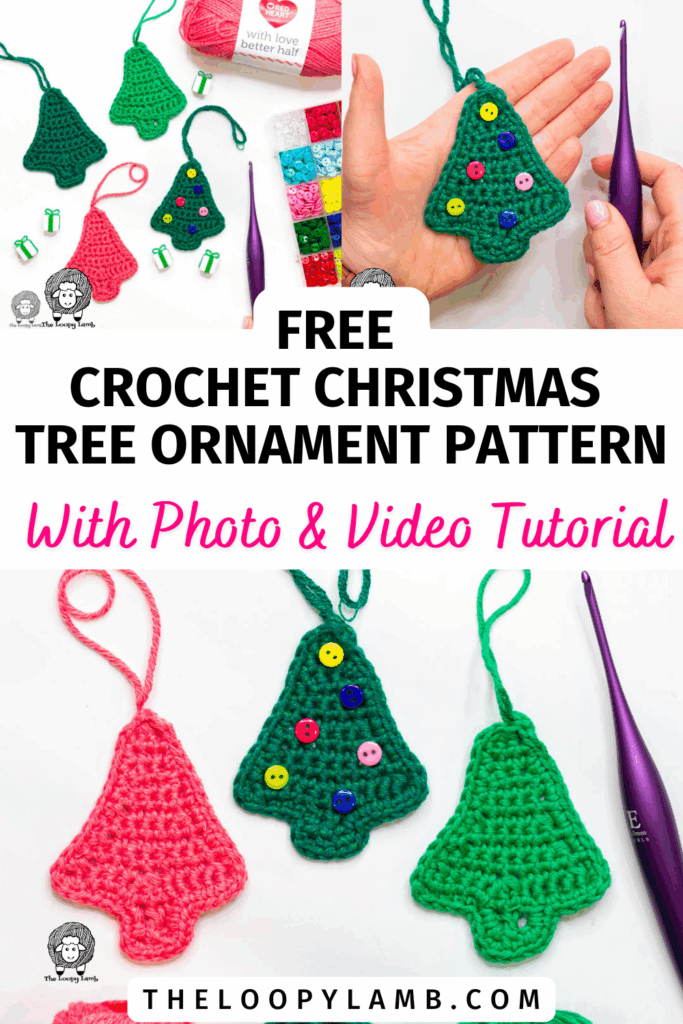
This free crochet Christmas tree ornament pattern is a quick, fun way to decorate your home for the holidays. The design is flat, features button “ornaments,” and works up beautifully in under an hour.
I’ve included both a photo and step-by-step video tutorial for this project so even a confident beginner can give it a go. This design can be used as way to add a handmade touch to your gifts by using them as gift tags or just a fun way to embellish a handmade gift.
Pin This Free Pattern To Your Pinterest Crochet Board for later SAVE
*This post may contain affiliate links, which means that I may earn a small commission from qualifying purchases made through my affiliate link at no extra cost to you. All opinions are my own.*
Prefer an ad-free, easy-to-print PDF?

Get the full printable version of this pattern, including all step-by-step photos, available in my Ravelry and Etsy shops.

Table of contents
- The Yarn I Used
- Recommended Yarn Subs
- 2025 Holiday Stashdown Crochet Along
- Disclaimer
- Skill Level :
- Terminology:
- Supplies :
- Abbreviations :
- Special Stitches & Techniques:
- Finished Size:
- Gauge:
- NOTES:
- Check out the Video Tutorial for this Pattern
- Mini Crochet Christmas Tree Ornament Pattern
- Frequently Asked Questions
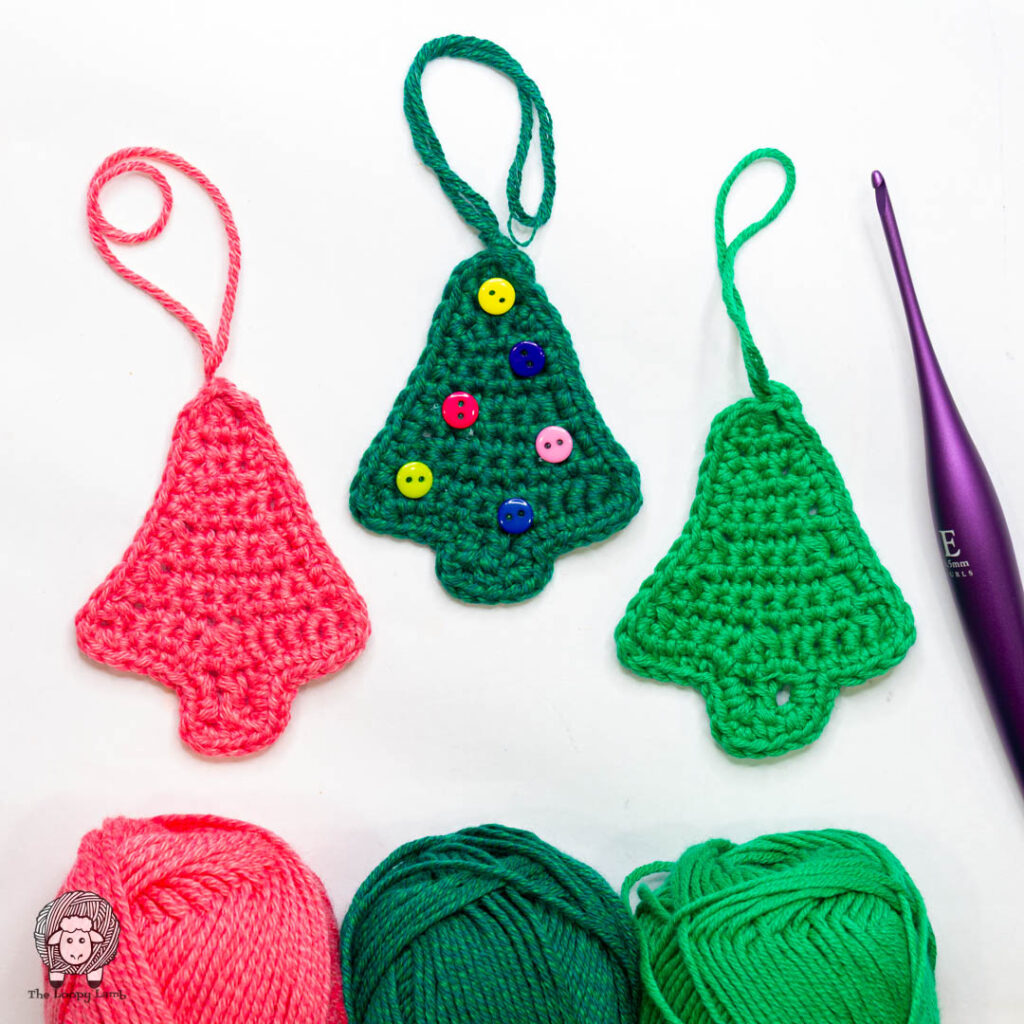
The Yarn I Used
I used Red Heart With Love Better Half for this project. This was a new-to-me yarn and I thoroughly enjoyed working with it. It’s a 50% Acrylic Yarn, 50% Cotton worsted weight (4) yarn. It’s soft but without sacrificing the structure you get with a cotton yarn. Some of the colors have a really great marling effect (a strand in the ply that is a different color) that is very pretty.
Recommended Yarn Subs
This project is a great stash-buster and can work with almost any worsted weight yarn you have on hand. However, if you’re wanting another yarn that has a cotton component or has a similar gauge, these would be the ones I would choose:
- Lion Brand Pima Cotton
- Lion Brand Heartland – the Rocky Mountains Color has the same kind of marling that the Red Heart yarn I used has
- Premier Cotton Sprout Worsted
- WeCrochet Comfy Worsted
- Lion Brand Made with Love the Cottony One
- Caron Jumbo or Caron One Pound
2025 Holiday Stashdown Crochet Along

This pattern is part of the 2025 Holiday Stashdown Crochet Along hosted by Underground Crafter and the CAL Central team! This event runs now through December 15, 2025, with free crochet patterns released every Monday and Thursday from different designers. Each project is stash-friendly and perfect for quick holiday gifts or decorations.
Share your progress with #HolidayStashdownCAL and #CALCentralCrochet, and join the CAL Central Facebook or Ravelry groups for more fun. Enter the CAL Giveaway by 11:59 p.m. on December 31, 2025 for your chance to win prizes from GlassEyesOnline, KnitPal, Knitter’s Relief Balm, Lenny Mud Pottery, MBT Creates, and Unicorn Clean.
Learn more and find all the pattern links here:
👉 2025 Holiday Stashdown Crochet Along
Disclaimer
This pattern is © Ashley Parker of The Loopy Lamb. You’re welcome to sell finished product made using it, I kindly request that you credit The Loopy Lamb as the pattern designer and link to https://theloopylamb.com. This pattern is for personal use only. Please don’t copy, share, or repost the pattern itself, translate or alter it, or use my photos. Video tutorial creation using this pattern is strictly prohibited.
Thank you for supporting independent designers by viewing this pattern right here on my blog. It helps me keep sharing free patterns with you.
Skill Level:
- Easy
Terminology:
- U.S. Terminology
Supplies:
- G / 4.0 mm Crochet Hook <– I recommend these ergonomic hooks
- Red Heart With Love Better Half (50% Acrylic Yarn, 50% Cotton, Worsted Weight (4), 174 yds/159m, 100g/3.5oz), 1 skein in Ivy (or preferred color) (approx. 9 yds/5 g/0.18oz)
- Scissors
- Tapestry Needle
- 9mm Buttons in various colors (optional) <—- these are the ones I used
- Hot Glue Gun and Glue or Needle and Sewing Thread (optional)
- Blocking Materials: Garment Steamer, Pins, Blocking Mat (optional)
- Stitch Marker (optional)
Abbreviations:
- CH(s) = Chain(s)
- DC = Double Crochet
- FSC = Foundation Single Crochet
- FO = Finish Off
- RS = Right Side
- RSS = Reverse Slip Stitch Join
- SC = Single Crochet
- SC3TOG = Single Crochet Three Together
- SCDEC = Single Crochet Decrease
- SL ST = Slip Stitch
- ST(s) = Stitch(es)
- WS = Wrong Side
- YO = Yarn Over
Special Stitches & Techniques:
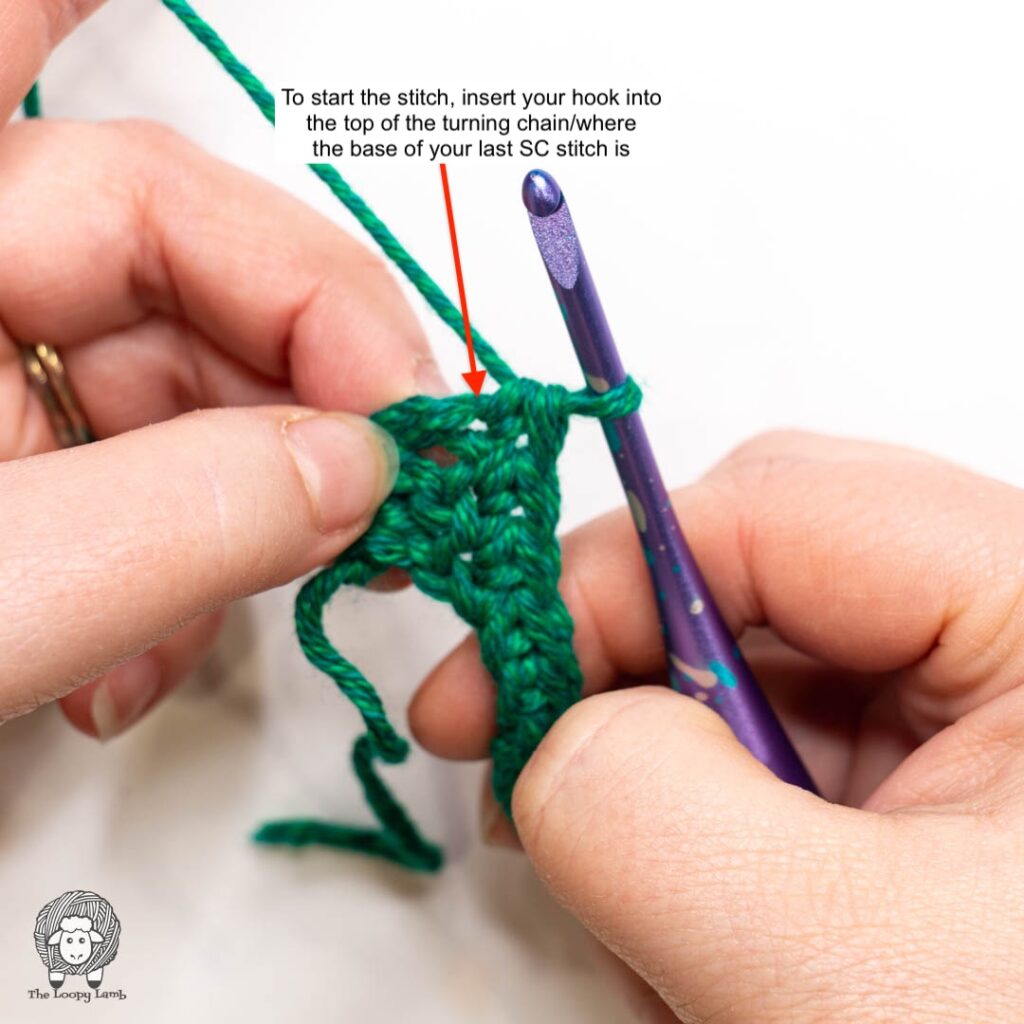
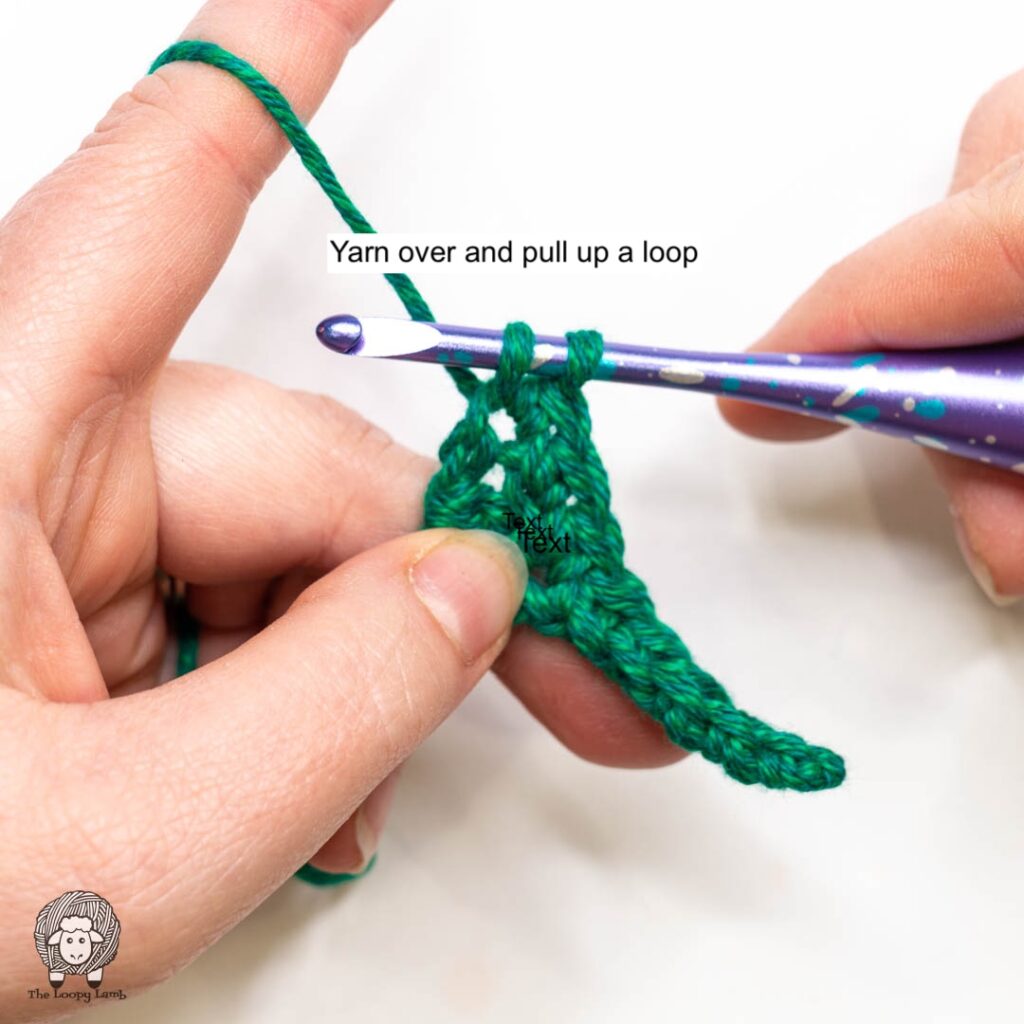
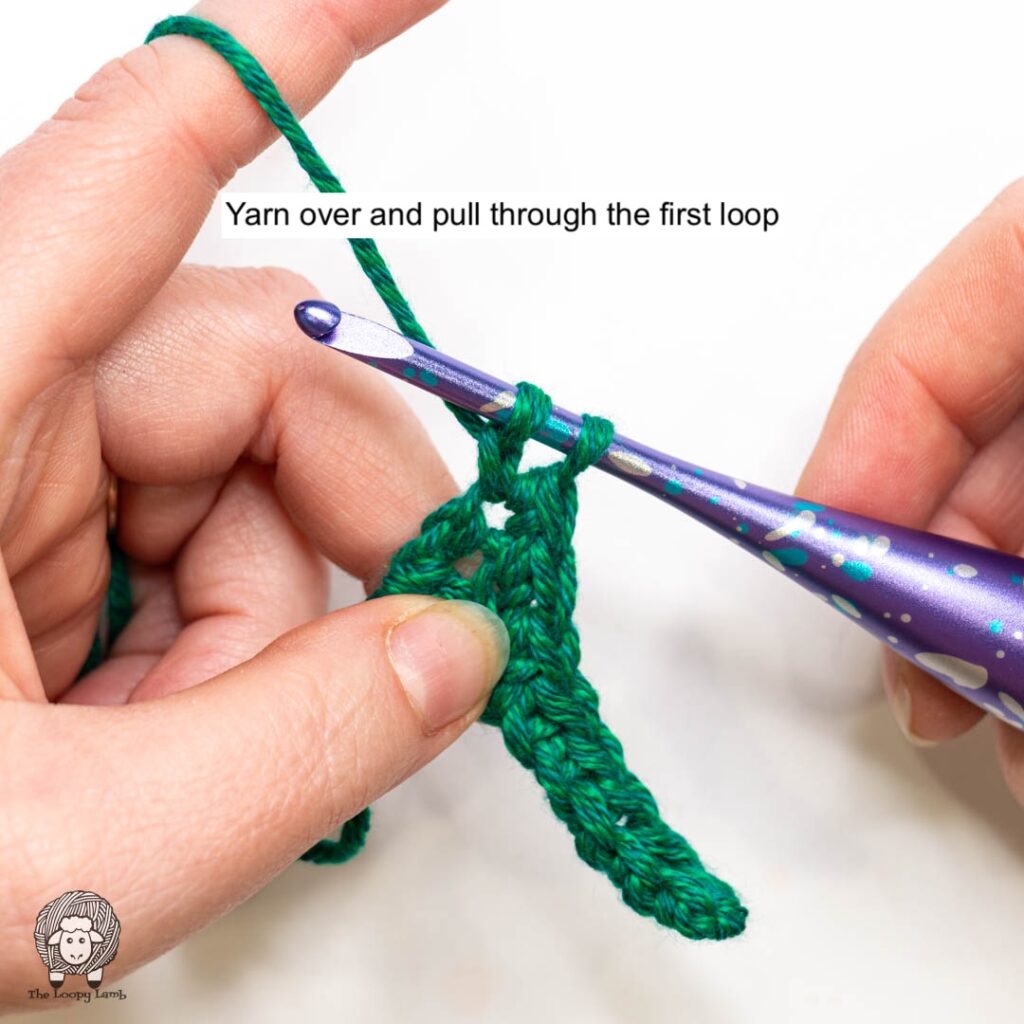
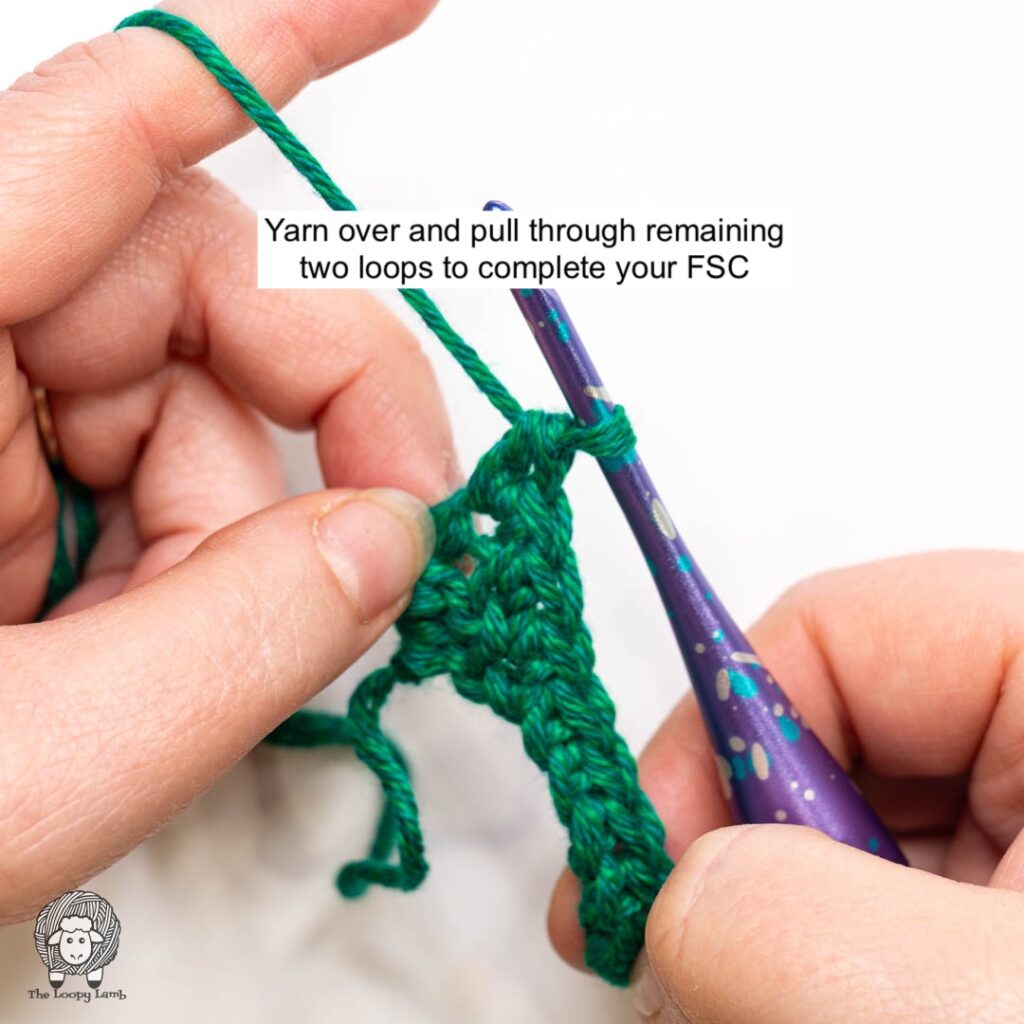
- Foundation Single Crochet: Insert hook into the chain at the base of the previous stitch (ST). Yarn over (YO) and pull up a loop (2 loops on your hook). YO and pull through the first loop (2 loops on your hook). YO and pull through both loops. View a tutorial here: https://theloopylamb.com/how-to-crochet-the-foundation-single-crochet-stitch/
- Reverse Slip Stitch Join (RSS): Remove working loop from hook and insert hook from back of fabric through to the front through the indicated ST. Place the working loop back on hook and pull the loop through the stitch to the back of the fabric.
- Single Crochet 3 Together: Insert hook into the first ST, yarn over (YO) and pull up a loop (2 loops on hook). Insert hook into the next ST, YO and pull up a loop (3 loops on hook). Insert hook into the next ST, YO and pull up a loop (4 loops on hook). YO and pull through all 4 loops on your hook. View a tutorial here: https://theloopylamb.com/how-to-single-crochet-three-together-sc3tog-tutorial/
Finished Size:
- Approx. 3.5” tall (not including hanger)
Gauge:
- Motif measures 3.5” tall measured from top to bottom and 2.75” wide across the widest part of the motif
NOTES:
- Gauge is not vital to the project but it may affect the amount of yarn needed for the project and the size of your tree. Keep a consistent tension throughout your project to ensure the pieces fit together properly.
- A 4.0 mm hook is recommended for this pattern, but I suggest using whatever hook size needed to create a tight, closed fabric free of holes, or whatever hook size needed to match the given gauge.
- If you find that you have holes in your fabric using the recommended hook size, try going down a hook size until you create a tight fabric with no holes in it.
- If you find that you have holes in your fabric using the recommended hook size, try going down a hook size until you create a tight fabric with no holes in it.
- This project is worked from the bottom of the tree to the top.
- Reading the Pattern: Instructions in brackets: I.e.: (SC, SCINC) x 6, this means you’ll work 1 SC stitch in the first stitch and then SCINC in the next and you’ll repeat that pattern a total of 6 times
- Numbers indicated in () at the end of a Round/Row indicate the number of stitches you should have at the end of the Round/Row. I recommend counting your stitches at the end of each Round/Row before moving on to the next.
- Where SC is followed by a number (i.e. SC 14), you’ll work 1 SC stitch in the next 14 stitches or chains, unless the pattern specifies to work those stitches into the same stitch or chain.
- I recommend placing a stitch marker in the top of the skipped chains from Row 1 so you know where to work your stitch in Row 3.
- Numbers indicated in () at the end of a Round/Row indicate the number of stitches you should have at the end of the Round/Row. I recommend counting your stitches at the end of each Round/Row before moving on to the next.
Check out the Video Tutorial for this Pattern

Mini Crochet Christmas Tree Ornament Pattern
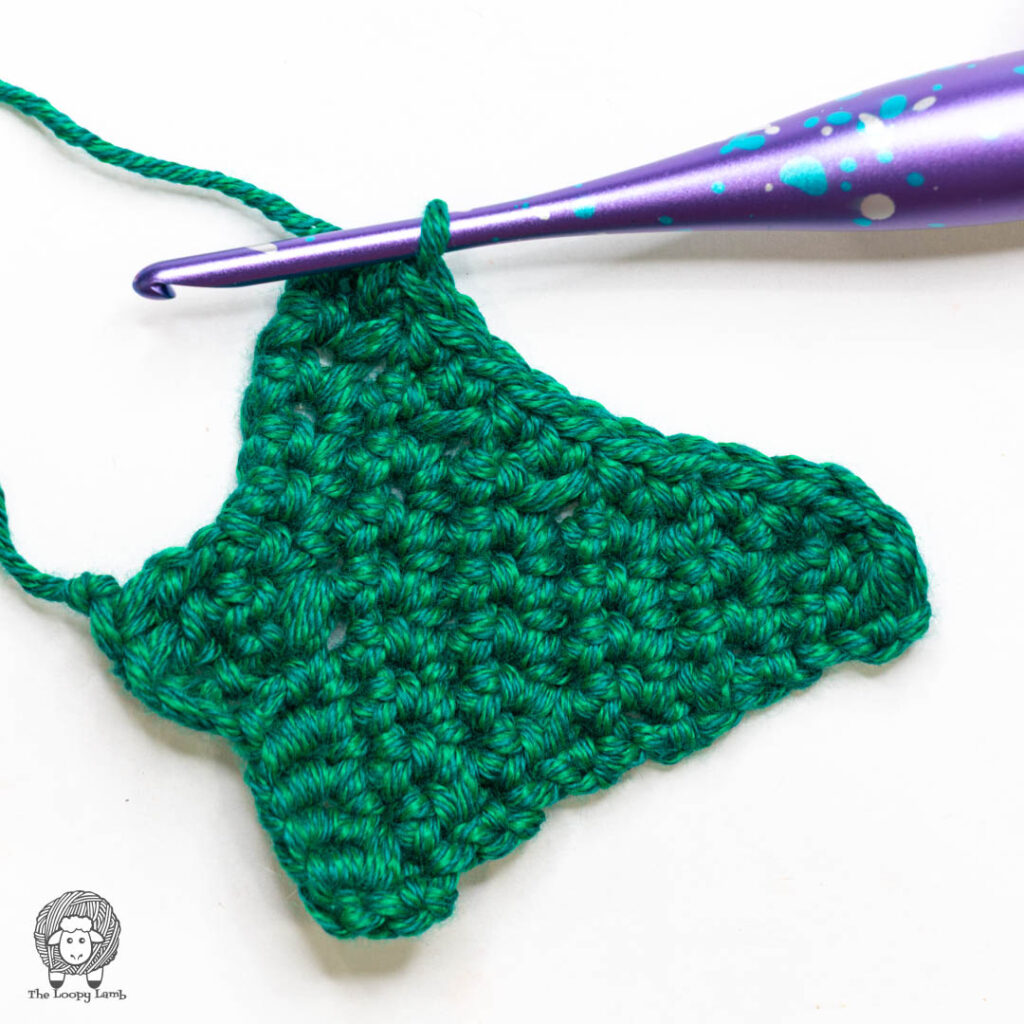
CH 5.
Row 1 (RS): DC in the 4th CH from the hook (skipped CHs count as the first DC). DC in last CH. CH 6 and turn. (3 DCs and 6 CHs)
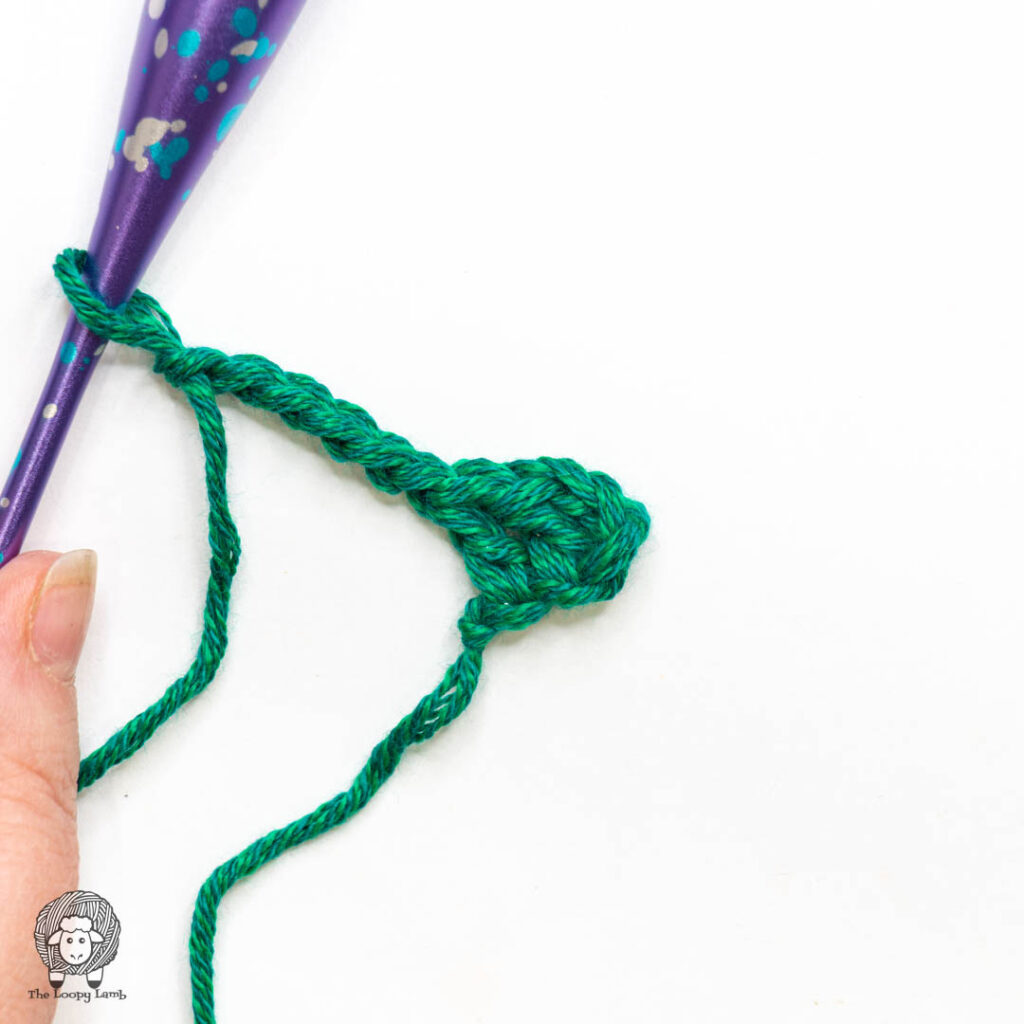
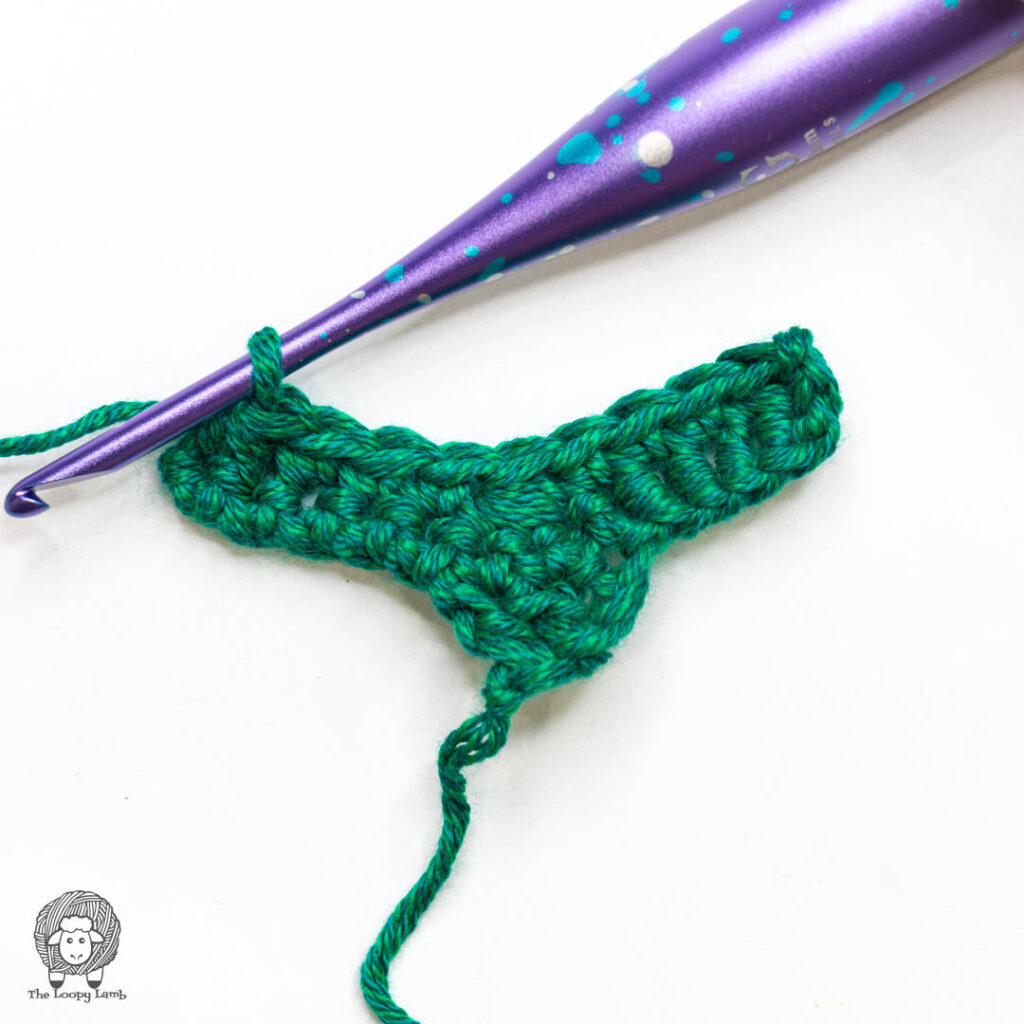
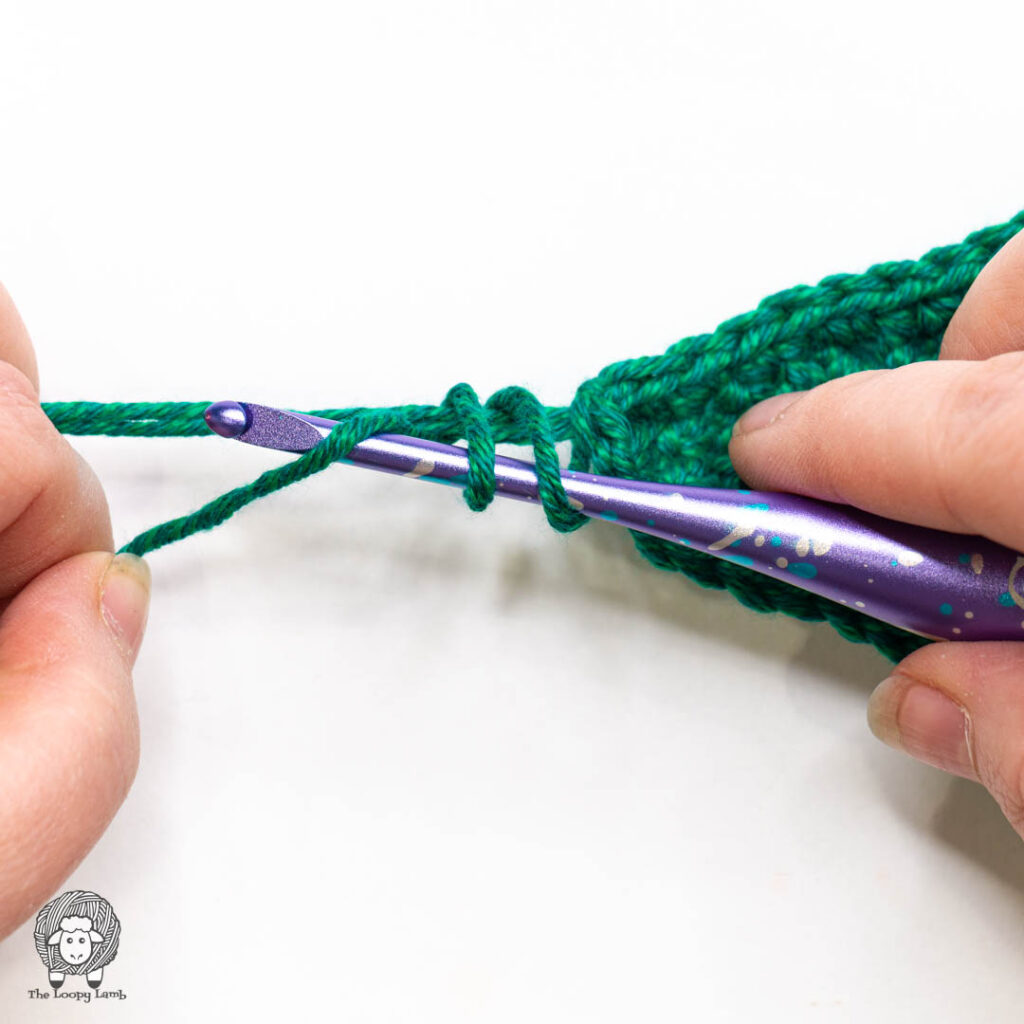
Row 2 (WS): SC in the 2nd CH from the hook. SC in each of the next 4 CHs, SC 3 (the last SC is worked into the top of the skipped CHs from Row 1), FSC 5. (13)
See below for how to do the FSC in this row.
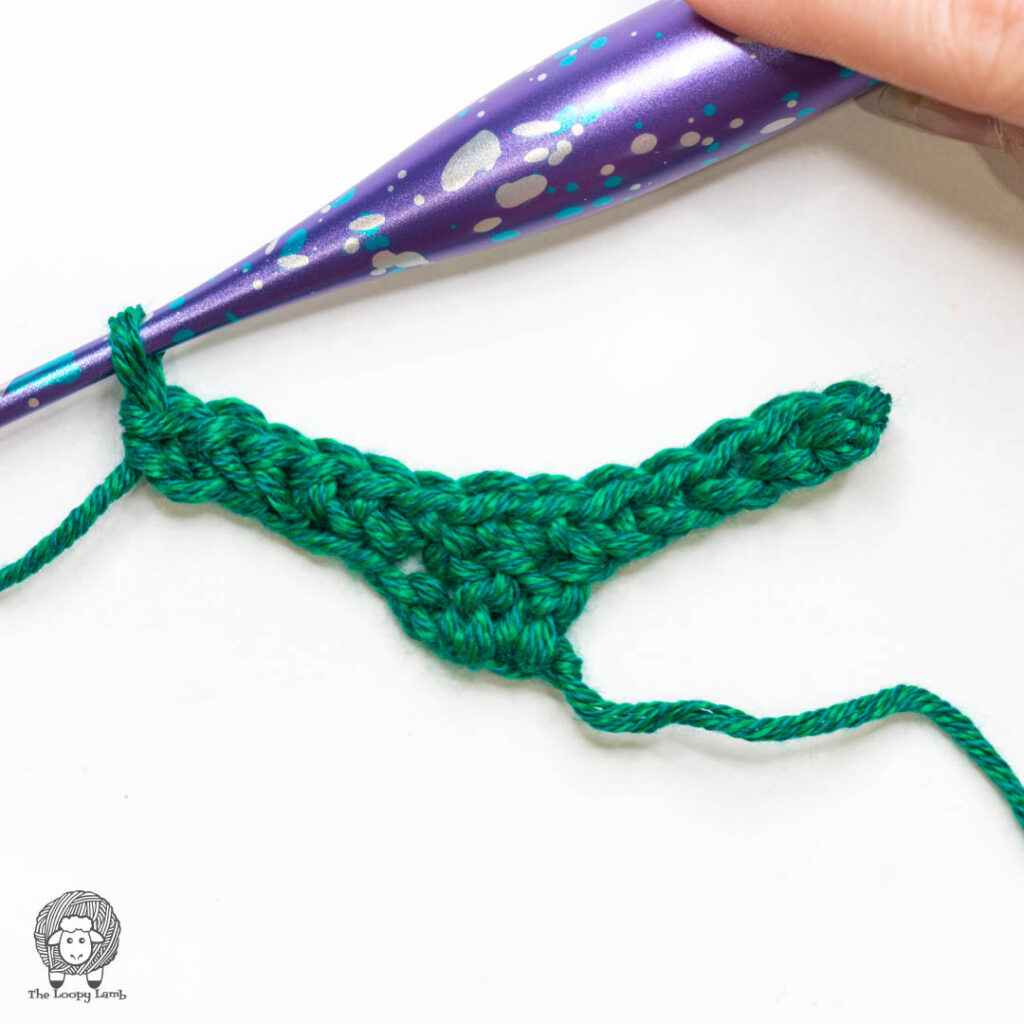
Here’s how to do the FSC in Row 2:
Insert your hook into the top of the turning chain from the previous row.
Yarn over and pull up a loop.
Yarn over and pull through the first loop on your hook only. You should have two loops remaining on your hook.
Yarn over and pull through both loops on your hook to complete your first foundation single crochet stitch
To create your subsequent foundation single crochet stitches, start by inserting your hook into the base of the previous stitch. The below image shows arrows pointing to the location you should insert your hook (only one space at a time. there are two arrows to show two separate spaces).
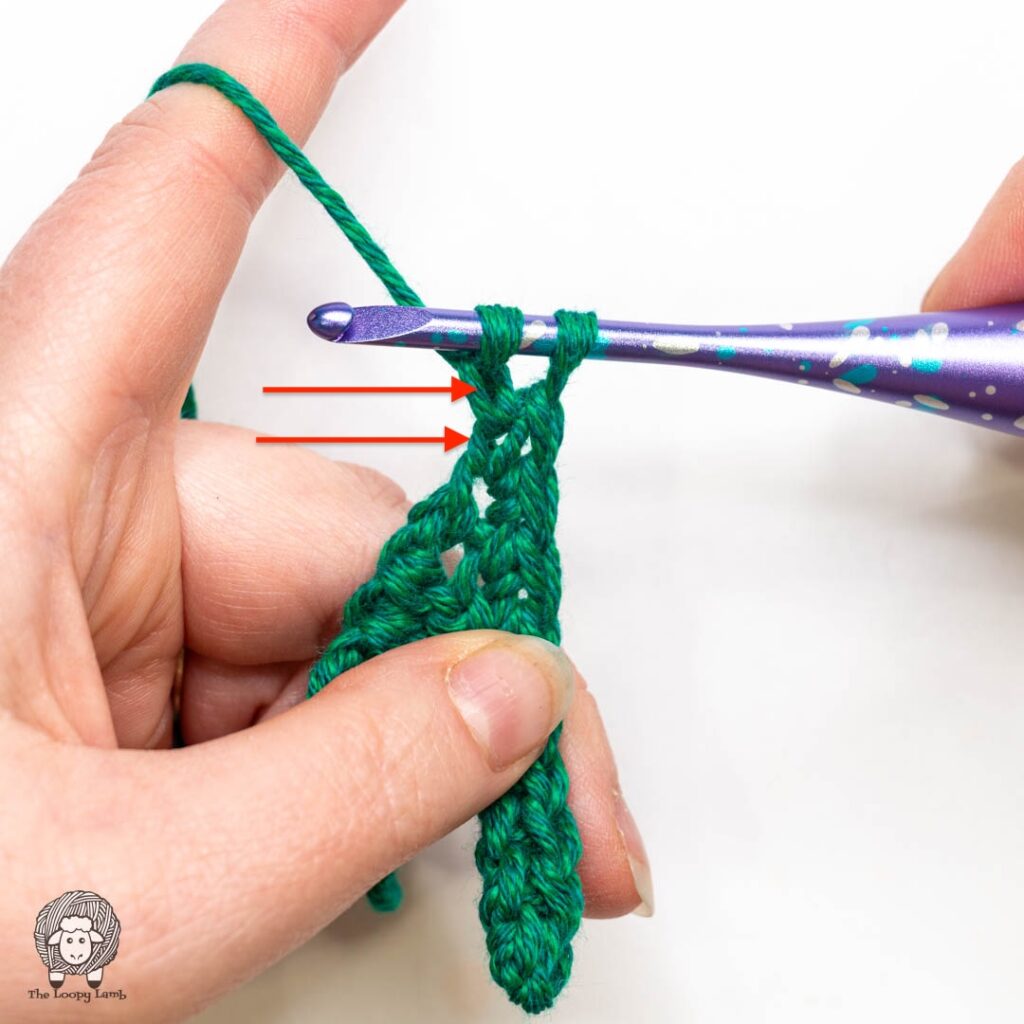
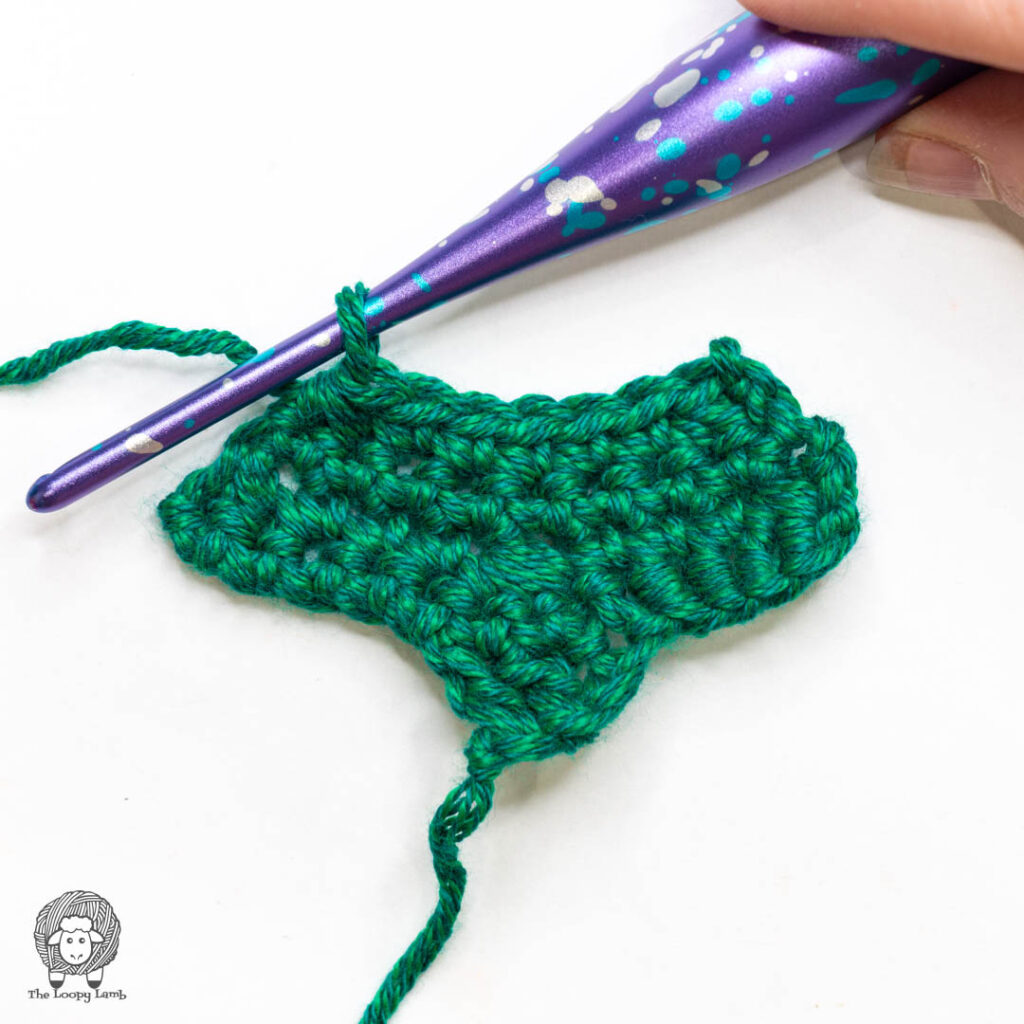
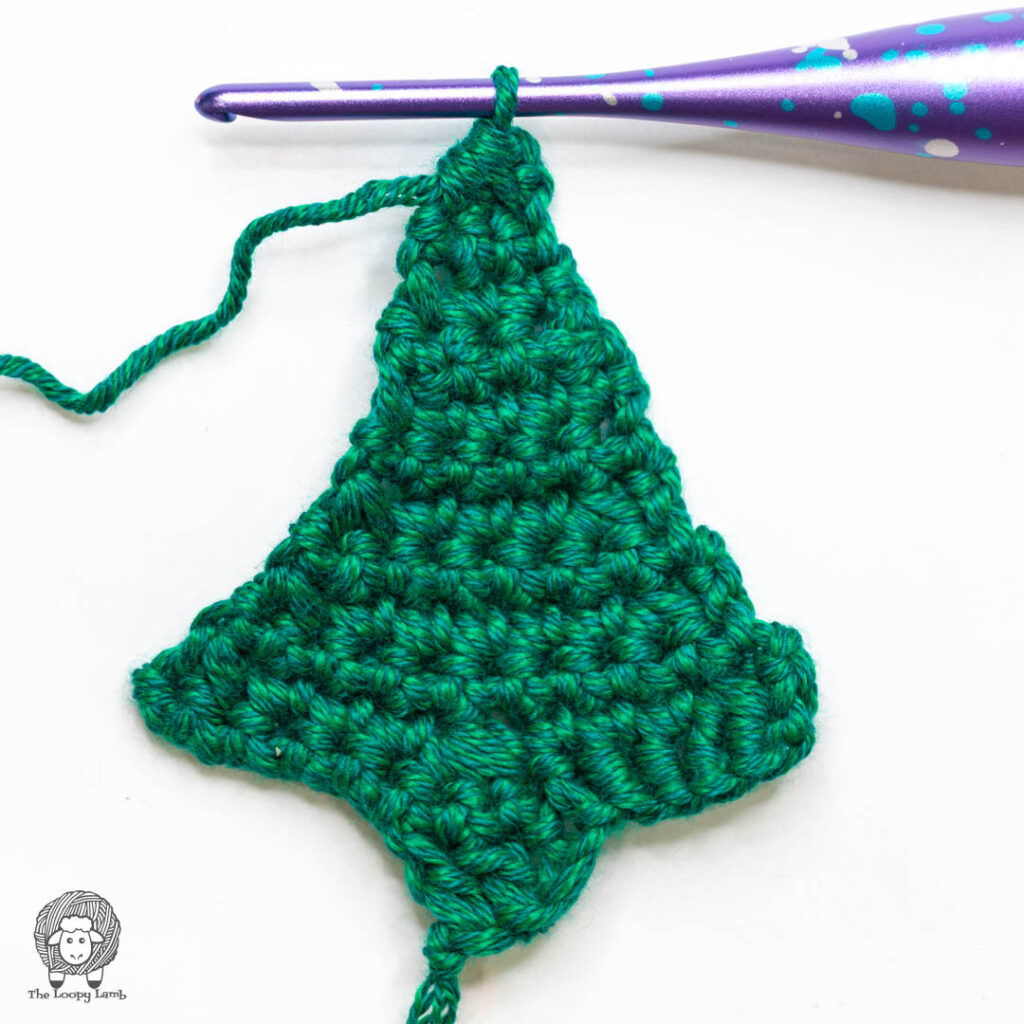
Row 3: CH 1 and turn. SCDEC, SC 3, SC3TOG, SC 3, SCDEC. (9)
Row 4: CH 1 and turn. SC across.
Row 5: CH 1 and turn. SCDEC, SC 5, SCDEC. (7)
Row 6: CH 1 and turn. SC across.
Row 7: CH 1 and turn. SCDEC, SC 3, SCDEC. (5)
Rows 8 – 9: CH 1 and turn. SC across.
Row 10: CH 1 and turn. SCDEC, SC, SCDEC. (3)
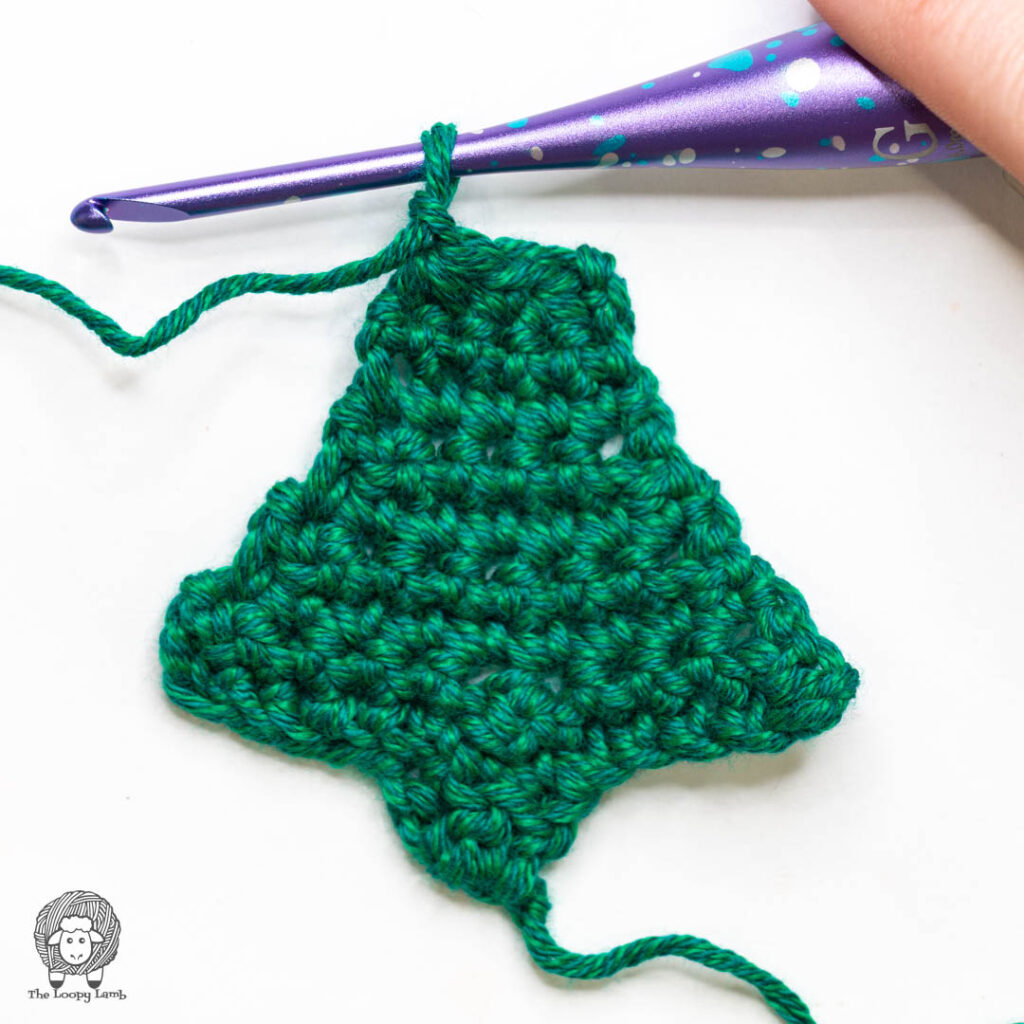
Rows 11 – 12: CH 1 and turn. SC across.
Row 13: CH 1 and turn. SC3TOG. (1)
Row 14: CH 1 and turn piece so you are working down the long side of the tree and the RS is facing you. Work 1 SC into the end of each row down the side of the piece.
When you reach a corner, work 3 SC in the corner.
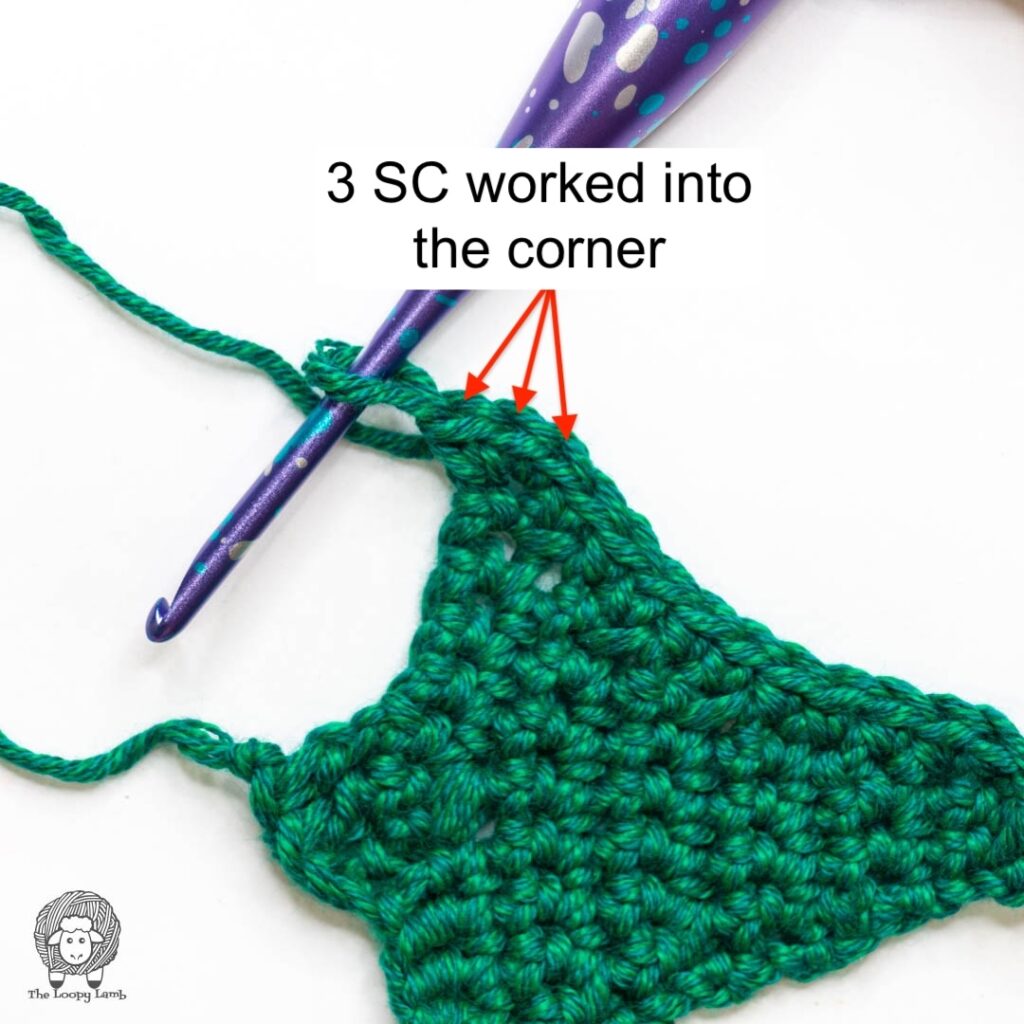
Continue this around the tree until you return to the top of the piece (Row 13).
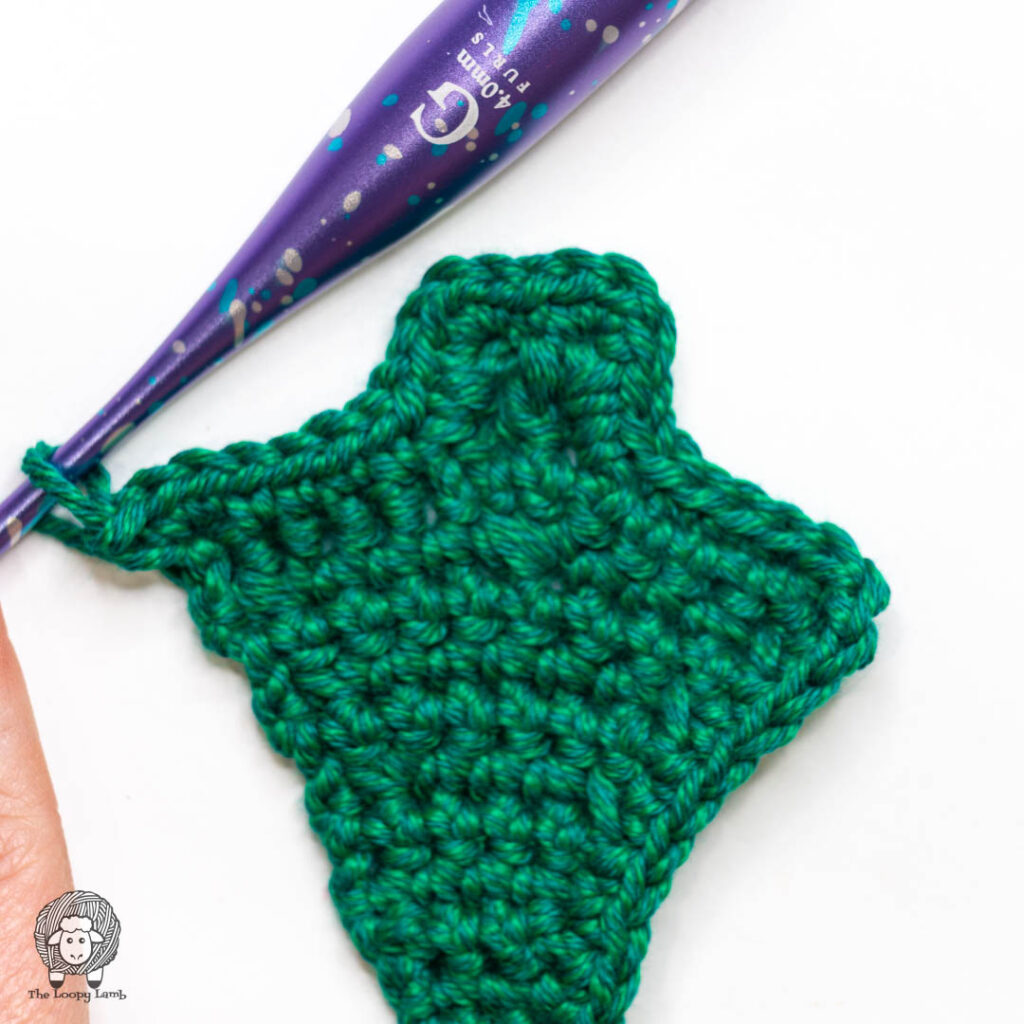
Do an RSS to join the last ST to the ST at the very tip of the top of the tree.
RSS Step 1 –>
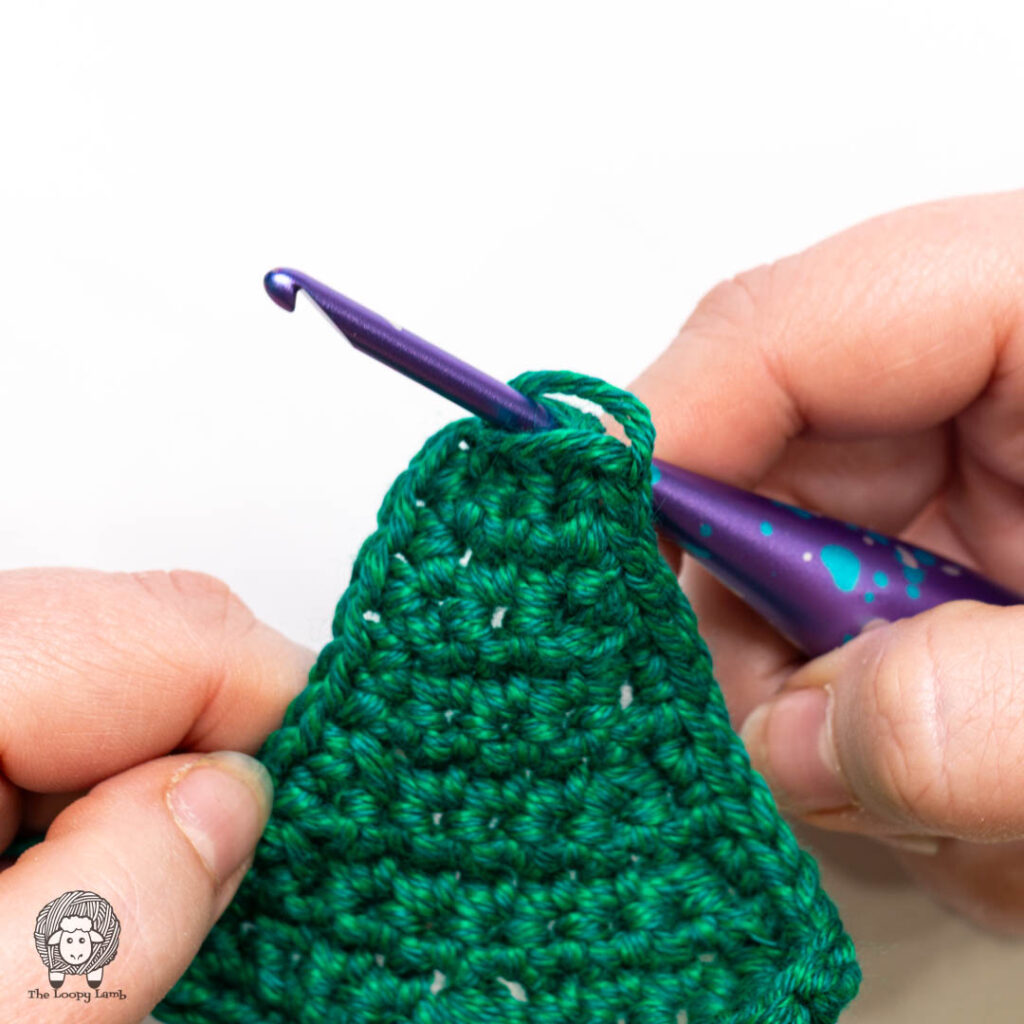
RSS Step 2 –>
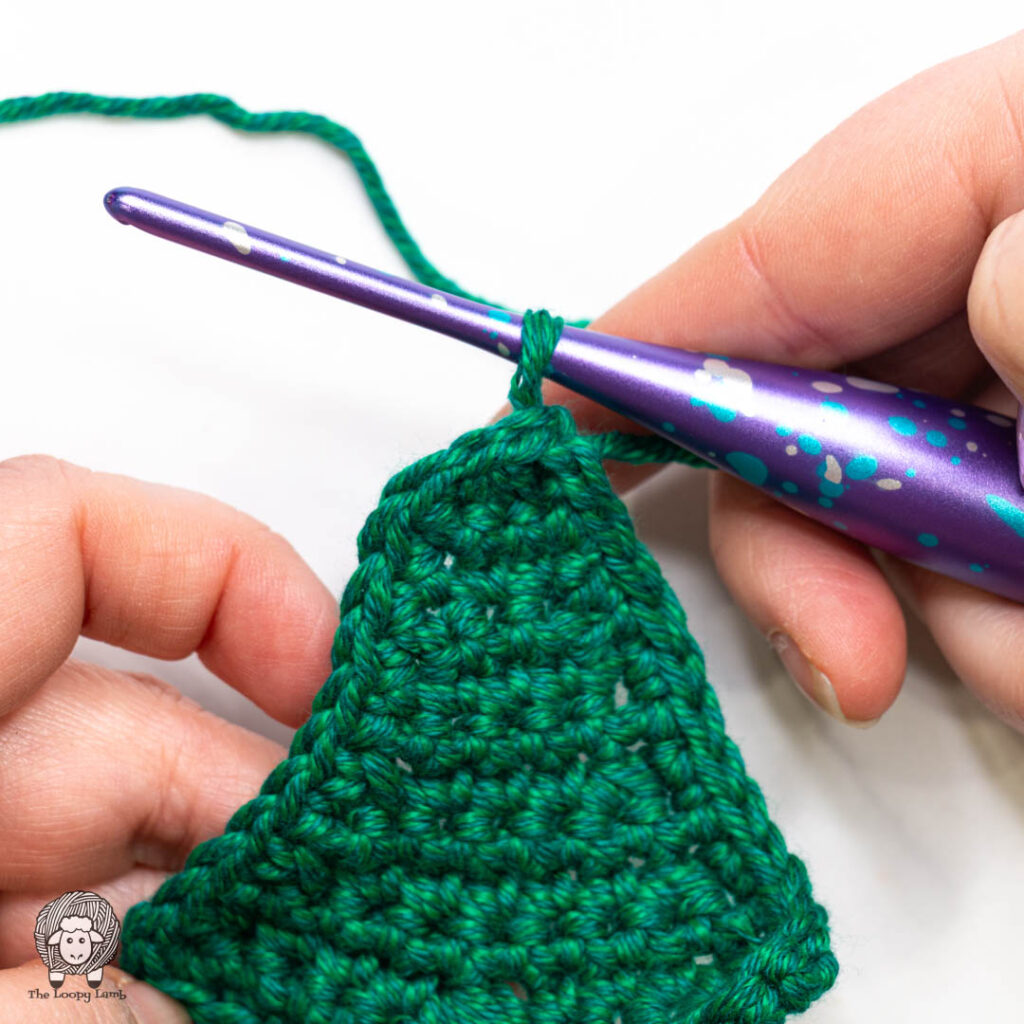
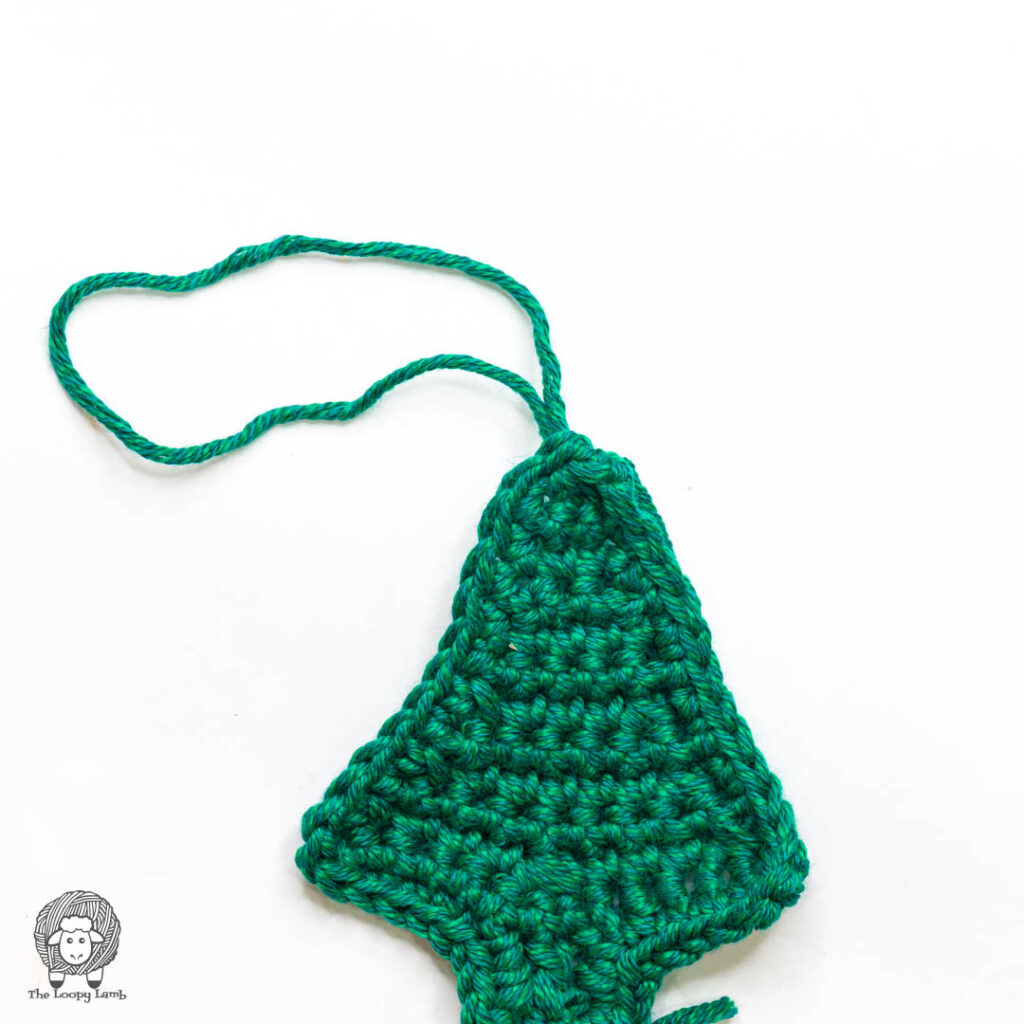
Pull the working yarn loop up to create your hanger loop of your desired length. Cut the yarn, leaving a 6” tail. Do NOT pull the yarn through the loop.
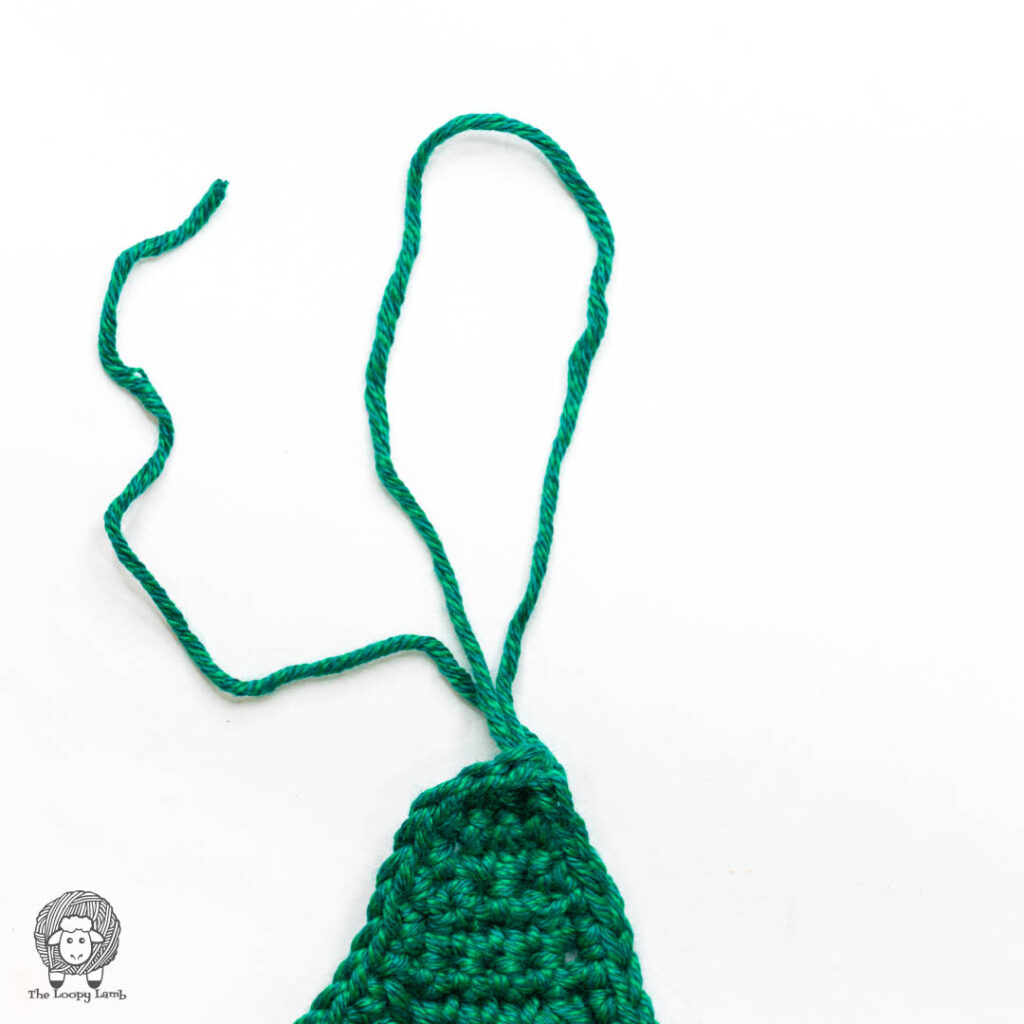
Instead, wrap the yarn tail around the base of the hanger loop twice, then insert the tail under both wraps, through the top and pull down tightly to secure the knot as closely to the top of the tree as possible.
Completed crochet Christmas tree ornament with hanger.
Weave in ends. I recommend steam blocking the piece to straighten.
Adding the Decorations (Optional)
Lay your completed ornament on a flat surface and place your buttons on the RS of the fabric to see how you would prefer them to be positioned. Then use either hot glue or needle and thread to secure the buttons in your preferred spots.
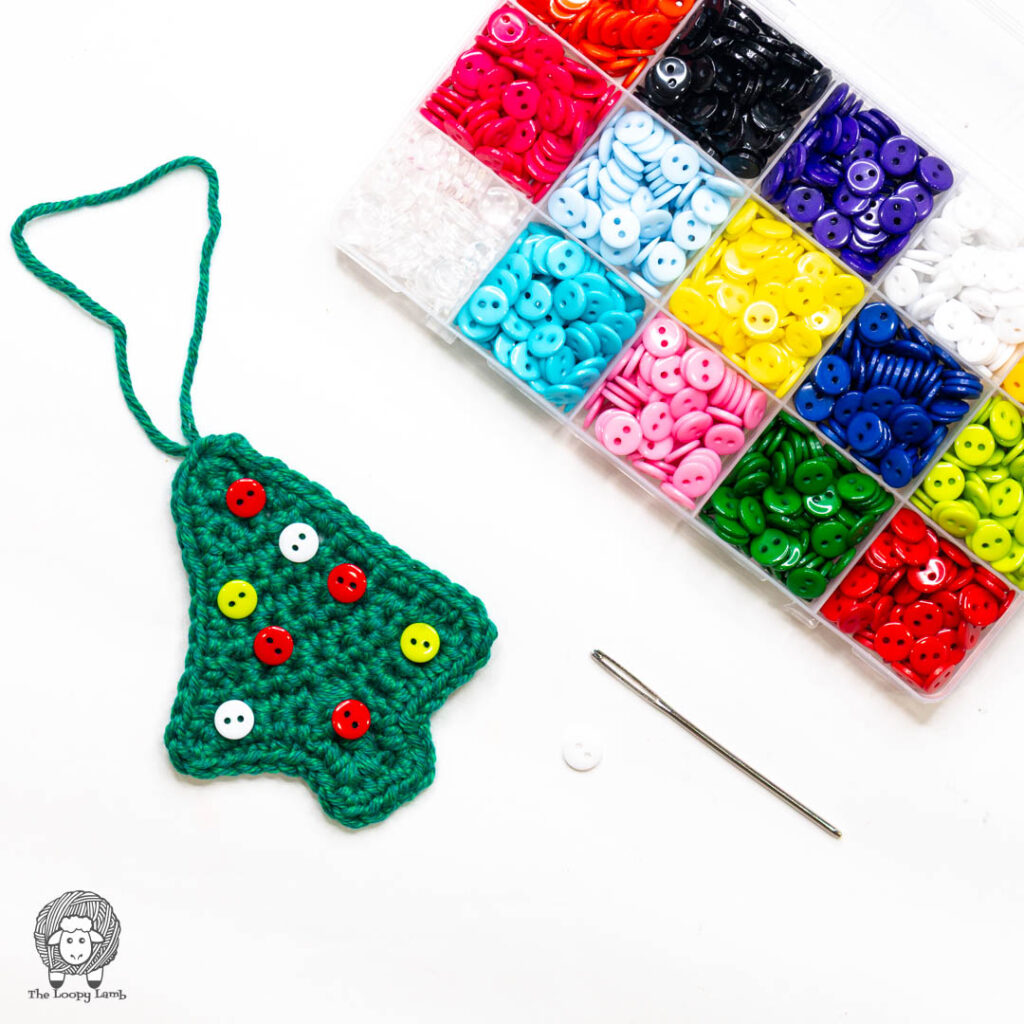
That’s it! I hope you had so much fun making your own little crochet trees for the festive season!
Frequently Asked Questions
The simplest way to make this crochet piece bigger or smaller is to use different yarns and crochet hook sizes. Want a bigger ornament? Try a thicker yarn and a larger crochet hook (i.e. chunky yarn and a 5mm hook). Want a smaller ornament? Use a thinner yarn and smaller crochet hook (i.e. sport weight yarn and a 2mm hook)
I recommend using worsted weight cotton or acrylic yarn (or the recommended yarn which is a blend of both!). Cotton holds its shape well for ornaments, while acrylic tends to give a softer texture. Avoid very stretchy or slippery yarns they can distort the shape of the flat tree.
If your ornament will be handled by little ones, skip plastic buttons and instead embroider small “ornaments” using yarn or thread. If using buttons, sew them on very securely with multiple passes of thread and tie off tightly on the back. You may even want to add a dab of hot glue behind the button as well as sewing it on.
Yes! You’re welcome to sell finished items made using this pattern. Please credit The Loopy Lamb and link back to the free pattern page. The pattern itself may not be shared, sold, or redistributed.
Absolutely! It’s lightweight and looks adorable strung together or tied onto gifts. Try making a set of different colors for a festive garland or mix it with your other crochet ornaments for a coordinated holiday look.
More Free Crochet Christmas Ornament Patterns You’ll Love
If you enjoyed this flat crochet Christmas tree ornament, you might also like these festive patterns:
- Easy Crochet Christmas Baubles
- Crochet Cat Head Christmas Tree Ornament
- Snowy Pines Tree Ornament
- Gnome Christmas Tree Ornament
- Baby Owl Crochet Tree Ornament
- Sloth Crochet Gift Card Holder & Tree Ornament
- See all my Free Christmas Crochet Patterns
If you’re sharing your finished crochet Christmas tree ornaments on social media, I’d love to cheer you on and share your post with our community! Tag me @theloopylamb or use #theloopylamb so I can see your adorable creations and maybe even feature you in my stories.
Join The Loopy Lamb Crochet Community Facebook Group to connect with other crafty friends and share your fabulous projects made with this free crochet christmas tree ornament pattern! Don’t forget to follow me on social media so you always know when new youtube tutorials and other free crochet patterns are released. Happy Crocheting!
Facebook Page: www.facebook.com/TheLoopyLamb
Instagram: www.instagram.com/TheLoopyLamb
YouTube: The Loopy Lamb YouTube Channel
TikTok: www.tiktok.com/@theloopylamb
Pinterest: www.pinterest.com/theloopylamb
Newsletter: Sign up for my newsletter!