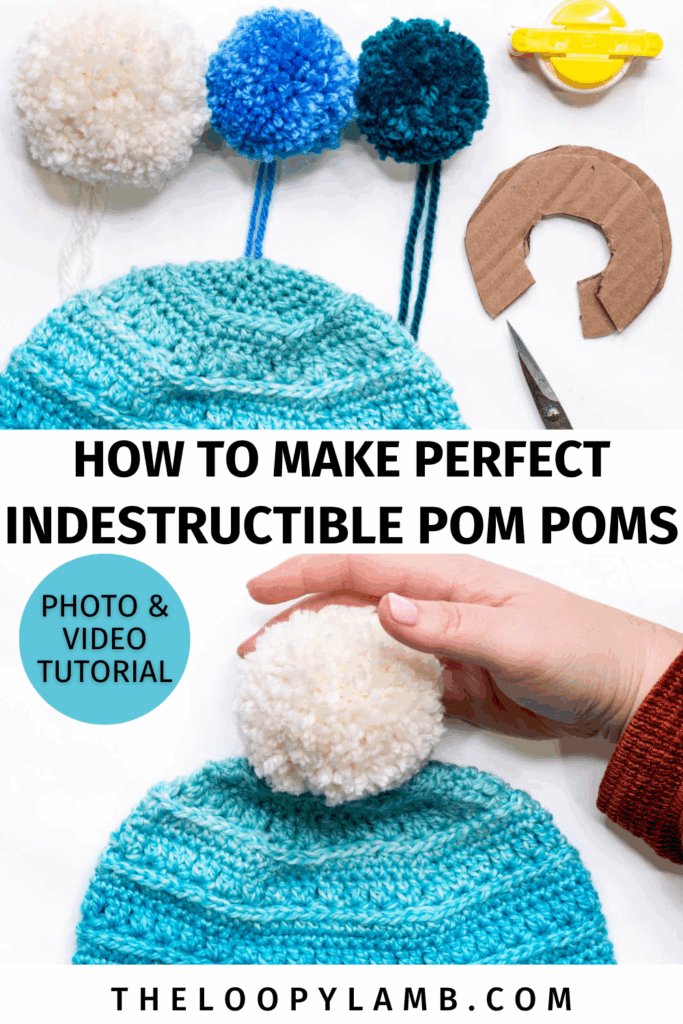
Yarn pom poms are a great way to finish off your handmade hat and a great way to use up scrap yarn. But how do you may the perfect pom pom? Today I’m going to show you how to make a yarn pom pom for a hat and how to attach it to your project.
Pin this for later Save
This post may contain affiliate links, which means that I may earn a small commission from purchases made through these links at no extra cost to you. All opinions shared here are my own.
Table of contents
- What Materials Do I Need to Make a Yarn Pom Pom?
- What is the Easiest Way to make a Pom Pom?
- How to Make a Cardboard Pom Pom Template
- How to Make Pom Pom with a Pom Pom Maker Video Tutorial
- How to Make a Yarn Pom Pom For a Hat With a Pom Pom Maker Photo Tutorial
- How to Make a Yarn Pom Pom For a Hat With a Cardboard Pom Pom Template Video Tutorial
- How to Make a Yarn Pom Pom For a Hat With a Cardboard Pom Pom Template Photo Tutorial
- How to Attach Your DIY Pom Poms to a Hat Video Tutorial
- How to Attach Your DIY Pom Poms to a Hat Photo Tutorial
What Materials Do I Need to Make a Yarn Pom Pom?
- Pom pom maker, cardboard template, or a fork
You can make pom poms with a Clover pom pom maker (my favourite method), a sturdy piece of cardboard, or even a fork.
- Cardboard lets you make pom poms of different sizes, and you aren’t limited by what’s available to purchase
- Pre-made pom pom makers come in standard sizes and help you get consistent results. Clover pom pom makers are my favorite to use.
- Forks work, but you’re limited to the width of the fork’s base.
Yarn: You can yarn of any weight to make pom poms. I usually use the same weight that I used for my crochet hats but feel free to experiment. Play with colors and textures to change the look of your pom pom. Roving yarn (like this one from Lion Brand) will give you a really fluffy pom pom. Avoid using cotton, bamboo or rayon yarn for your pom pom as they tend to droop when used.
Yarn needle: A tapestry or yarn needle is essential for attaching your finished pom pom to the top of a hat.
Sharp Scissors: This is MUST. Sharp scissors make trimming easy and help you get a clean, round, fluffy pom pom. Dull scissors make the process frustrating (ask me how I know). These are my go-to scissors for yarn crafts like this.

What is the Easiest Way to make a Pom Pom?
I personally think that using a pre-made pom pom maker like the Clover pom pom maker set is the easiest way to make a pom pom. They can help you make consistently-sized pom poms and even have little guides on them for making multi-colored pom poms. They also make it easy to create pom poms in various sizes. From small pom poms to large pom poms and every size in-between. They have a pom pom maker for that.
How to Make a Cardboard Pom Pom Template
Making your own pom pom template is an easy way to make differently-sized pom poms without buying special tools. All you need is a scrap piece of sturdy cardboard, a pair of scissors, and a few minutes at your craft table.
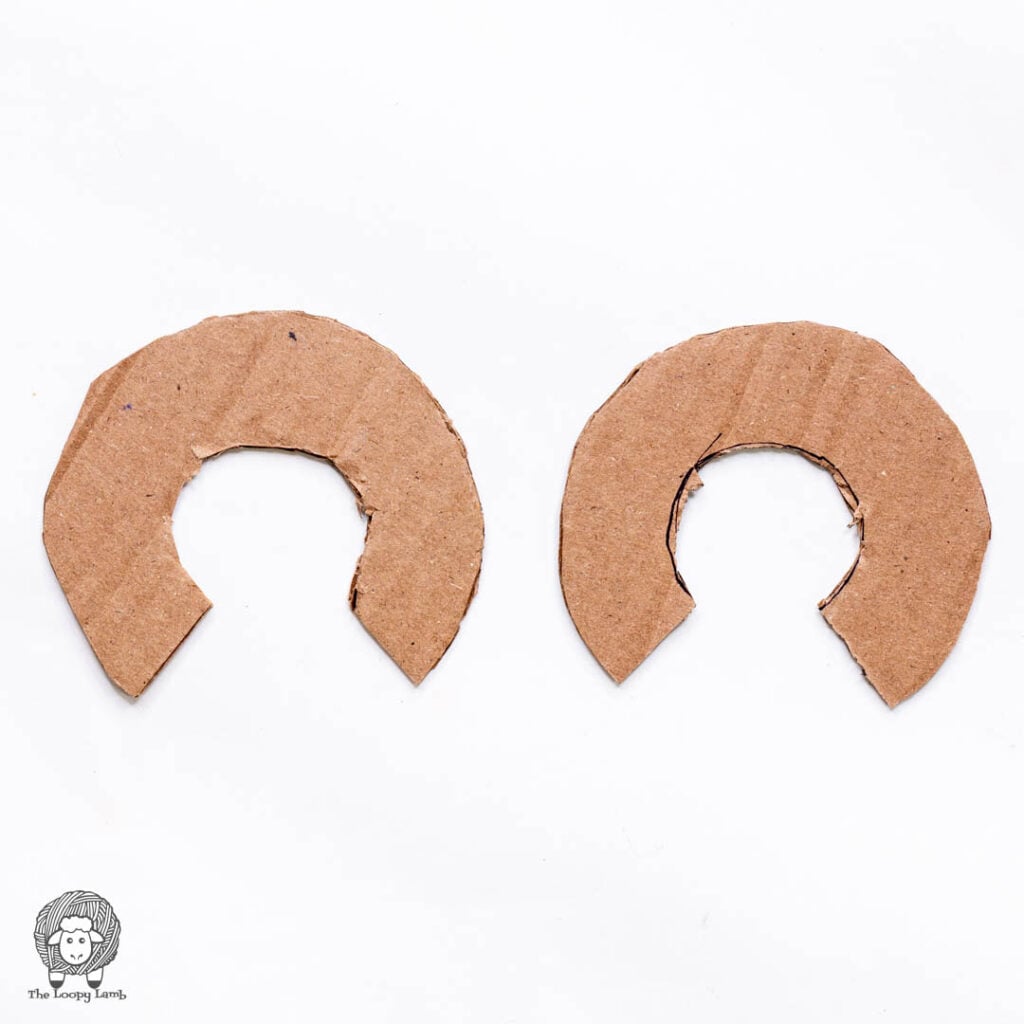
Start by cutting out two matching cardboard circles in the size you’d like your pom pom to be. I usually trace a small cup, jar lid, or anything round that fits the size I’m aiming for (this helps get a a consistent, perfect circle between the two).

Once you have your two circles, cut a smaller circle out of the centre of each one to create donut shapes. This opening is where your yarn will wrap through. When both pieces match, stack them together, and you’re ready to start wrapping your yarn to build your pom pom.

It’s quick, beginner-friendly, and a great little DIY tool you can reuse whenever you need a perfectly round pom pom for your crochet projects. It’s also the best way to make giant pom poms. The only downside is that they don’t last forever and I often need to make a new template every couple of pom poms.
How to Make Pom Pom with a Pom Pom Maker Video Tutorial
How to Make a Yarn Pom Pom For a Hat With a Pom Pom Maker Photo Tutorial
I’m going to show you first how to use a pom pom maker and then how to use your own template made from cardboard.
1. Open the arms of one side of the pom-pom maker.
You’ll notice that there are two sets of arms with an indent in the middle. Holding one set of arms together, wrap the yarn around the arms of the maker. (I’m using this pom pom maker here in this tutorial)

2. Grab one of the ends of the yarn and start wrapping it around the arms of the pom pom.
The fuller you wrap the arms, the fluffier/fuller your pom pom will be. You can use different colors of yarn for a multi-colored pom pom. Make sure to keep the yarn tight and close together to avoid gaps in the pom pom. Once you’re happy with the amount of yarn wrapped around the arms, close the arms of the pom pom maker to secure the yarn in place.

3. Wrap the other arm of the pom pom maker.
Bring the yarn to the open side of the pom pom maker and wrap yarn around the other set of arms until it is full. When you’re done close the second set of arms and cut your yarn.

4. Cut the yarn on both arms of the pom pom maker.
Using scissors, cut the yarn along the outer edge of both sides of the pom pom maker, following the groove between the two sets of arms. Make sure to hold the pom pom maker securely to prevent the yarn from unravelling.

5. Secure Your Pom Pom with a Piece of Yarn
Take a separate piece of yarn and insert it between the two sets of arms, wrapping it around the center of the pom pom maker and pulling it tight against the center of the pom pom. Tie a very tight double knot to secure the yarn in place.

6. Tie Additional Knots for Added Security (My personal trick for indestructible pom poms)
Take a look at the pom pom maker and imagine there is a compass on top of it, placing the knot and yarn tails facing yourself. Wrap the yarn around the center of the pom pom maker and tie a knot at each of the remaining 3 compass points to ensure the most secure hold possible.

7. Remove the pom pom from the maker.
Once you’re done with your knots carefully open up the arms of the pom pom maker and pull both sides of the maker away from each other to release your pom pom. Leave the yarn tails intact as you will use them to attach the pom pom to the top of a hat.
8. Trim and shape your pom pom.
Your pom pom may look a bit uneven at first. Use scissors to trim any excess yarn or long threads and shape the pom pom into a nice round shape. Be careful not to cut the yarn used to tie the pom pom together. I recommend holding the pom pom by the yarn tails left from tying your knots while trimming. Give your pom pom a gentle shake to fluff it up and remove any loose fibers. Now it’s ready to be attached to your hat.

How to Make a Yarn Pom Pom For a Hat With a Cardboard Pom Pom Template Video Tutorial

How to Make a Yarn Pom Pom For a Hat With a Cardboard Pom Pom Template Photo Tutorial
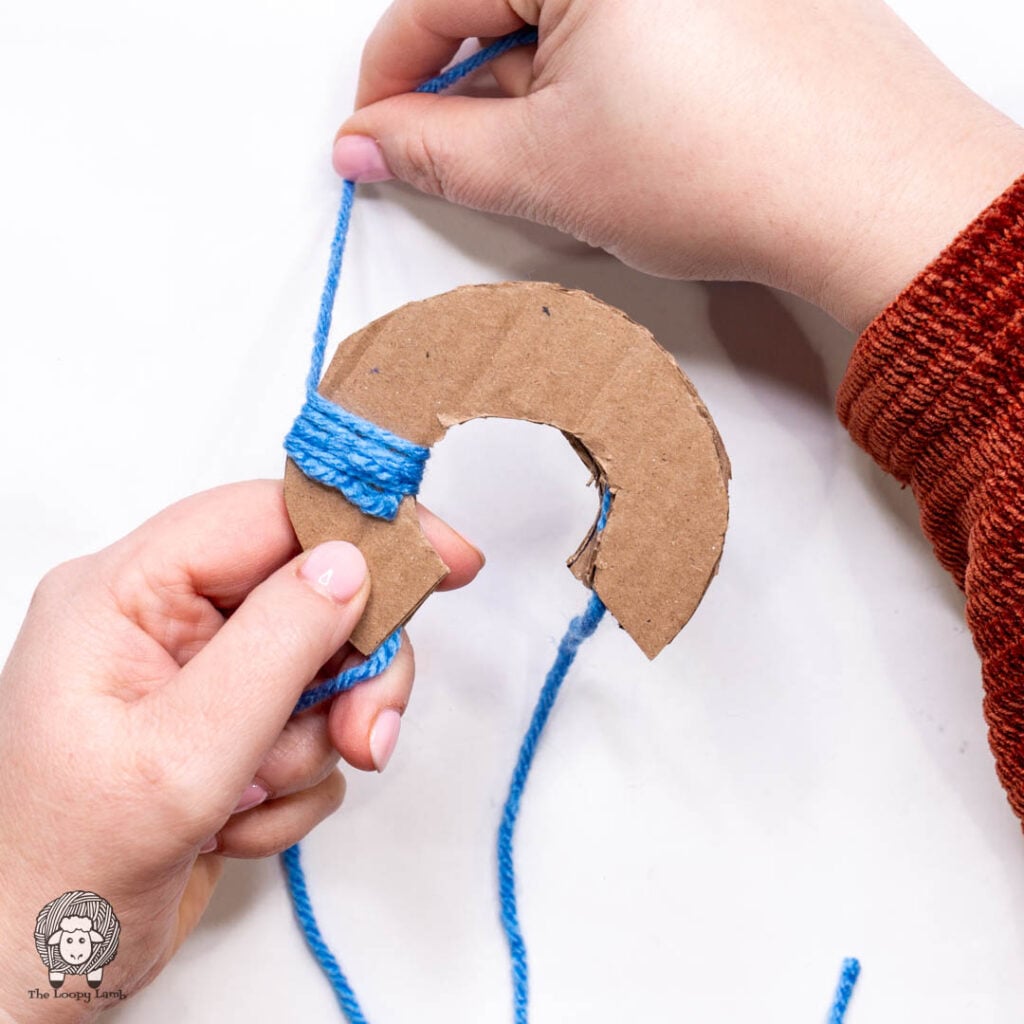
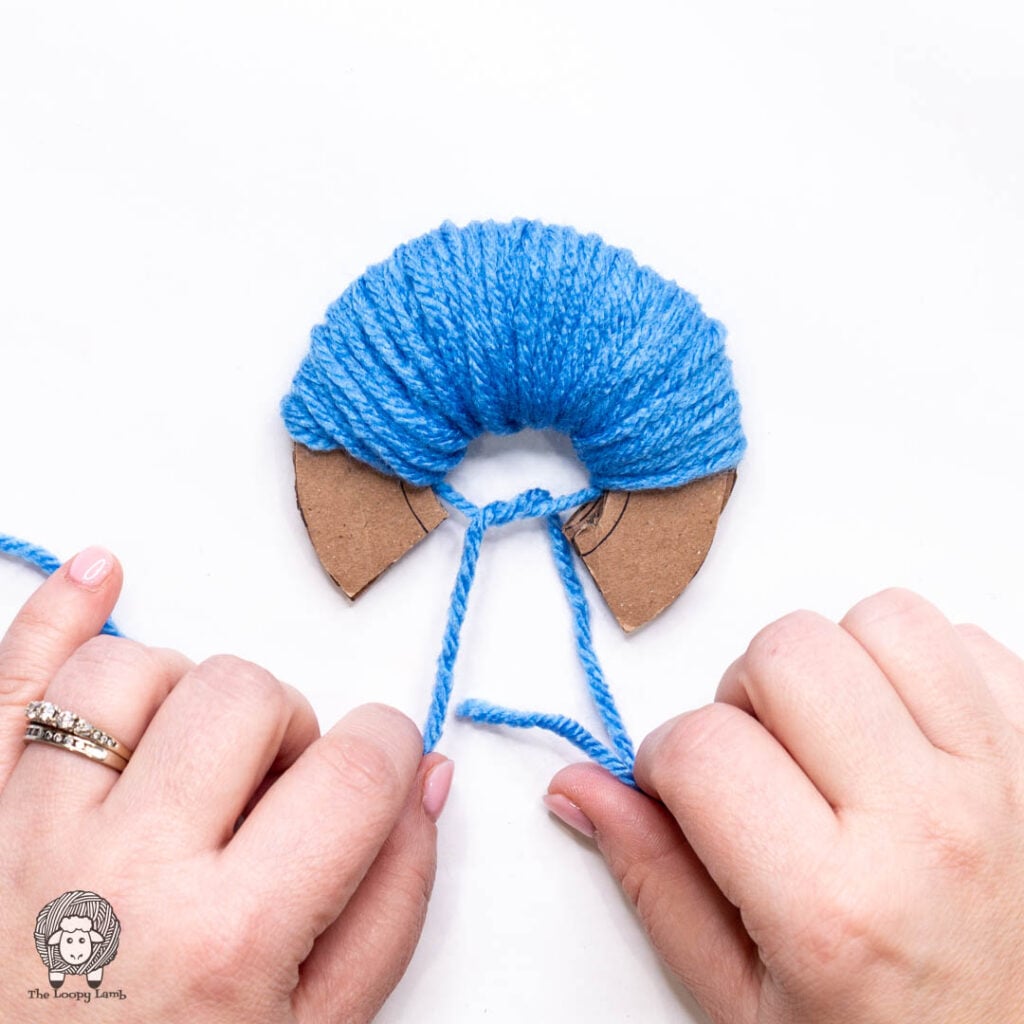
1. Make Your Pom Pom Template & Add Your Tie:
Cut your template out of cardboard and hold the two cardboard circles together. (See instructions at the top of this post on how to make the template) Cut a long piece of yarn that matches the pom pom you’re going to make and lay it between the two layers, ensuring that each end is hanging out and out of the way.

2. Wrap the Template:
Start wrapping your yarn around your template working from one end to the other and back again until you are satisfied with how full it is. Again, the more yarn you use, the bigger and fuller your pom pom will be.
3. Cut the Working Yarn:
When done, cut the working end of the yarn and secure it in place. (This is where an extra pair of hands comes in or even a small clip like these ones from Clover)
4. Start to Tie It Together:
Grab the ends of your 2 cut yarn strand from Step 2 and tie half a knot (do the first step of the knot but don’t finish it) and hold it tight.
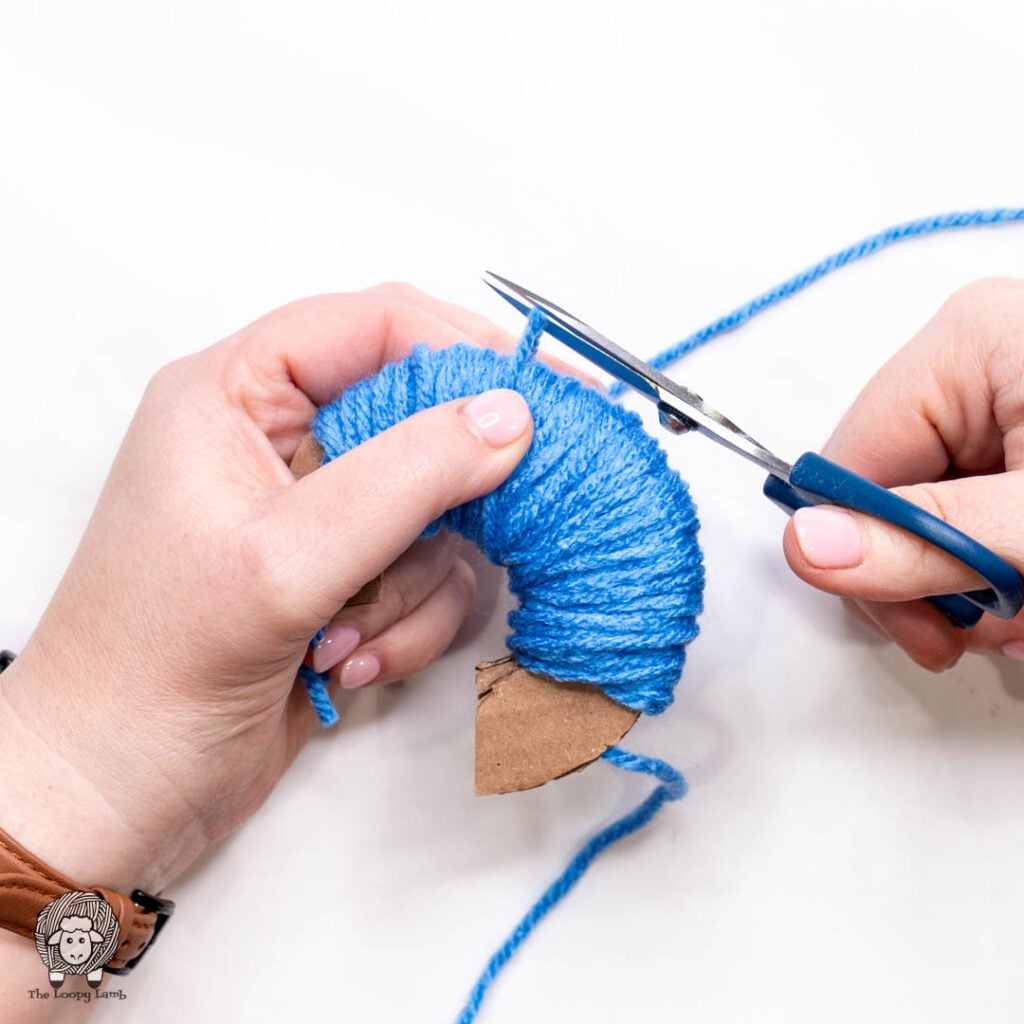
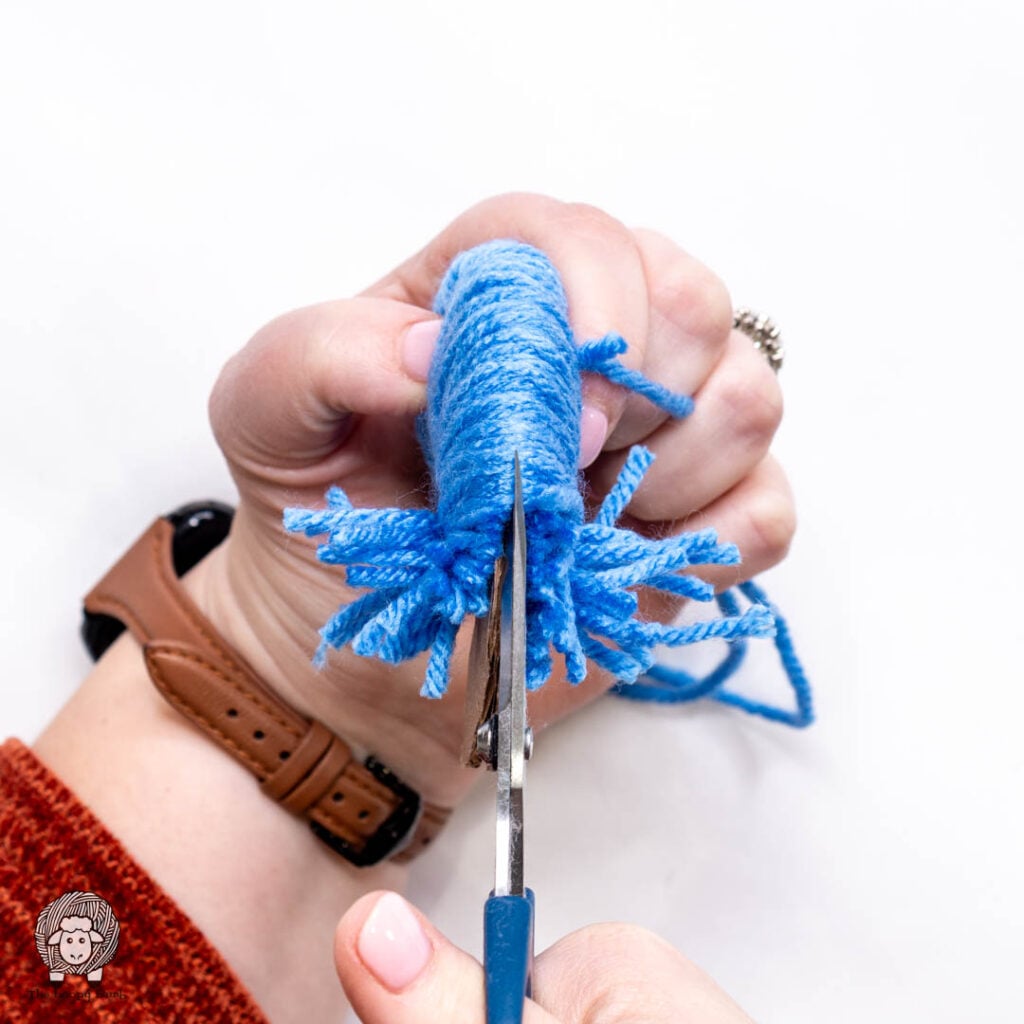
5. Cut the Yarn From the Pom Pom Maker:
Hold onto the yarn ends tightly and cut along the outside of your template to release the yarn. I like to cut a little bit of the yarn and then finish tying my knot before I finish cutting my pom pom from the template. I find it easier this way without an added pair of hands to help me.
6. Remove the Template:
While holding your yarn, pull your yarn strands tight and complete your knot (if you haven’t done so as I note above).
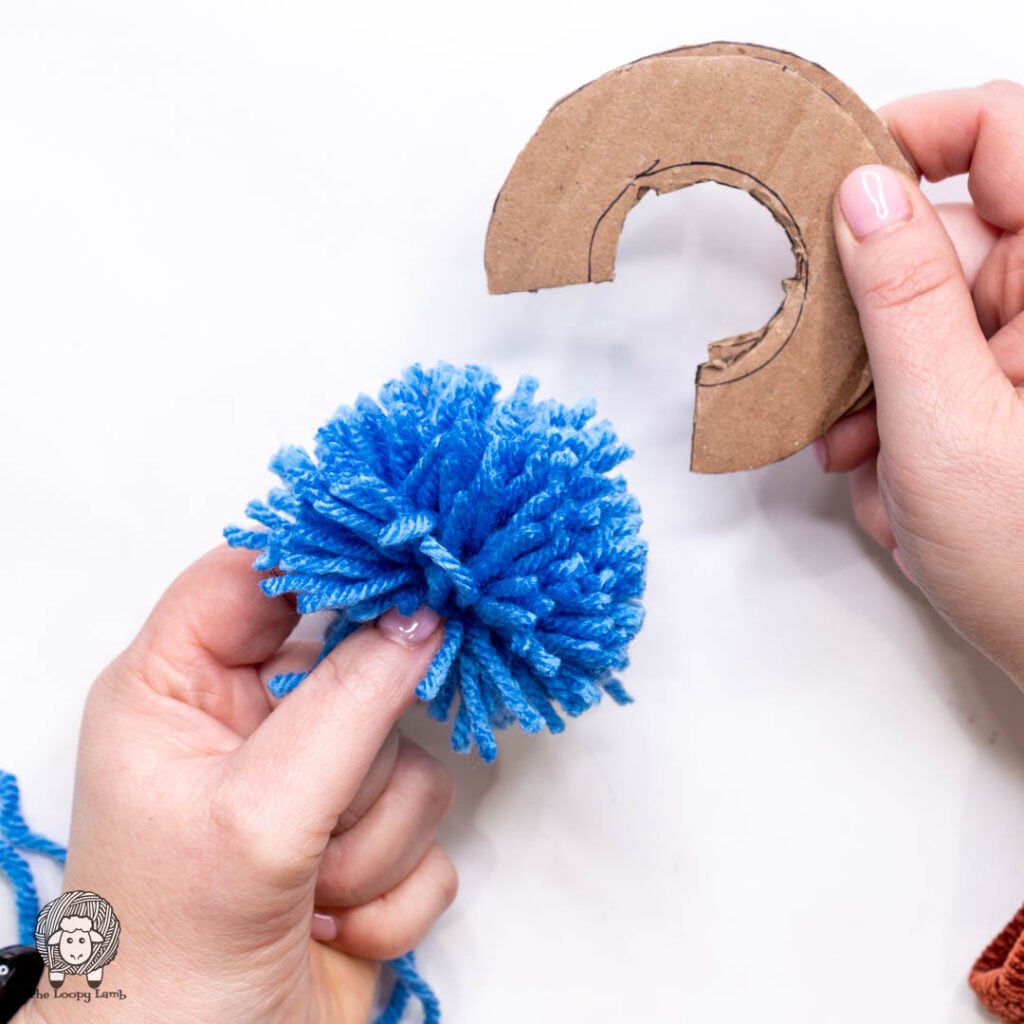
7. Tie Additional Knots to Secure It & Trim it to Shape:
To make a more secure pom pom, pull the yarn strands to the opposite side of the pom pom and tie another tight knot. Keep the yarn strands handy to attach it to your hat. Use scissors to trim your pom pom to shape.

How to Attach Your DIY Pom Poms to a Hat Video Tutorial
How to Attach Your DIY Pom Poms to a Hat Photo Tutorial
Once you are done making your pom pom, it’s time to attach it to your hat. The method is the same no matter how you made your pom pom.
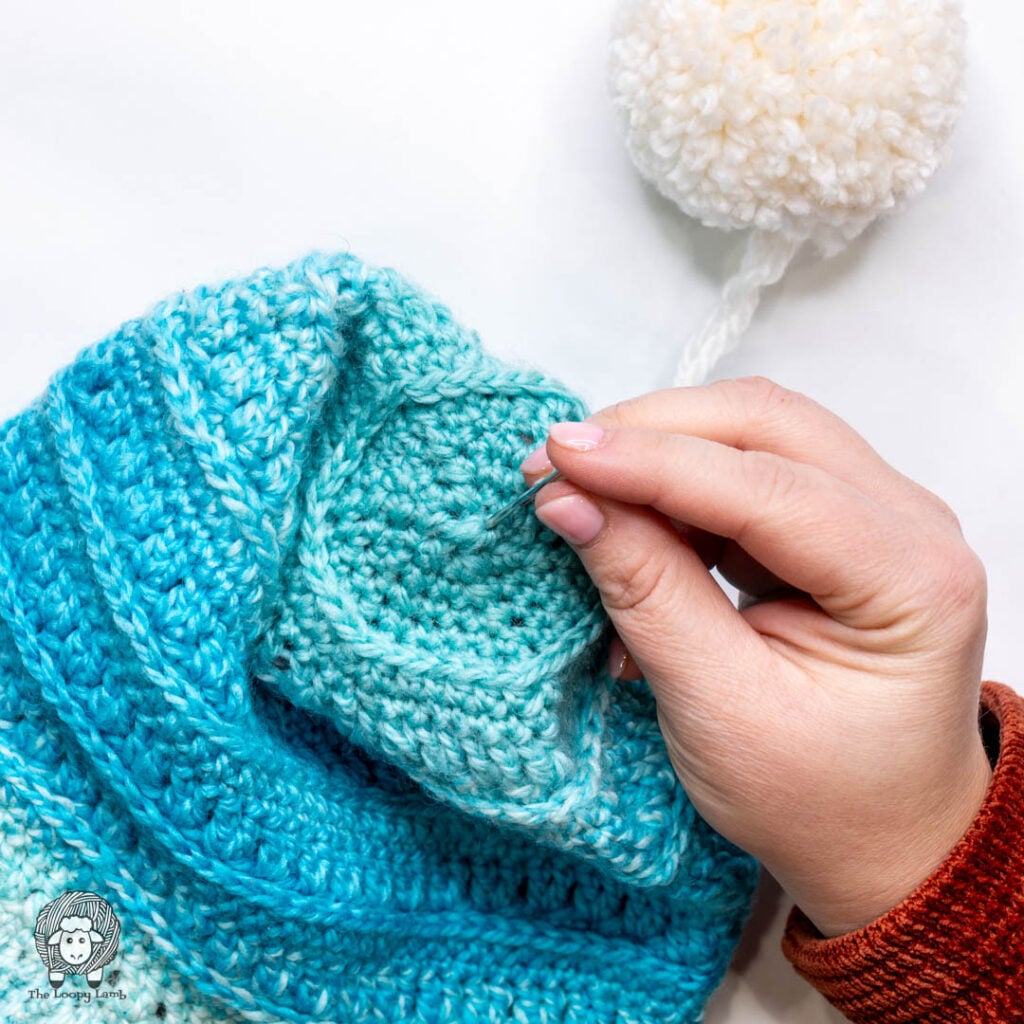
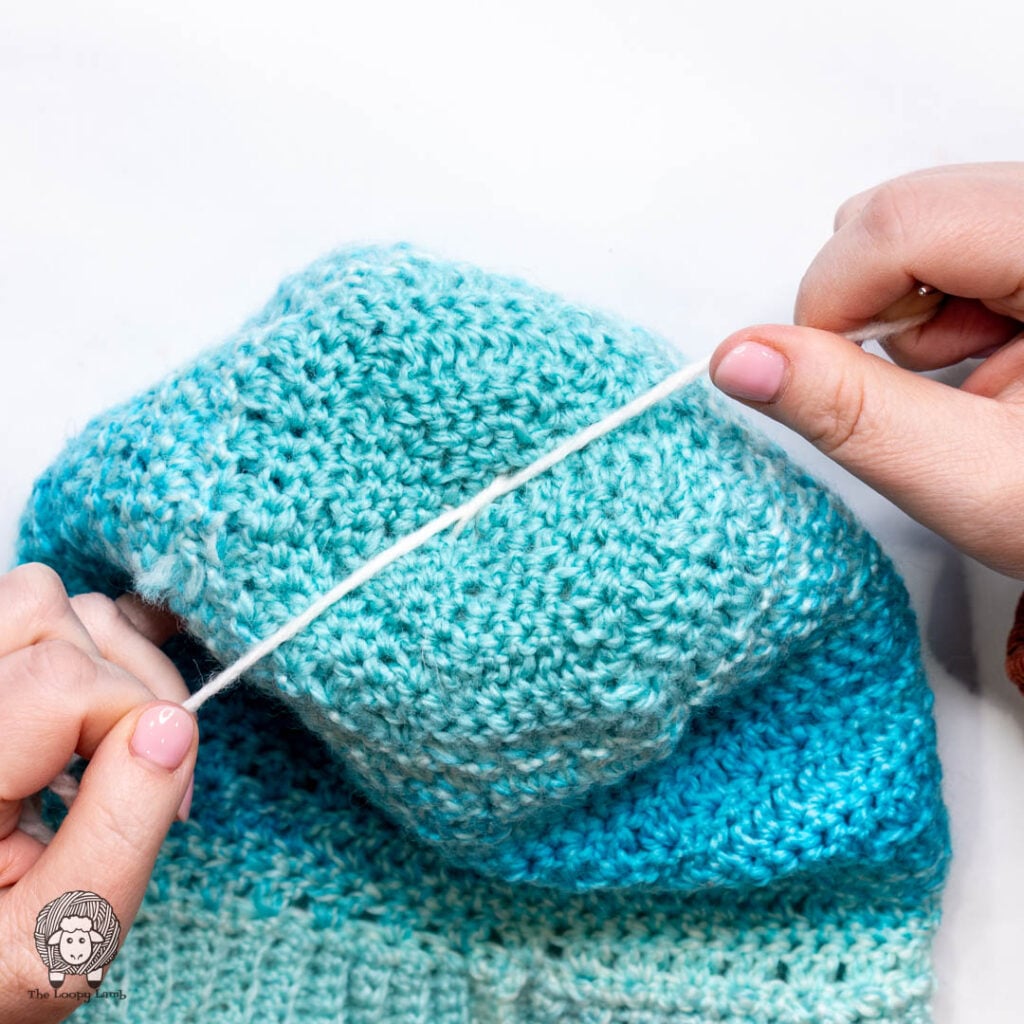
1. Thread your yarn tails onto a tapestry or yarn needle and insert it through the very top of the hat.
You can do them one at a time or both at once. Whatever feels easier. Push the needle straight down through the center so the yarn ends end up inside the hat. (This is the Into the Fade Beanie available as a free pattern here on the blog)
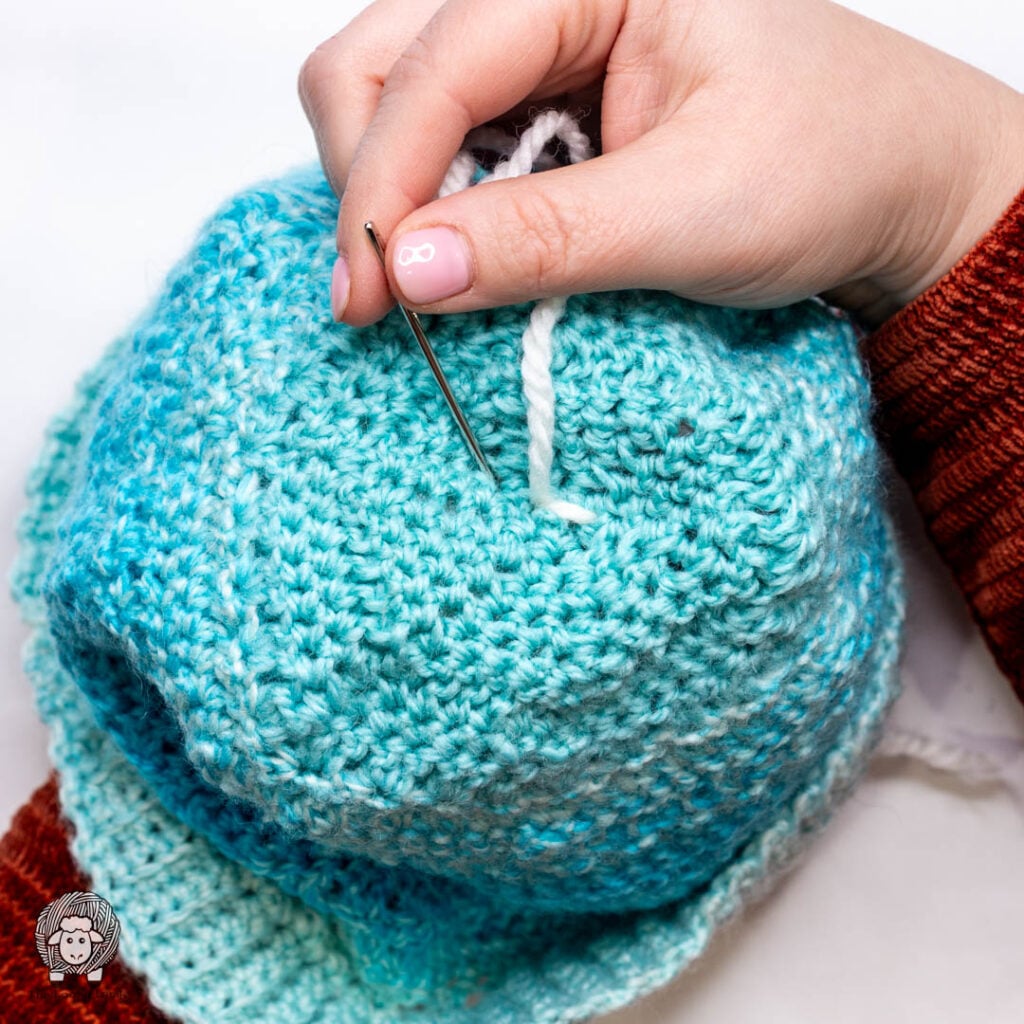
2. Bring each yarn tail back up to the outside of the hat.
Using your needle, take one yarn tail and bring it up through a stitch that’s just slightly off-center (a tiny step to the left or right). Repeat with the other yarn tail, but bring it up through a stitch on the opposite side. This gives the pom pom a wider base and keeps it from wobbling.
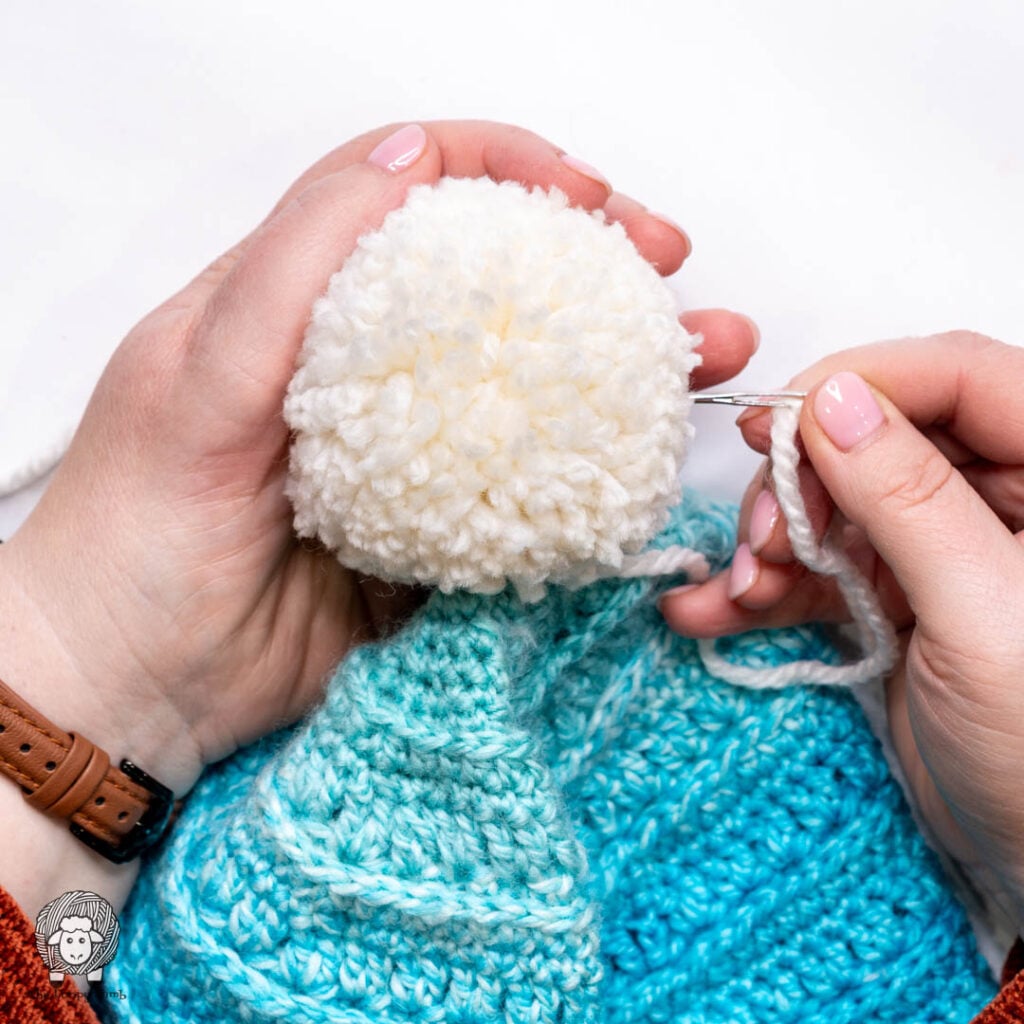
3. Run both yarn tails through the center of the pom pom.
Insert your needle through the middle of the pom pom and pull the yarn through to the opposite side. (If you’re unsure where the center is, just aim for the densest part. Pom poms are very forgiving!)
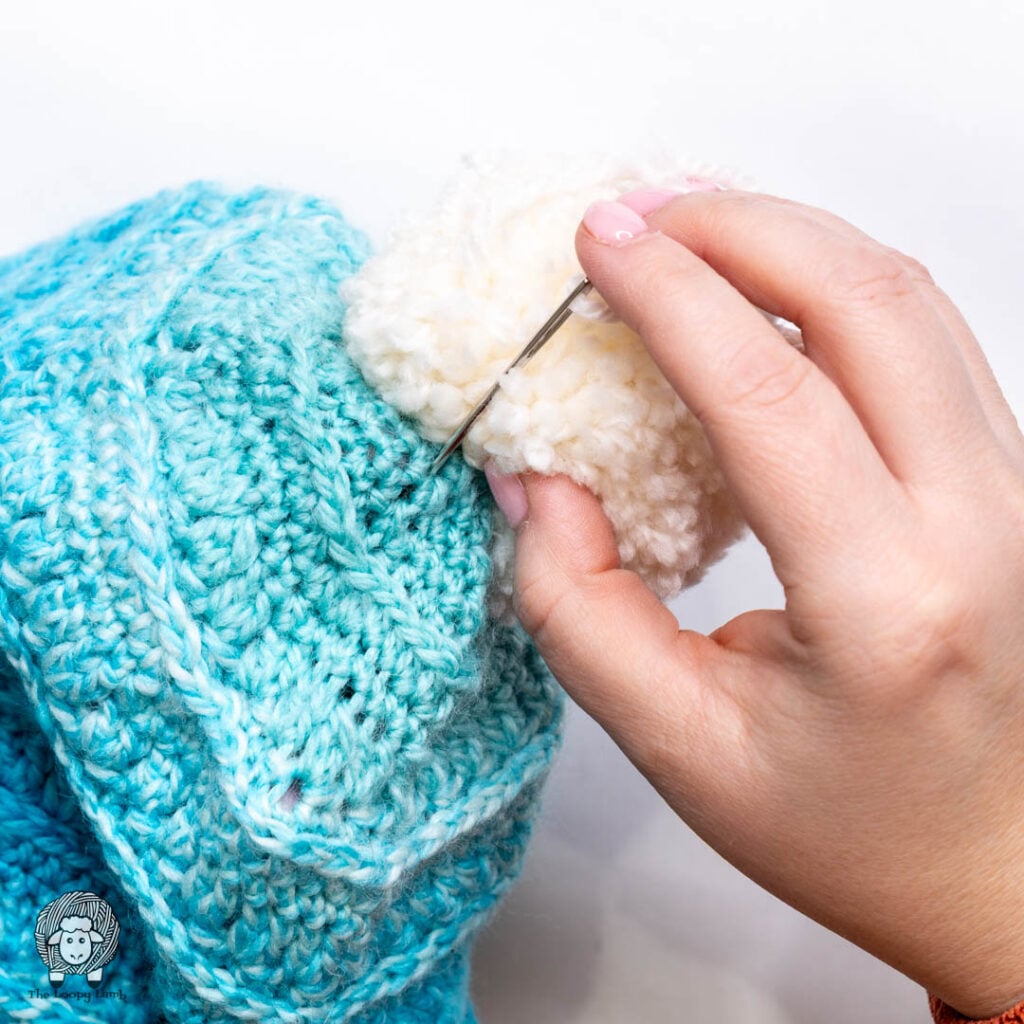
4. Bring the yarn tails back inside the hat.
Insert each tail into the same stitches you came out of in Step 3 or close to the base of the pom pom. This anchors the pom pom firmly in place.
5. Tie a secure knot inside the hat.
Pull the yarn snug and tie the tails together twice or extra security.
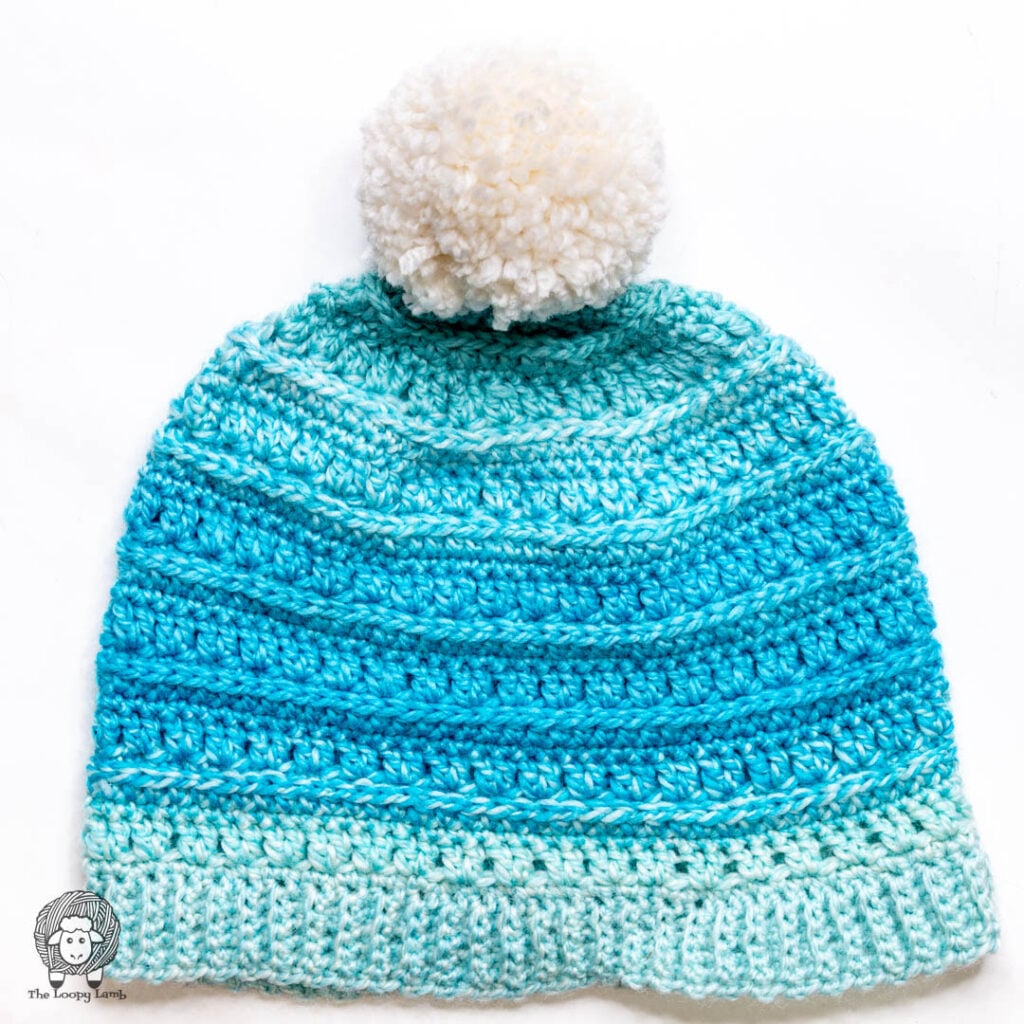
6. Check the pom pom to ensure it sits snugly against the hat.
If it wiggles too much, repeat Steps 2 – 5 again.
7. Weave in the ends.
Frequently Asked Questions About Making Yarn Pom Poms
How much yarn do I need to make a pom pom?
The exact amount depends on how full you want it to be and what yarn weight you’re using. Thicker yarns fill out faster, while lighter yarns need more wraps to look fluffy and full.
What’s the best yarn to use for pom poms?
Acrylic or wool yarn works best for fluffy, bouncy pom poms. They hold their shape beautifully and trim cleanly. Fibers like cotton, bamboo, or rayon tend to droop and look stringy, so I avoid those for hat toppers.
Can I make a pom pom without a pom pom maker?
Absolutely. You can make a DIY pom pom using a fork, your fingers, or a simple cardboard template. Cardboard is my favourite alternative because you can cut it to any size and reuse it a few times before making a new one.
Why does my pom pom look uneven or sparse?
Usually it means you didn’t wrap enough yarn around your maker or template. The more wraps you do, the fuller the pom pom will be. You can also trim it into shape. Pom poms are forgiving and can be sculpted with scissors until they look perfect.
How do I make my pom pom extra fluffy?
Give it lots of wraps, use a “bouncier” yarn fiber like wool or acrylic, and take your time trimming it. A sharp pair of scissors makes a big difference in getting that perfectly round, fluffy finish.
How do I make sure my pom pom doesn’t fall off my hat?
Tie the center of the pom pom very tightly and use the method I share above for securing it through multiple stitches at the top of your hat. I also recommend tying two knots on the inside of the hat for a little extra peace of mind.
Can I make a giant pom pom?
Yes! Clover has a 4.5″ pom pom maker that makes HUGE pom poms that I LOVE. If you want to go REALLY giant, a large custom cardboard template is the easiest way to make oversized pom poms. Just cut a bigger circle, wrap until it looks like you’ve wrapped way too much, and then tie and trim as usual.
That’s it! I hope you found this how to make a yarn pom pom for hats tutorial helpful and you’re confident to use them to give your hats the perfect finishing touch!. Pom poms are a great way to use up leftover yarn and accessorize many other projects. I hope you have fun finding new ways to use them. If you’re looking for a fun, new pom pom project, check out my How to Make Pom Pom Earrings tutorial here.
If this post helped you, save it on Pinterest so you can reference it later, or share it with a crochet friend who might find it useful!
I’d love to see what you’re working on and cheer you on! Tag me @theloopylamb or use #theloopylamb so I can see your adorable creations and maybe even feature you in my stories.
Join The Loopy Lamb Crochet Community Facebook Group to connect with other crocheters, ask questions, and share your projects inspired by my free crochet patterns and tutorials.
Looking to learn more? Check out my guide on crochet standards that all crocheters should know! Need a hat to put your pom pom on? Check out all my free crochet hat patterns and tutorials here.
If you loved this guide, share it with your crochet friends! It helps more makers find free crochet tutorials like this!
Follow The Loopy Lamb for More Crochet Goodness
Follow along for free crochet patterns, helpful tutorials, yarn reviews, and crochet tips every week:
Facebook Page: www.facebook.com/TheLoopyLamb
Instagram: www.instagram.com/TheLoopyLamb
YouTube: The Loopy Lamb YouTube Channel
TikTok: www.tiktok.com/@theloopylamb
Pinterest: www.pinterest.com/theloopylamb
Want more helpful crochet tutorials like this?
Sign up for my newsletter to get free patterns, video tutorials, and crochet tips delivered straight to your inbox.
Happy Crocheting! 💕
Ashley