Whether you are looking for a fun and easy crochet Christmas baubles pattern to make to trim your family Christmas tree or if you need a last-minute crochet gift for a host/hostess, you’re in the right place.
My Easy Crochet Christmas Baubles pattern is an easy pattern that is super quick to make and customize. This crochet project is beginner friendly and has a step-by-step video tutorial available that will show you how to make one of these fun and festive crochet baubles.
Pin this for later Save
*This post may contain affiliate links, which means that I may earn a small commission from qualifying purchases made through these links. All opinions are my own.*
Grab a printable, ad-free PDF version of this pattern in my Etsy and Ravelry shops for a small fee.

Table of contents
How do you Crochet a Christmas Bauble?
This free crochet bauble pattern was designed to be crocheted from the bottom-up. This means that we will create the base of our crochet ornaments first in one colour and then after adding our tassel, we’ll add the top of the bauble in a second colour.
Once we have the bauble completed, we’ll create a hanging loop so that we can hang our cute Christmas bauble onto the tree.
You’ll need a tassel maker or a piece of cardboard to create the tassel before starting to crochet our bauble. Following the steps of the pattern in order will help keep your process efficient and hassel-free.
Playing with Colour to Add Your Own Personal Touch
For this project, I’ve use non-traditional Christmas colours because I have young kids and they really like that fun and funky bright coloured Christmas palette of purple, pink, teal, bright green and white.
My daughter is a big fan of the bright colours in this palette and insisted that I make extra pink and purple baubles for her. But just because I’ve used these colours, doesn’t mean that you have to.
Get creative and mix it up, using whatever colours will match the colour scheme that you prefer for your holiday decor.
If you don’t want to use two different colours, you can skip the instructions for changing colours and just continue to crochet the bauble as instructed. Here are some fun colour combo suggestions to help you get the creative juices flowing:
- Light/baby blue and white
- Red and green
- Green and white
- All red with a white tassel
- All white with a green tassel
- Cream and blue
- Try googling “Christmas colour palettes” for other colour suggestions as well.
The Perfect Project for Holiday Gifting?
I always like to include a handmade gift for everyone on my list during the holiday season. But when I already have so many priorities on my list during the holidays, it can be so hard to make enough for everyone.
So I designed my Easy Crochet Christmas Baubles pattern as a quick way to make a ton of beautiful ball ornaments in a small amount of time so I can make enough for everyone on my list with time to spare.
Because let’s be honest – the best homemade ornaments to make and gift are the ones that look like they took more time than they really did.
I decided to use a worsted weight yarn called WeCrochet Brava Worsted for this project because 1. I love it. It’s a fabulous yarn and 2. they have a line of coordinating speckled yarns called Brava Speckles which made colour matching super simple.
For my Christmas Bauble samples, I used these combos: Plummy Speckle and Lady Slipper (the purple ones), Cherry Speckle and Rouge (the pink ones) and Tidal Speckle and Cornflower (the teal ones).
The speckled yarns work with so many other colours and give some character to what would otherwise be a plain white base to our baubles. Again, mix and match your favourite colours when making your own bauble.

Other Free Christmas Crochet Patterns Available:


Disclaimer:
Feel free to sell the item created by this free crochet pattern but please provide pattern credit back to me when posting online, and please provide a link to my blog: https://theloopylamb.com. This pattern is for personal use only. Please do not resell, distribute, duplicate, or share this pattern in any printed or digital form, or claim this pattern as your own original design. Please do not use my photos when selling your finished items. This pattern is for personal use only.

Skill Level:
- Easy
Terminology:
- U.S. Terminology
Supplies:
- 3.5 mm (E) Crochet Hook
- Brava Worsted (Worsted Weight (4), 100% Premium Acrylic, 3.5oz/100g, 218yds/200m)
- Colour A: Lady Slipper (1 Skein, Approx. 8g/18yds)
- Colour B: Plummy Speckle (1 Skein, Approx.4g/9yds)
- Polyester Toy Stuffing
- Scissors
- Tapestry Needle / Yarn Needle
- Stitch Marker
- Small Clover USA Tassel Maker or a piece of carboard approximately 5.25” tall
- ½” Round Wooden Bead In Preferred Colour

Abbreviations:
- BLO = Back Loop Only
- FLO = Front Loop Only
- FO = Finish Off
- MC = Magic Circle / Magic Ring
- SC = Single Crochet
- SCDEC = Single Crochet Decrease
- SCINC = Single Crochet Increase / 2 Single Crochet Stitches Worked in the Same Stitch
- SL ST = Slip Stitch
- ST(s) = Stitch(es)
Special Techniques:
- Invisible Join: FO leaving a tail that is at least 5 – 6 inches in length. Thread the tail onto a tapestry needle. Place the tapestry needle through the top of the 2nd ST from front to back and pull through. Place tip of needle into top of the last ST of the round, under the back loop of the stitch, and pull through to the back of the work. Weave in the end. Check out my Invisible Join Tutorial.
Finished Size:
- Approx. 4.75” tall from bottom of tassel to top of ornament once assembled (not including hanger.)
Gauge:
- Rounds 1 – 6 measures 2.5” across at the widest point.
NOTES:
- Gauge is not vital to the project but it may affect the amount of yarn needed for the project and the size of your finished Christmas decorations.
- Follow the instructions for this pattern in the order they are given.
- Maintain a consistent tension throughout the project to ensure the pieces fit together as expected.
- A 3.5mm crochet hook is the recommended hook size for this pattern but I suggest using whatever hook size is needed to create a tight, closed fabric free of holes, or whatever hook size needed to match the given gauge.
- If you find that you have holes in your fabric using the recommended hook size, try going down a hook size until you create a tight fabric with no holes in it and no stuffing is showing through.
- If you find that you have holes in your fabric using the recommended hook size, try going down a hook size until you create a tight fabric with no holes in it and no stuffing is showing through.
- This pattern can be worked in either regular single crochet or the yarn under single crochet. My sample was done using regular single crochet. Keep in mind that if you use the yarn under single crochet, it may affect the amount of yarn used and the size of your ornament.
- Reading the Pattern: Instructions in brackets: I.e.: (SC, SCINC) x 6, this means you’ll work 1 SC stitch in the first stitch and then SCINC in the next and you’ll repeat that pattern a total of 6 times.
- Numbers indicated in () at the end of a Round/Row indicate the number of stitches you should have at the end of the Round/Row. I recommend counting your stitches at the end of each Round/Row before moving on to the next.
- Where SC followed by a number (i.e. SC 14), you’ll work 1 SC stitch in the next 14 stitches or chains, unless the pattern specifies to work those stitches into the same stitch or chain.
- This pattern is worked in continuous Rounds (unless stated otherwise). Do not join at the end of the Round, unless indicated. A stitch marker is used to keep track of the beginning of the Round.
- This pattern is worked from the top of the carrot to the bottom. Then the greens are crocheted and seamed to the piece.
- Magic Circle Substitution: If you struggle with the MC or your yarn breaks when you try to do a MC with it, use a CH 2 and work all Round 1 stitches into the 2nd chain from the hook.
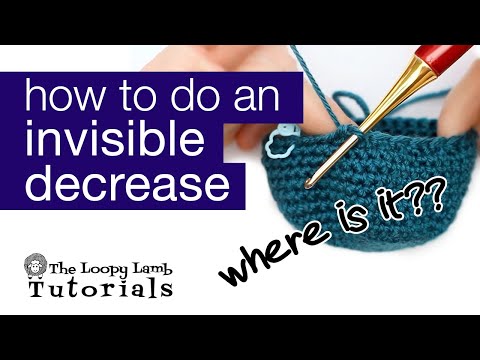
- For a cleaner SCDEC, do your SCDEC under the front loops only of each stitch rather than under both loops (except when indicated to work your ST in a different location i.e. BLO). This is often referred to as an invisible decrease. Check out my Invisible Decrease tutorial here.
Grab a printable, ad-free PDF version of this pattern in my Ravelry and Etsy shops for a small fee.
Easy Crochet Christmas Baubles Free Pattern
Creating the Tassel:
- Using a small Clover Tassel Maker/cardboard set to the largest setting, create a tassel using Colour A. I wrapped my tassel maker approximately 10 times.
- Leave a tail at the top of your tassel approximately 6 inches in length to secure to ornament.
- After tassel is completed, lightly steam the tassels straight and trim ends.

Watch the Video Tutorial of this Easy Crochet Christmas Bauble Pattern Here:

Ornament:
Round 1: Using Colour B, make a MC and SC 6 into the MC (6)
Round 2: (SCINC) x 6 (12)
Round 3: (SCINC, SC) x 6 (18)
Round 4: SC, SCINC, (SC 2, SCINC) x 5, SC 1 (24)
Round 5: (SCINC, SC 3) x 6 (30)
Round 6: SC 2, SCINC (SC 4, SCINC) x 5, SC 2 (36)
Gauge Check: Piece should measure 2.5” across at this point.
Rounds 7 – 9: SC around (36)
FO with invisible join (see special techniques). Add bead to yarn tail on tassel so it rests on top of the tassel. Attach tassel to base by inserting yarn tail on tassel through the center of the MC from Round 1 and tying a knot with the yarn tails to secure on the inside of your piece.
Round 10: Attach Colour A in BLO of the first ST of Round 9. Working in the BLO, SC in the first ST and each ST around (36)
Rounds 11 – 13: SC around (36)
Round 14: SC 2, SCDEC (SC 4, SCDEC) x 5, SC 2 (30) – start stuffing, adding more stuffing as you work.
Round 15: (SCDEC, SC 3) x 6 (24)
Round 16: SC 1, SCDEC, (SC 2, SCDEC) x 5, SC (18)
Round 17: (SCDEC, SC) x 6 (12)
Round 18: (SCDEC) x 6 (6)
FO, weaving tail through FLO to close. Weave in ends.

Adding the Hanger:
- Cut a length of Colour A to approximately 8 – 10” long.
- Thread the tail onto a tapestry needle and pull the yarn through a stitch near the center of the top of the ornament. Do NOT pull it all the way through.
- Thread it through another stitch at the top of the ornament and pull it outside the ornament.
- Take the two ends of your yarn and tie a knot, making sure that you leave enough yarn to hang it on the tree.
- Use the yarn to pull the knot inside the ornament.
CCheck Out These Other Easy Crochet Christmas Ornaments Free Patterns


I’d love to see your finished Easy Crochet Christmas Baubles! Please share your finished holiday decorations by tagging the pattern on Ravelry, sharing it to our Facebook page or Instagram. Don’t forget to follow me on social media so you don’t miss a thing. Happy Crocheting!
Facebook: www.facebook.com/TheLoopyLamb
Instagram: www.instagram.com/TheLoopyLamb
YouTube: The Loopy Lamb YouTube Channel
Pinterest: www.pinterest.com/theloopylamb
Newsletter: Sign up for my newsletter!


1 thought on “Easy Crochet Christmas Baubles Free Pattern”