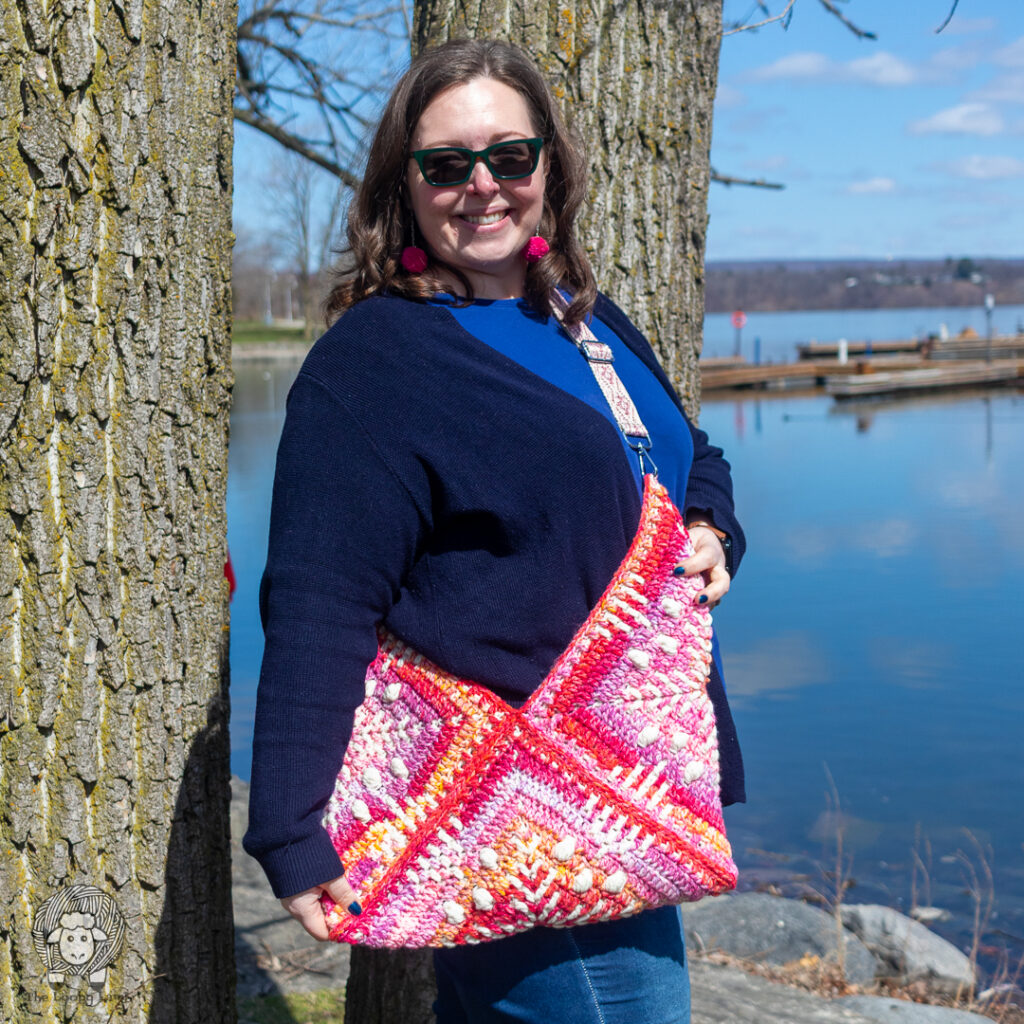
This granny square bag crochet pattern uses my mosaic crochet granny squares to create a beautiful and functional bag. If you’ve been looking for a crochet granny square bag pattern that’s a little different, this one is a fun option.
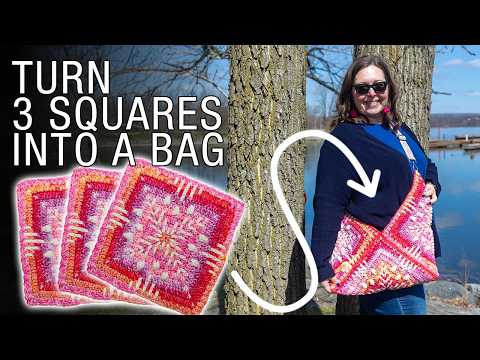
This easy crochet bag is made from just 3 granny squares and uses a simple join with minimal sewing, making it a quick and satisfying project. After you’ve crocheted your 3 granny squares, I’ll walk you through exactly how to join them step-by-step to turn them into a finished bag. This crochet tote bag is perfect for everyday use and is a great way to turn your granny squares into something practical.
Before You Begin:
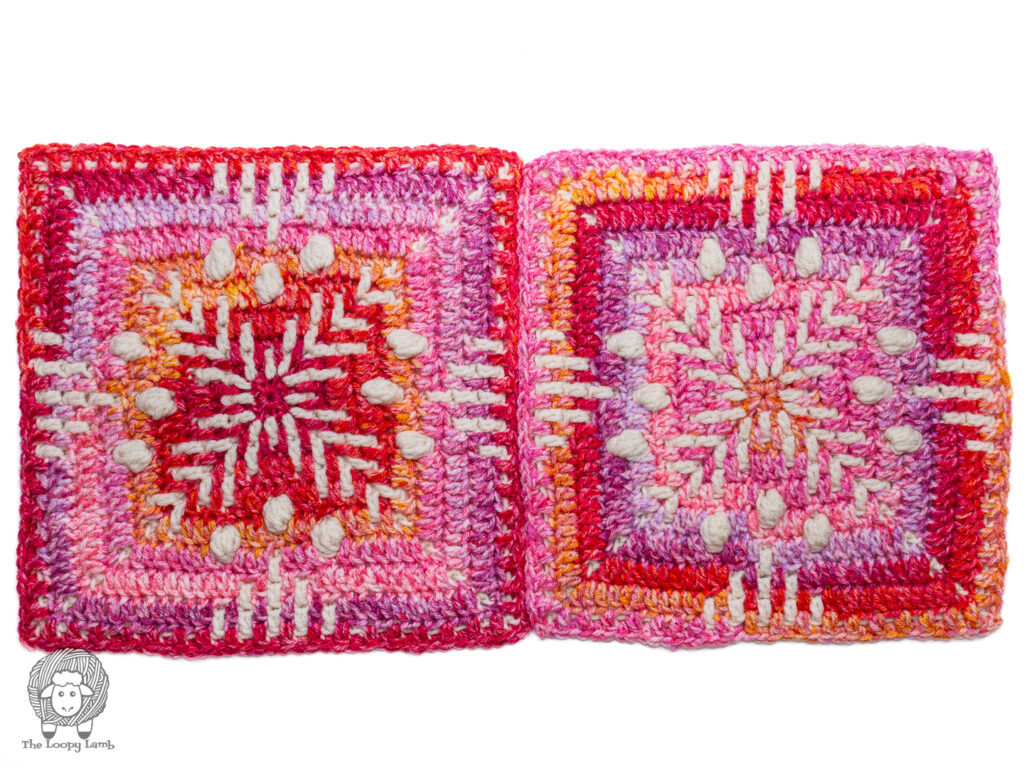
- You’ll need to crochet 3 granny squares using my Pink Lemonade Mosaic Granny Square written pattern.
- Find the granny square pattern here: https://theloopylamb.com/mosaic-granny-square-crochet-pattern/.
- In this blog post you’ll find the step-by-step assembly instructions and a YouTube video showing you how to put your granny square tote bag together.

Pin This Free Pattern to Save It For Later Save It
*This post may contain affiliate links, which means that I may earn a small commission from qualifying purchases made through these links at no extra cost to you. All opinions are my own.*
Pink Lemonade Granny Square Bag
(Ad-Free PDF)
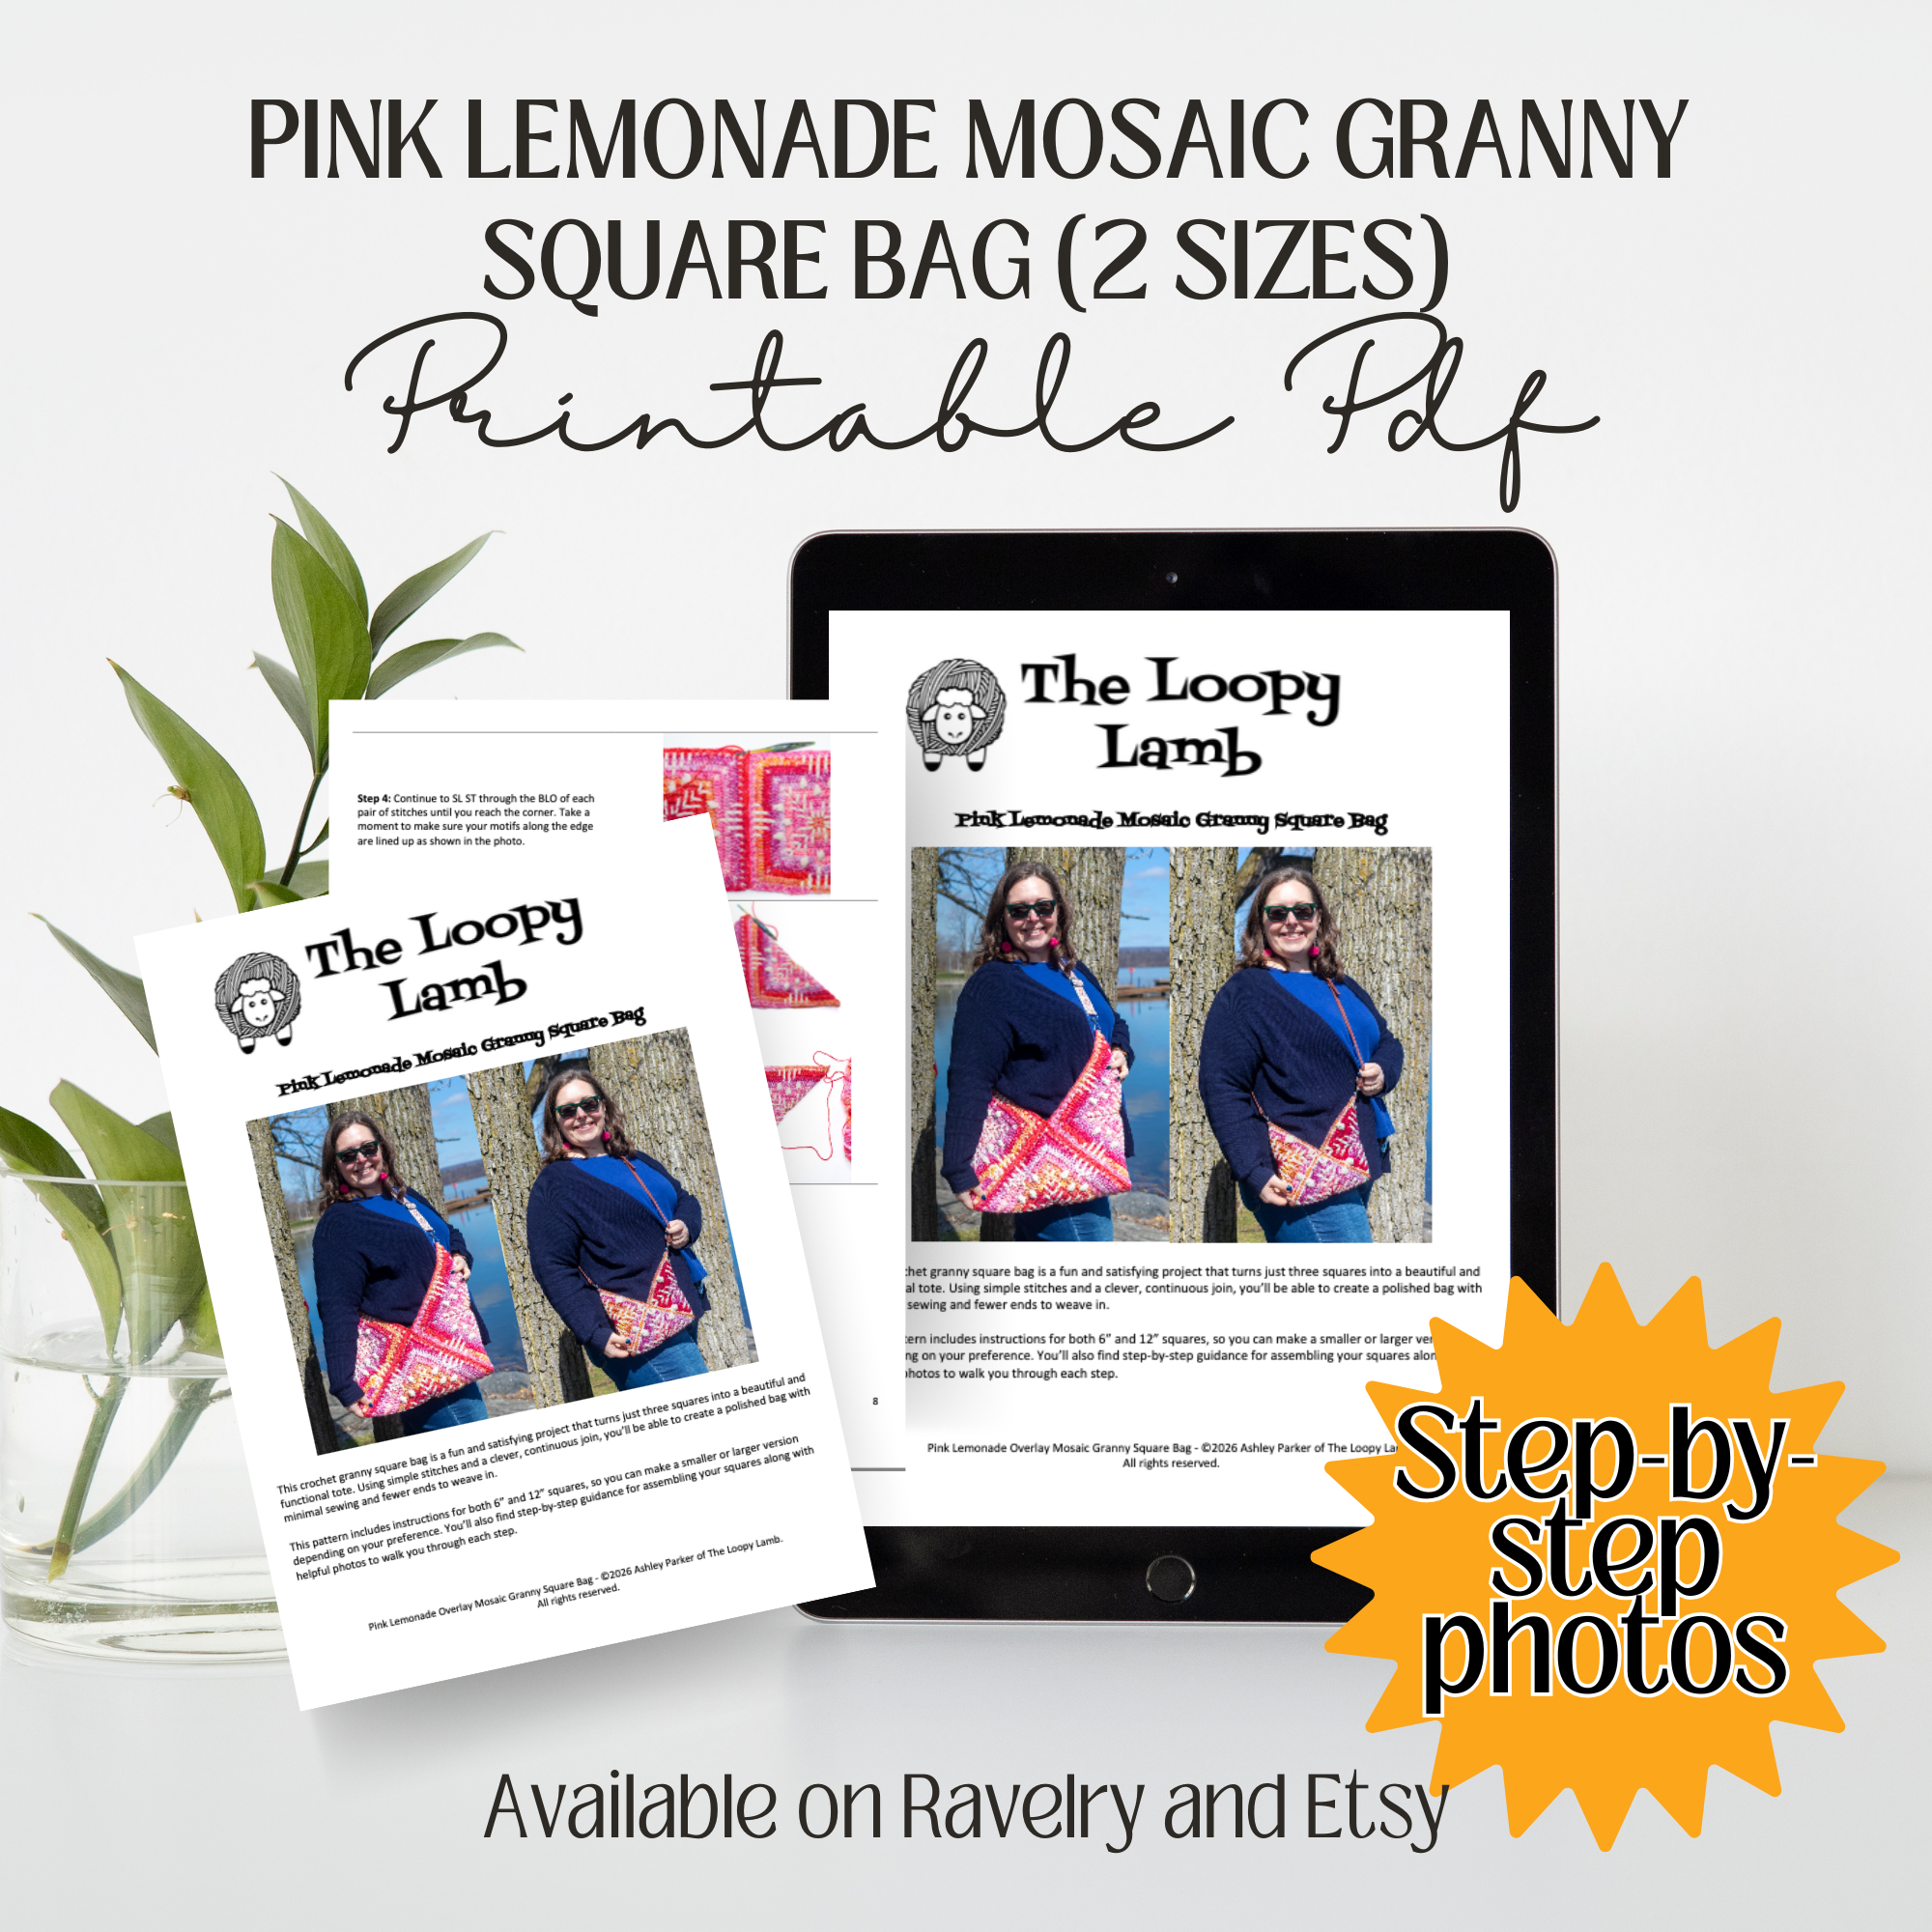
Prefer to have everything in one place? The printable PDF includes the mosaic granny square pattern, step-by-step bag instructions and a photo tutorial to guide you through each step.
Table of contents
- Before You Begin:
- What You’ll Love About This Granny Square Bag Pattern:
- Join the Fantastical BagtastiCAL Crochet Along
- Disclaimer
- Skill Level:
- Terminology:
- Abbreviations:
- Special Stitches & Techniques:
- Finished Sizes:
- Gauge:
- Crochet Granny Square Bag Instructions
- FAQs
- Looking for Other Crochet Granny Square Projects?
What You’ll Love About This Granny Square Bag Pattern:
While many traditional granny square bag patterns require you to use the whip stitch to put your crochet bag together or use multiple different joins to assemble your bag, this one is joined using a single seam. That means less ends to weave in and you can join your bag in one go.
I’ve included a photo and video tutorial to walk you through putting your bag together. Even the square motif pattern that was used in this pattern was designed to minimize the amount of yarn ends you have to weave in. Here are some other reasons to love this project:
- It can be made in two different sizes
- Can be used in place of plastic bags
- It’s a great way to use two of your favorite colors in a project
- It’s an easy crochet pattern that can be made in other yarn weights
Join the Fantastical BagtastiCAL Crochet Along
This pattern is part of the Fantastical BagtastiCAL 2026, hosted by CAL Central.
➡️ Visit the event post to see all the patterns and enter the giveaway.
Disclaimer
This free crochet pattern is © Ashley Parker of The Loopy Lamb. You’re welcome to sell finished product made using it, I kindly request that you credit The Loopy Lamb as the pattern designer and link to https://theloopylamb.com. This pattern is for personal use only. Please don’t copy, share, or repost the pattern itself, translate or alter it, or use my photos. Video tutorial creation using this pattern is strictly prohibited.
Thank you for supporting independent designers by viewing this pattern right here on my blog. It helps me keep sharing free patterns with you.
Skill Level:
- Easy
Terminology:
- US terms
Supplies:
- 5.5 mm (I) Crochet Hook (or size needed to match gauge)
- Red Heart Super Saver Bitty Stripes (100% Acrylic yarn, Worsted (4), 515 yd/471 m, 283 g/10 oz), in the following colors and quantities:
- Color A: Pink Lemonade – 1 skein
- 6 in square: (approx. 27 yd/14 g)
- 12 in square (approx. 113 yd/62 g)
- Color A: Pink Lemonade – 1 skein
- Red Heart Super Saver (100% Acrylic, Worsted (4), 364 yd/333 m, 198 g/7 oz),
- Color B: Aran – 1 skein
- 6 in square: (approx. 24 yd/13 g)
- 12 in square (approx. 67 yd/36 g)
- Color B: Aran – 1 skein
- Bag Straps:
- Scissors
- Tapestry Needle / Darning Needle
- Stitch Markers
- Blocking Materials (blocking mat, pins, garment steamer)
Abbreviations:
- BLO = Back Loop Only
- CH(s) = Chain(s)
- FO = Finish Off
- SL ST = Slip Stitch
- ST(s) = Stitches
Special Stitches & Techniques:
- Invisible Finish/Join: FO leaving a long tail. Thread the tail onto a tapestry needle. Place the tapestry needle through the top of the 2nd ST from front to back and pull through. Place the tip of the needle into the top of the last ST of the round, under the back loop of the ST and pull through to the back of the work. Weave in the end. Find a tutorial here: https://theloopylamb.com/invisible-finish-crochet-tutorial/
Finished Sizes:
- Small Bag: 8 in wide x 8 in tall along the longest point (not including strap)
- Large Bag: 17 in wide x 17 in tall along the longest point (not including strap)
Gauge:
- Gauge is not vital for this project. You may substitute a different yarn and hook size. Any change in gauge will affect the finished size of the project and the amount of yarn required.
- The sizes given for the bag are based on the gauge given in my Pink Lemonade Mosaic Granny Square pattern. You can change the size of the bag by changing your yarn weight and crochet hook however, keep in mind this will affect how much yarn is needed.
Crochet Granny Square Bag Instructions
Make Your Granny Squares:
To make this bag, you’ll need to crochet 3 granny squares in your desired size. My Pink Lemonade Mosaic Granny Square pattern includes instructions for both 6” square and 12” squares. The Pink Lemonade Mosaic Granny Square pattern can be found here.
To make a small bag (approx. 8 in wide x 8 in tall), make 3 squares in the 6” size.
To make a large bag make 3 granny squares using the 12” size. Do not mix sizes in the same bag. Once your 3 squares are complete, proceed to the assembly instructions.
Crochet Granny Square Bag Video Tutorial
Granny Square Bag Assembly Instructions:
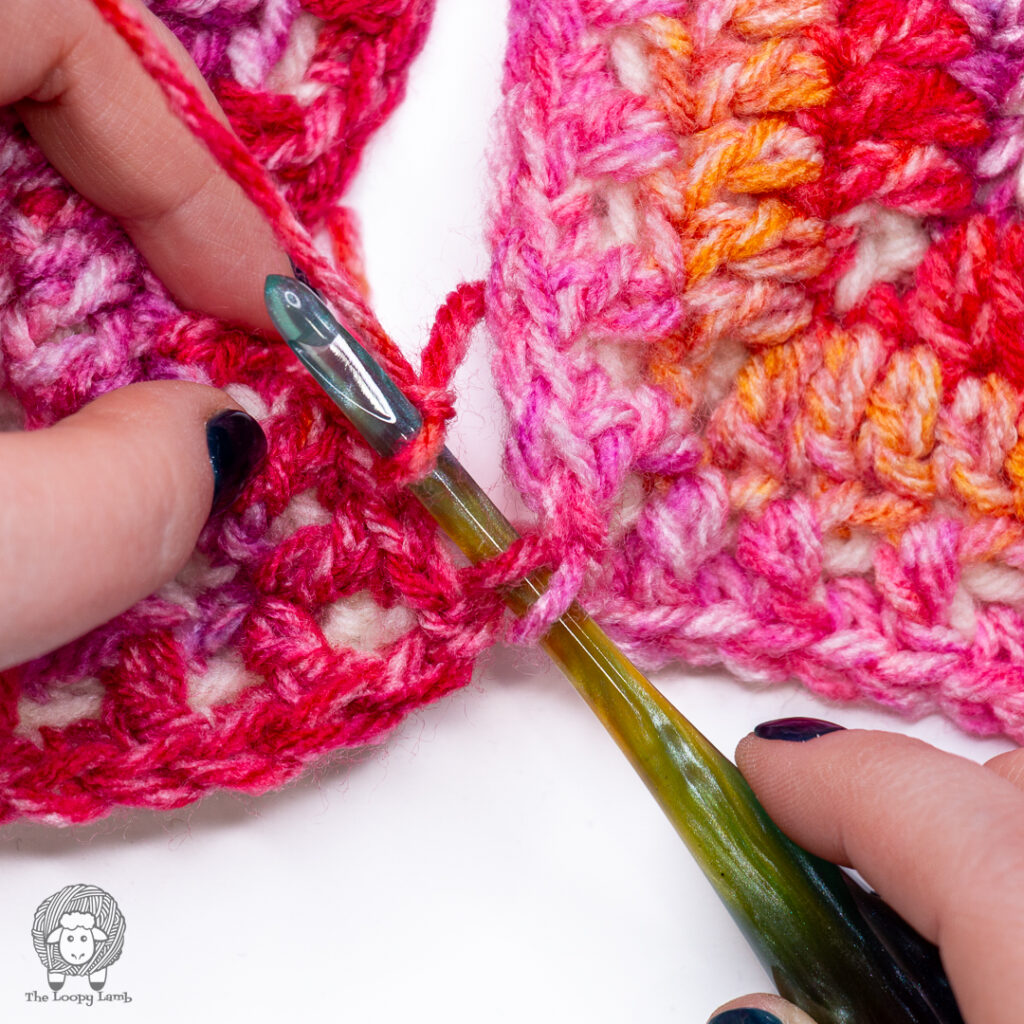
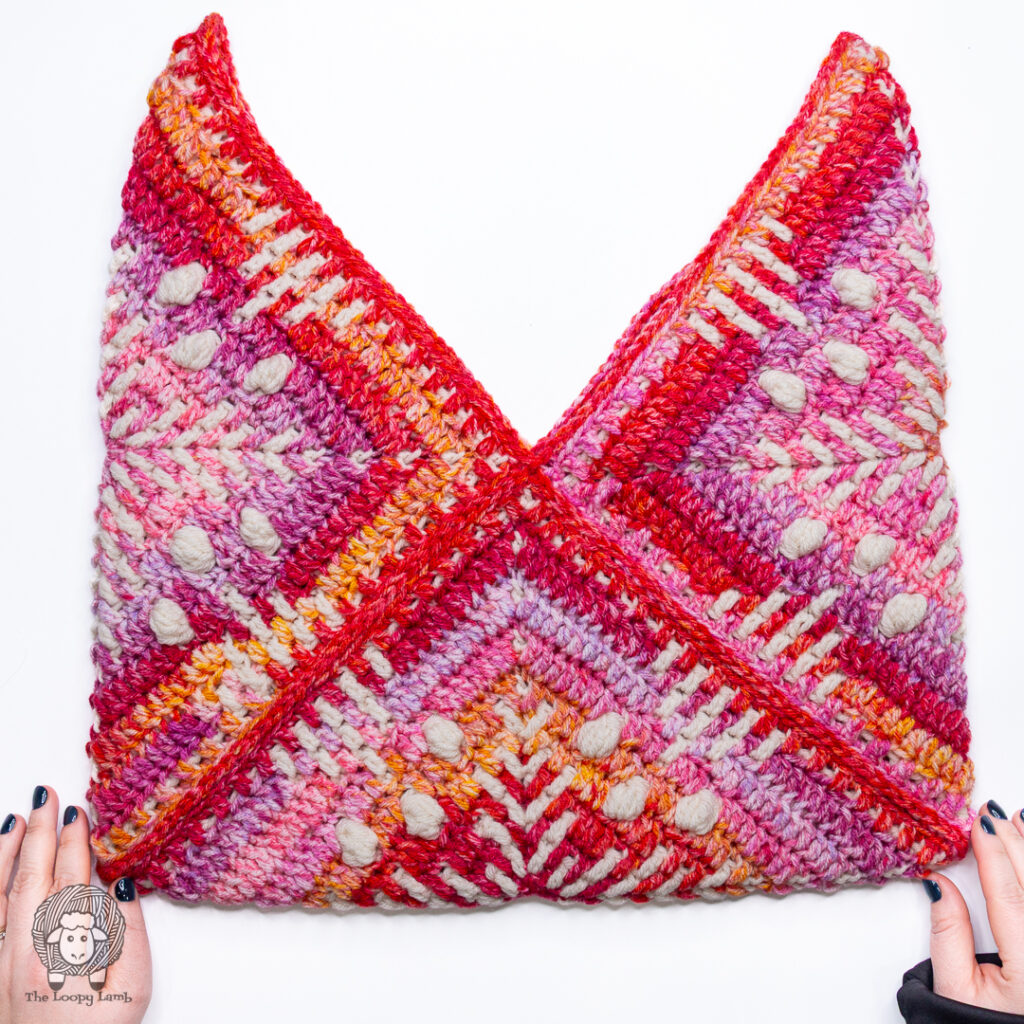
We will join our three squares using a flat slip stitch seam worked through the back loops only. This is one continuous join in order to minimize the amount of yarn ends you’ll need to weave in. Make sure you’re carefully joining your squares together so the motifs along the edge line up.
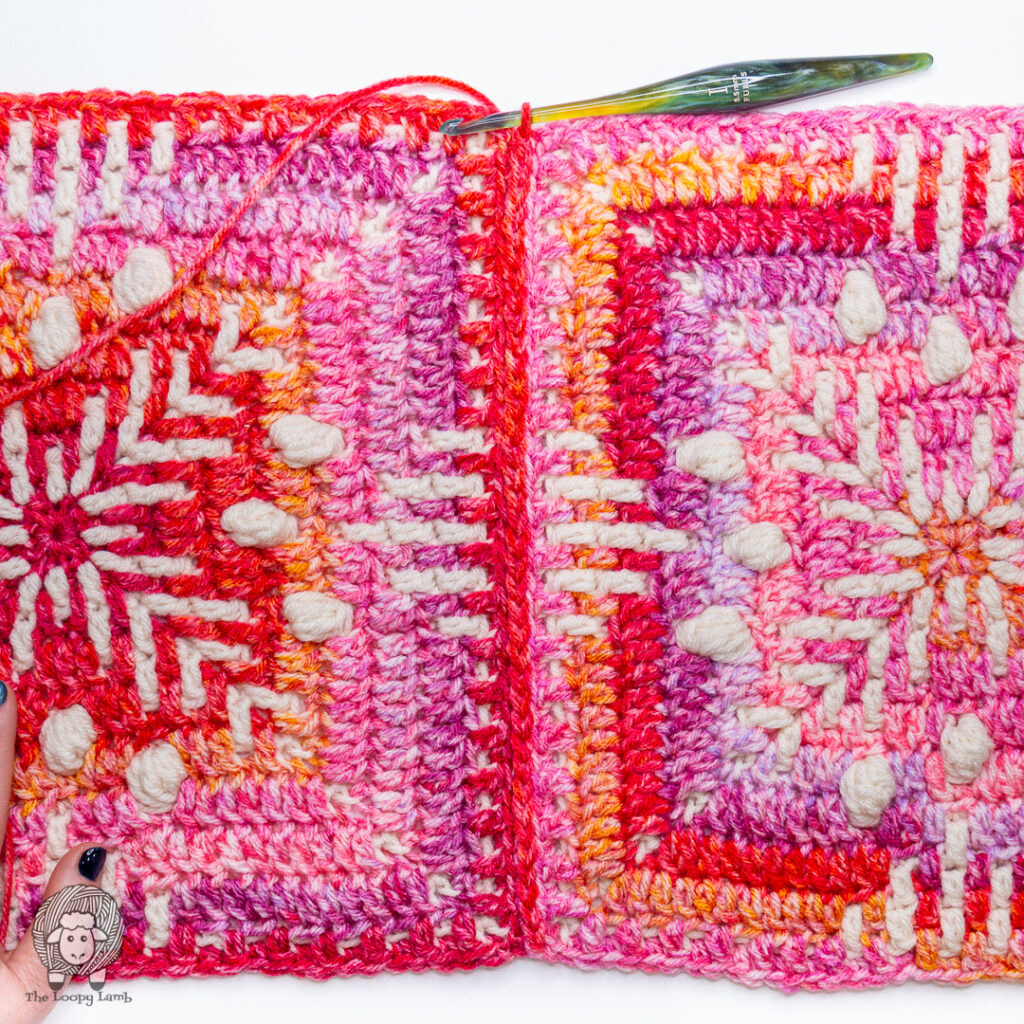
Step 1: Lay two squares side-by-side with the right side facing you, lining up the stitches.
Step 2: Insert your hook through the BLO of the first stitch of both squares closest to you. Place a slip knot in Color A (or your color of preference) on your hook and pull it through both stitches.
Note: For your joining yarn, I recommend using the same color as the last round of your squares if you want the join to be less visible. If you’d like it to stand out, you can use another color from your square.
Step 2 Image 2
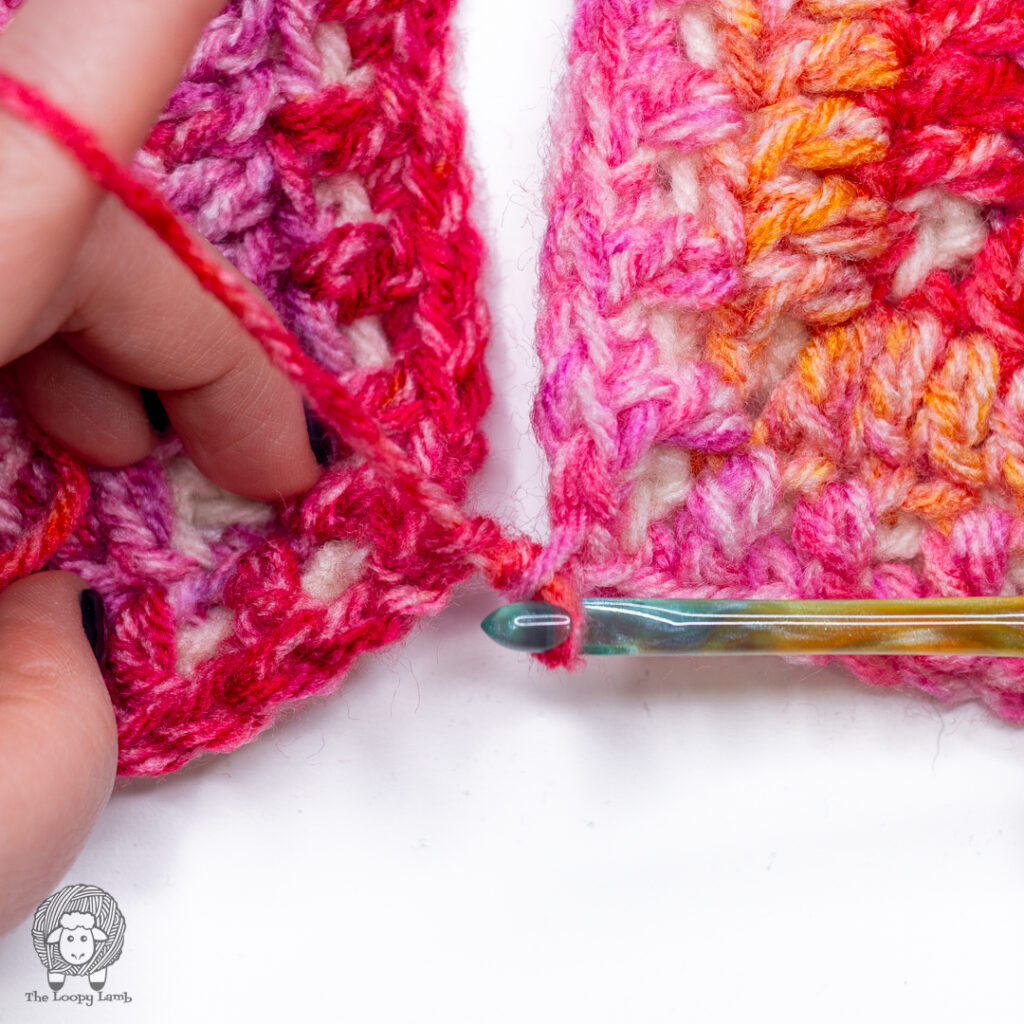
Step 3: SL ST into the BLO of the next pair of stitches (one from each square).
Step 4: Continue to SL ST through the BLO of each pair of stitches until you reach the corner. Take a moment to make sure your motifs along the edge are lined up as shown in the photo.
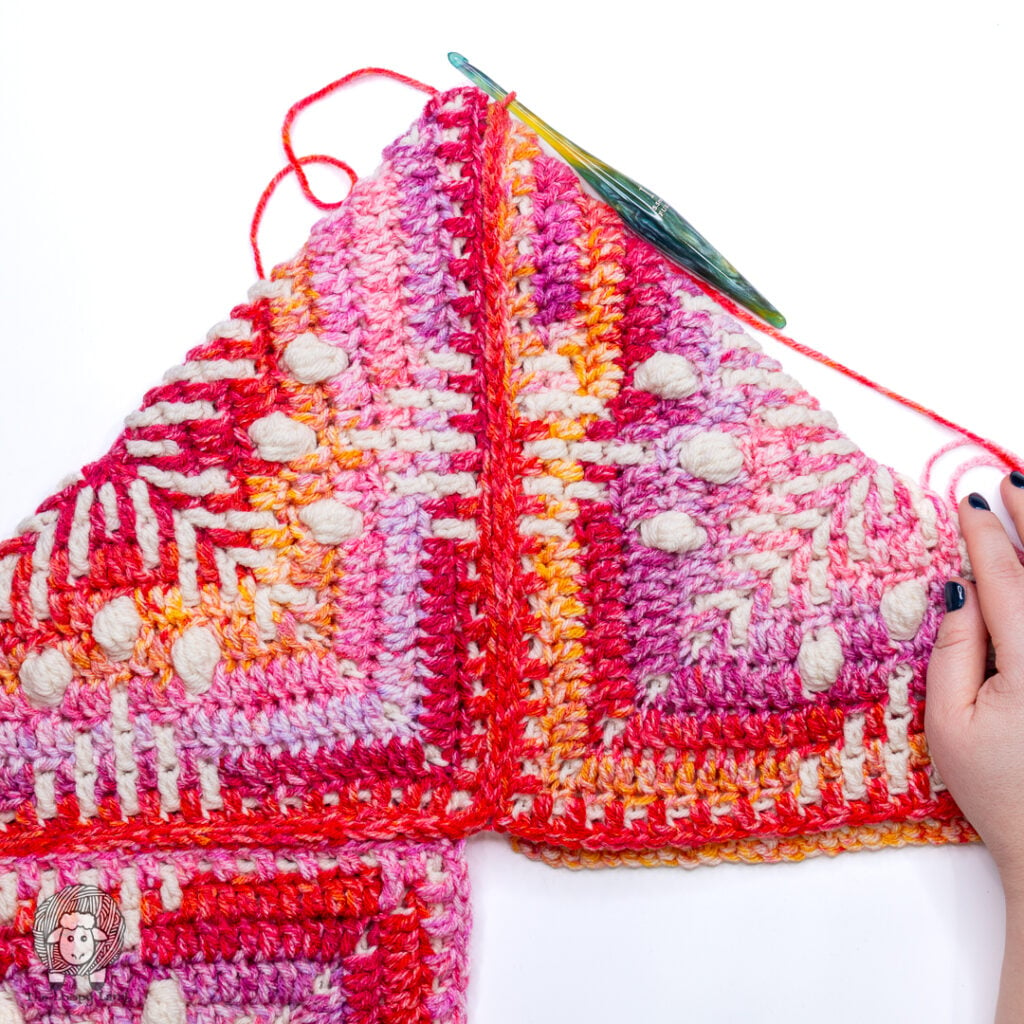
Step 5: Fold the top two outer corners down so they meet at the point where you joined your yarn. Your piece should now resemble a triangle (see photo).
Flip the piece over so you can continue to crochet up the unjoined edge (see second photo). Continue to SL ST through the BLO of each pair of stitches until you reach the next corner.
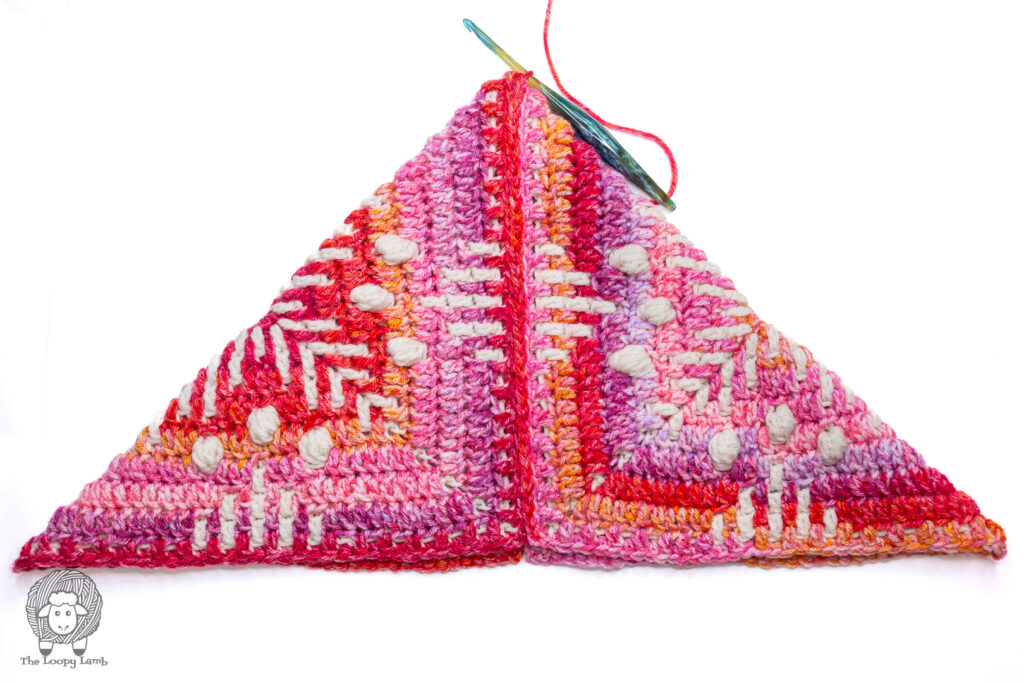
Step 5 Image 2
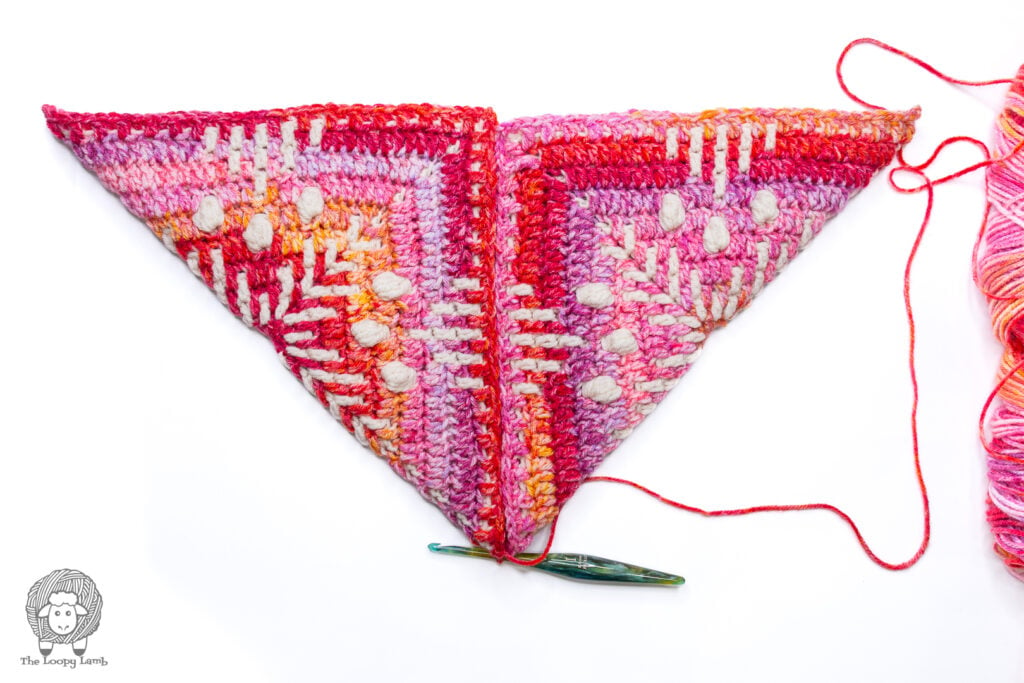
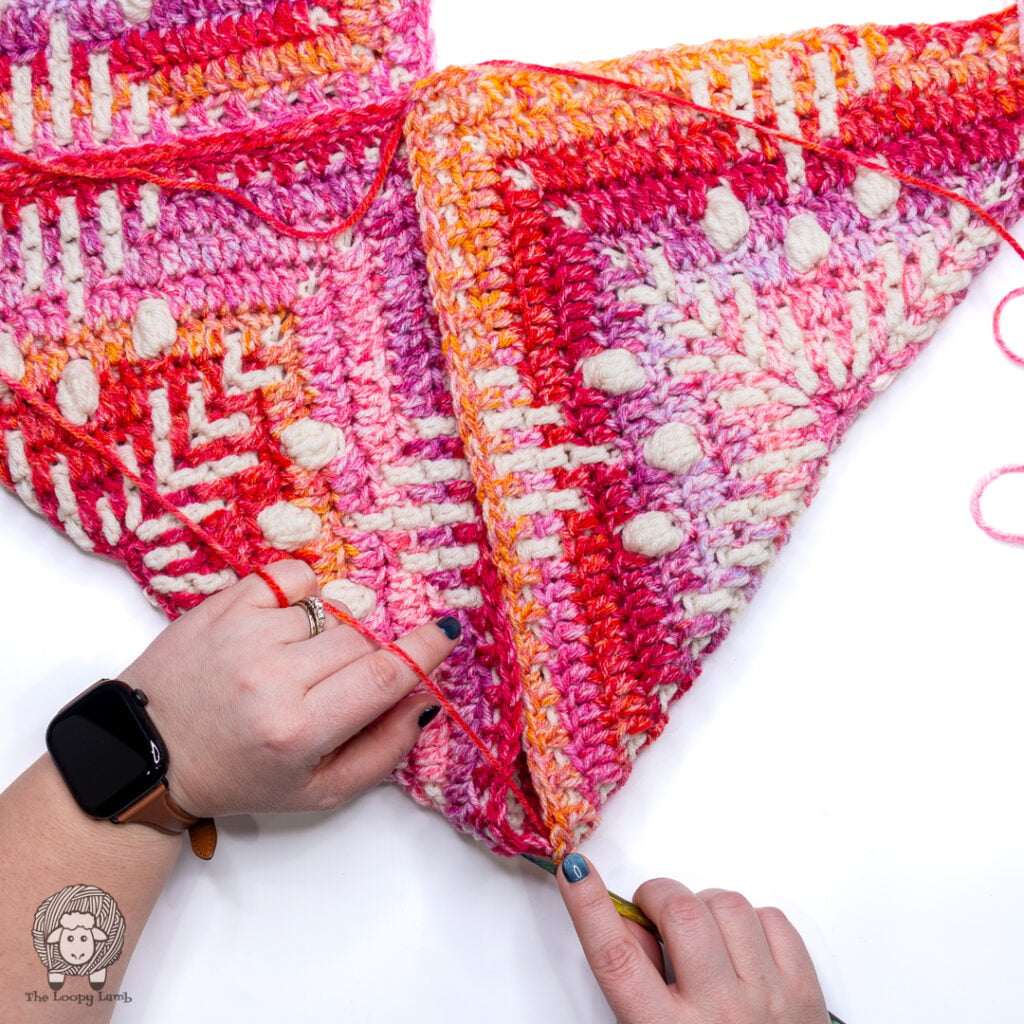
Step 6: Fold your third square in half so the edges line up. Match those stitches to the square furthest from you. Continue to SL ST through the BLO of each pair of stitches to join the third square.
Step 6 Image 2
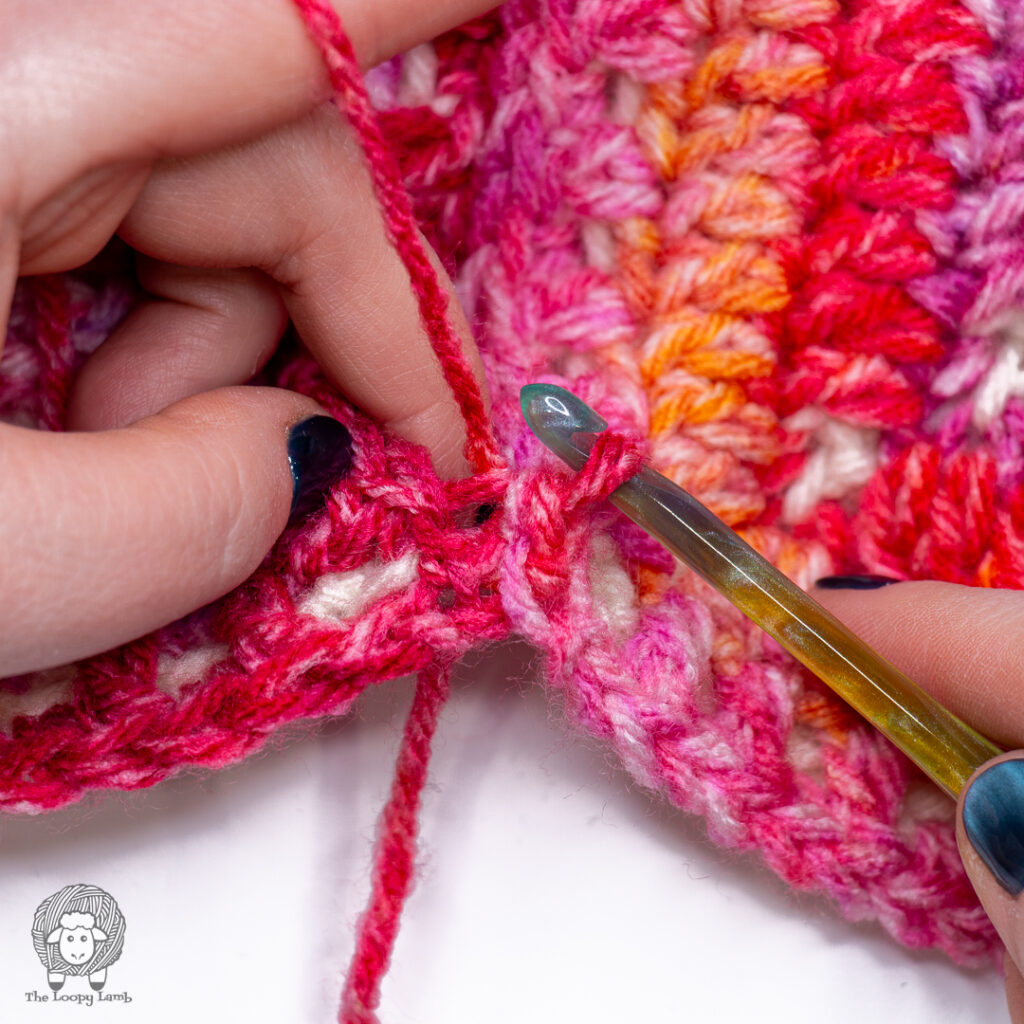
Step 7: Flip the piece over to join the third square on the other side of the bag. BLO SL ST through each pair of stitches to the next corner. Make sure your motifs line up or it will look mismatched as it does in the photo.
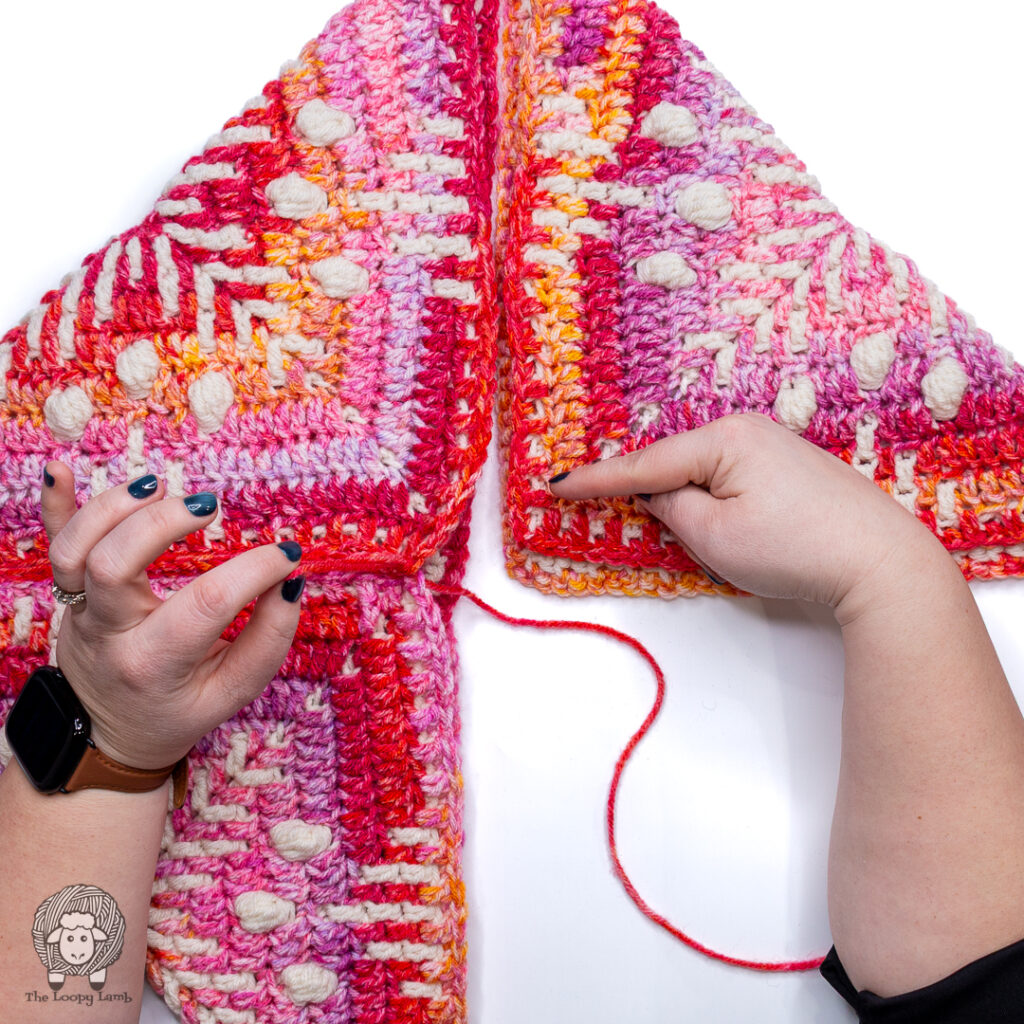
Step 8: The next corner is where all three squares meet. This is your center point. Insert your hook through the center of the first SL ST (and the stitch underneath) of the next square and SL ST. Then work one SL ST into the BLO of each stitch and chain along this edge to trim your bag until you reach the next center point on the opposite side of the bag.
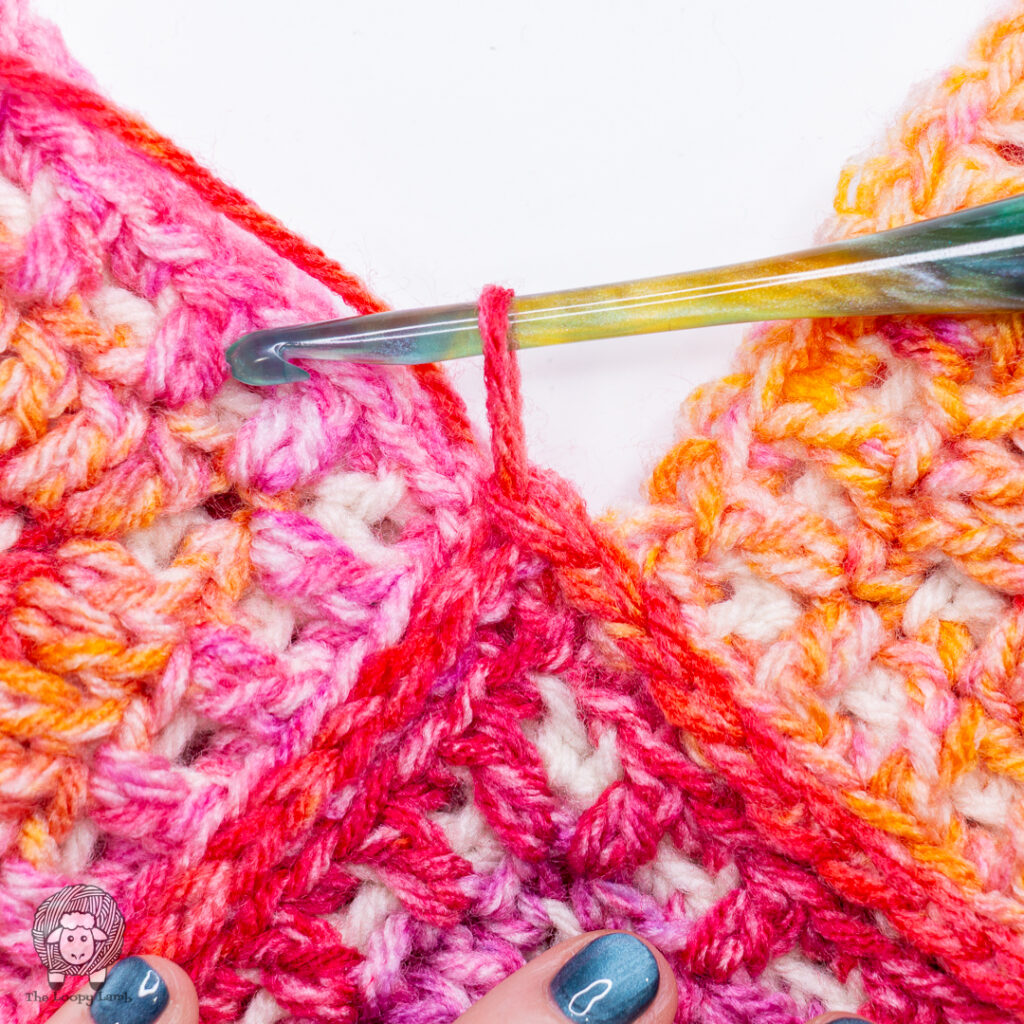
Step 9: At the next center point, insert your hook through the center of the SL ST closest to the middle of the center point and the BLO of the stitch underneath then SL ST.
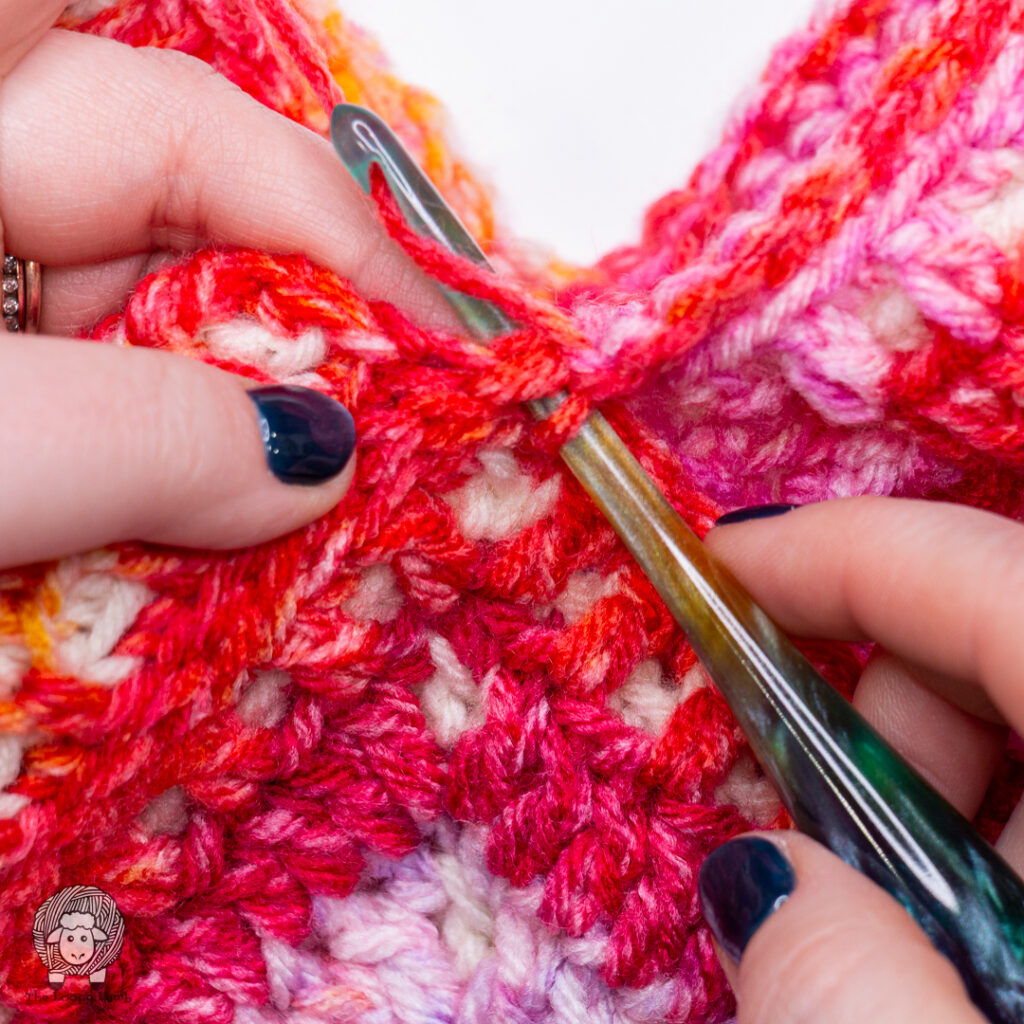
Step 10: Continue working one BLO SL ST into each stitch along the final edge until you reach the first center point. Do NOT SL ST in the final stitch. FO with an invisible finish (See Special Stitches & Techniques) and weave in ends.
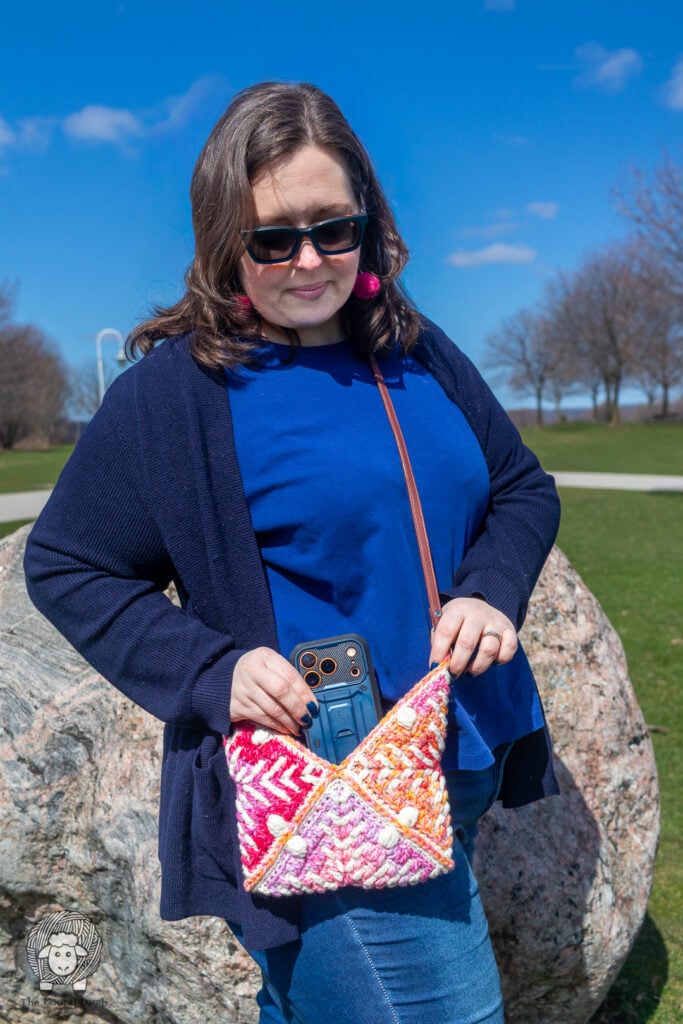
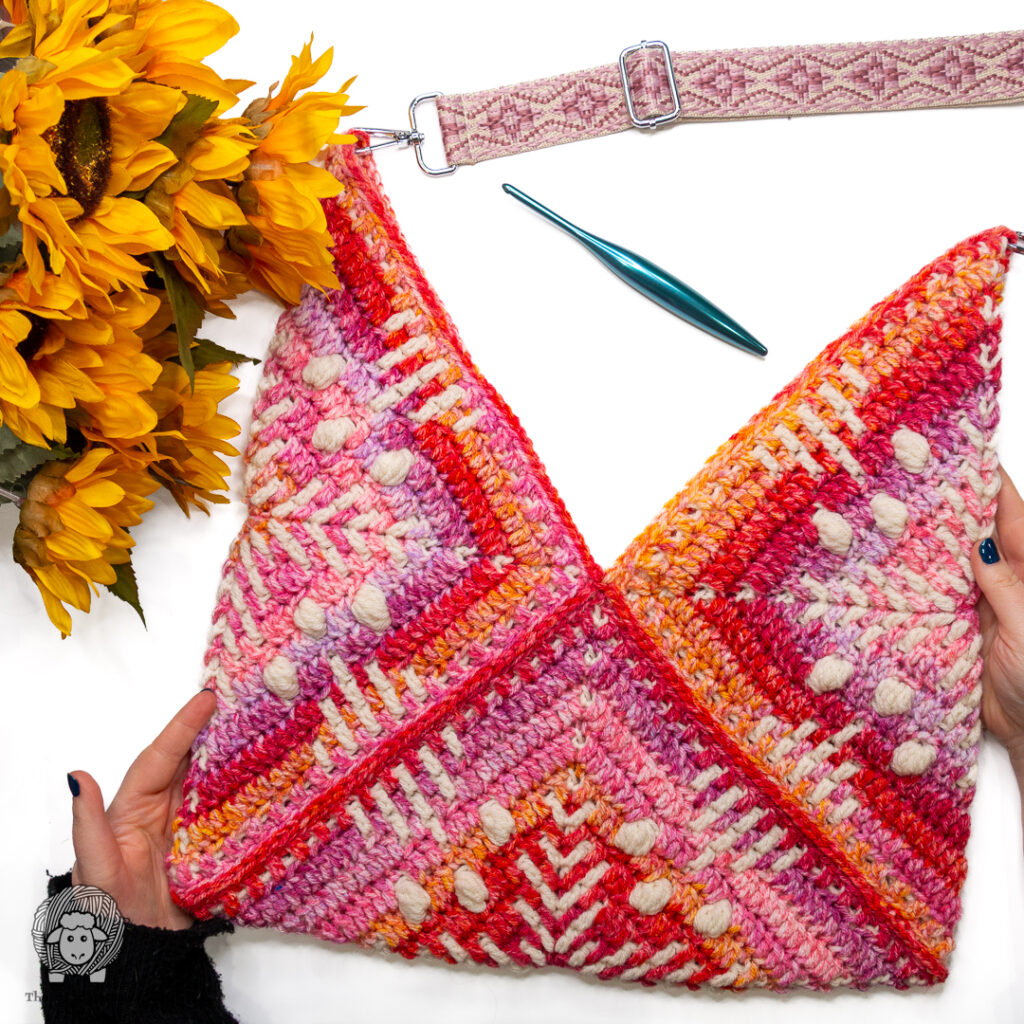
Step 11: To attach the bag strap, insert the clip at each end of the strap through the corners at the top of the bag.
If you post pictures of your finished mosaic granny square bags on social media, I’d love to cheer you on and share your post with our community! Tag me @theloopylamb or use #theloopylamb so I can see your colorful tote bags and maybe even feature you in my stories.
Join The Loopy Lamb Crochet Community Facebook Group to connect with other crafty friends and share your fabulous projects made with this free crochet granny square bag pattern. Don’t forget to follow me on social media so you always know when new youtube tutorials and other new free crochet patterns are released. Happy Crocheting!
Facebook Page: www.facebook.com/TheLoopyLamb
Instagram:www.instagram.com/TheLoopyLamb
YouTube: The Loopy Lamb YouTube Channel
TikTok: www.tiktok.com/@theloopylamb
Pinterest:www.pinterest.com/theloopylamb
Newsletter: Sign up for my newsletter!
FAQs
The Pink Lemonade Mosaic Granny Square Pattern is available in a separate post so you can easily use it for other projects. You can find it here: https://theloopylamb.com/mosaic-granny-square-crochet-pattern/
Absolutely! If you’d prefer to have the granny square patterns and assembly instructions all in one place, grab a copy of the printable, ad-free PDF pattern in my Ravelry and Etsy shops for a small fee.
Absolutely! If worsted weight yarn isn’t available near you or you’d prefer to use another yarn weight this pattern can easily be made using another yarn weight. Things to keep in mind with yarn substitution:
– You’ll need to adjust your hook size
– You may end up using more (or less) yarn than called for in the pattern
– It will affect your bag size
Sure! As long as your bag is made up of three granny squares, you can use the same method I show here to join them together.

Looking for Other Crochet Granny Square Projects?
You’ll love these other crochet granny square patterns and books:


