This week I want to share my free crochet seal pattern for my new little friend Salty the Seal and her baby seal pups.
This crochet seal pattern is designed to have as little sewing as possible. These adorable seals are worked from the head to the tail in one piece. The only part you’ll sew onto this little guy are her side fins and closing the tail fin.
Be sure to check out my video tutorial for this free amigurumi pattern if you’re needing extra help.
This free crochet seal pattern has been sponsored by Clover USA. All opinions are my own.
*This post may contain affiliate links, which means that I may earn a small commission from qualifying purchases made through these links at no extra cost to you. All opinions are my own.*
Get an ad-free PDF version of this crochet seal pattern in my Ravelry or Etsy shops.
Materials Used For this Seal Amigurumi Pattern
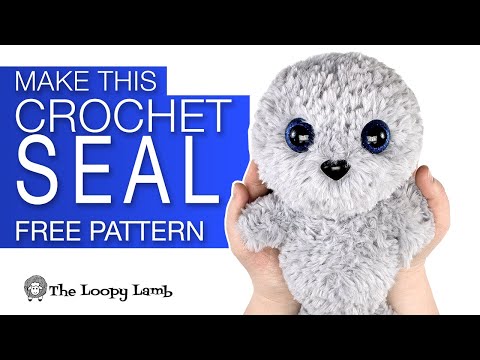
Salty is made with Fable Fur yarn from We Crochet. I absolutely love, love, LOVE creating amigurumi patterns with this faux fur yarn.
Combine the minimal sewing with the fact that the Fable Fur yarn is a super bulky weight yarn, this crochet seal pattern is a really quick make.
The baby seals are made using the same pattern but you’ll be using a 3.5mm crochet hook and Brava Worsted yarn – a size 4 medium weight yarn.
You’ll need 10mm eyes and a 8mm safety nose for each baby seal and 24mm safety eyes & 21 mm safey nose for Salty.
The tools I used in this project were generously supplied by Clover USA. I used their Clover Amour Crochet hooks, Chibi Bent Tip Tapestry Needle, Locking Stitch Markers and Patchwork Mini Scissors.

How Big Will The Final Piece Be?
Salty the Seal measures approximately 10 inches tall. She is a great cuddle-sized toy for little ones.
The baby seals measure approximately 4.5 inches tall. These final sizes are approximate and based on the gauge given in the pattern.
Crocheting an Amigurumi Seal With Fur Yarn
If this is your first time working with faux fur yarn or if you’re nervous about trying it, check out my tips and tricks for working with faux fur yarn. or check out the video version below.
Free Crochet Seal Pattern – Salty the Seal

Pin it for later Save
Want to print this pattern? Grab an ad-free PDF version of this crochet seal pattern in my Ravelry or Etsy shops.
Disclaimer:
This pattern is for personal use only. Feel free to sell the item created by this free crochet pattern but please provide pattern credit back to me when posting online, and please provide a link to my blog: https://theloopylamb.com. Please do not resell, distribute, duplicate, or share this pattern in any printed or digital form, or claim this pattern as your own original design. Please do not use my photos when selling your finished items.
Skill Level:
- Intermediate
Terms:
- US Terms
Supplies for Salty the Seal:
- 5.5 mm Crochet hook <– I used Clover Amour Crochet Hooks for this project
- 71 yards/65m (3.5 oz/100g) of We Crochet Fable Fur Yarn in Ursa
- 24 mm Safety Eyes – I used Sapphire Glitter eyes from Chateau Bornais Crochet
- 21mm Black Safety Nose
- Clover Chibi Bent Tip Tapestry Needle
- Clover Quick Locking Stitch Makers
- Polyester Stuffing
- Scissors – I used Clover Patchwork Mini Scissors
Supplies for the Baby Seals:
- 3.5 mm (E) Clover Amour Crochet hook
- 28 yards/26m (> 1 oz/12g) of Brava Worsted Weight Acrylic Yarn in either Dove Grey Heather (for the light grey baby) or Cobblestone Heather (for the dark grey baby)
- 2 – 10 mm Blue Safety Eyes for each baby seal
- 1 – 8 mm Oval black Safety Nose for each baby seal
- Clover Chibi Bent Tip Tapestry Needle / Yarn Needle
- Clover Quick Locking Stitch Makers
- Polyester Stuffing
- Scissors – I used Clover Patchwork Mini Scissors
Abbreviations:
- CH = Chain
- ST = Stitch
- MC = Magic Circle / Magic Ring
- SC = Single Crochet
- SCINC = Single Crochet Increase / 2 Single Crochet Stitches in the Same Stitch
- FO = Finish Off
- SCDEC = Single Crochet Decrease
Finished size:
- Salty is approximately 10” Long by 7.5” wide (fin tip to fin tip)
- Baby seals are approximately 4.5” long by 3” wide (fin tip to fin tip)
Gauge:
- Salty: 5 sts x 5 rows = 2 inches
- Baby seals: 5 sts x 5.5 rows = 1 inch
NOTES:
- Salty the Seal is worked with the wrong side facing out to show the better-looking side of the fur.
- The head, body and tail fin are all working in the round and in a single piece. The fins are worked in rows and then sewn onto either side of the body.
- This project is worked in continuous rounds (except the fins). Do not join at the end of every row (unless indicated). Use a stitch marker to mark the first stitch of every round, moving it up at the start of each new round.
- To make Salty the Seal: Follow the instructions using the Fable Fur Yarn and the 5.5mm hook.
- To make the Baby Seals: Follow the instructions using the Brava Worsted yarn and a 3.5 mm hook.
- Gauge is not vital to the project as long as tension is maintained throughout the project and there are no holes where stuffing can be seen. However, please note if you do not match gauge, it will affect the final size of your project and therefore, potentially the amount of yarn required.
- Please note that if you’re giving an amigurumi toy with safety eyes in it to a little person, please be aware that the safety eyes can be a choking hazard for little ones that may put them in their mouth.
Check out the Step-By-Step Video Tutorial for this Free Crochet Seal Pattern Below:
Head and Body
Round 1: Make a MC and SC 6 into the MC. (6)
Round 2: (SCINC) x 6. (12)
Round 3: (SC, SCINC) x 6. (18)
Round 4: (SC 2, SCINC) x 6. (24)
Round 5: (SC 3, SCINC) x 6. (30)
Rounds 6 – 10: SC around. (30) – Insert eyes in stitches 3 and 8 of Round 6.
Insert safety nose in stitch 6 of Round 8, centered between the eyes. I recommend placing stitch markers in these spots until you are able to attach the safety eyes.
Round: 11: (SC 3, SCDEC) x 6. (24) – Start adding stuffing, adding a bit more after every row or two.
Round: 12: (SC 2, SCDEC) x 6. (18)
Round 13: (SC, SCDEC) x 6. (12)
Round 14: (SCDEC) x 6. (6)
Round 15: (SCINC) x 6 (12)
Round 16: (SC, SCINC) x 6. (18) – Continue to add stuffing every couple of rows, adding extra in the neck area for added support of the head.
Round 17: (SC 2, SCINC) x 6. (24)
Rounds 18 – 20: SC around. (24)
Round 21: (SC 2, SCDEC) x 6. (18)
Round 22: SC around. (18)
Round 23: (SC, SCDEC) x 6. (12)
Round 24: SC around. (12)
Round 25: (SCDEC) x 6. (6)
Round 26: (SCINC) x 2, SC, (SCINC) X 2, SC. (10)
Round 27: SC, (SCINC) x 2, SC 2, (SCINC) x 2, SC 3. (14)
Round 28: SC 2, (SCINC) x 2, SC 5, (SCINC) x 2, SC 3. (18)
Rounds 29 -31: SC around. (18)
Join last ST to first ST with a SL ST. FO leaving a long tail.
Finish stuffing the body but do not add any stuffing to the tail portion of the body.
Hold the two long sides of the tail fin together and sew the hole closed using a tapestry needle.
Fins (Make 2)
Row 1: CH 7. SC in 2nd CH from the hook and each CH across. CH 1 and turn. (6)
Row 2: SCDEC, SC 2, SCDEC. CH 1 and turn. (4)
Row 3: SC across. CH 1 and turn. (4)
Row 4: (SCDEC) x 2. CH 1 and turn. (2)
Row 5: SC across. (2)
FO leaving a long tail and sew onto either side of the body, just below the neck.
Finishing Touches for Salty the Seal
The fur may cover up the eyes and nose a bit so use your fingers to smooth the fur away from the eyes and nose. Use a sharp pair of scissors and trim the fur around the face to clean up any fur that may overlap the nose and eyes.
Free Amigurumi Crochet Patterns Using Faux Fur Yarn
Ready to make more amigurumi toys using faux fur yarns? Here are some free crochet patterns that I have available on my site to get you started. Happy Crocheting!:
- Taran Tarantula
- Kaya Koala
- Crochet Koala Keychain
- Flikka Flamingo
- Crochet Christmas Gnome Free Pattern: Gnorman the Gnome
- Seth the Sloth
- Otis the Owl
- Baby Owl Crochet Tree Ornament
- Crochet Animal Ears Headband Free Pattern
- Crochet Gnome Christmas Tree Ornament Pattern
- Crochet Bear Tree Ornament Free Pattern
I’d love to see your finished Salty the Seal made with this free crochet seal pattern! Please share your finished makes by tagging the pattern on Ravelry, sharing it to our Facebook page or Instagram.
Don’t forget to follow me on social media so you always know when new fun patterns, giveaways and reviews are posted.
Facebook: www.facebook.com/TheLoopyLamb
Instagram: www.instagram.com/TheLoopyLamb
Youtube: The Loopy Lamb YouTube Channel
Pinterest: www.pinterest.com/theloopylamb
Newsletter: Sign up for my newsletter!


Hi Ashley,
Thanks for sharing that cute Salty the Seal pattern. That’s my next project. Love your patterns.
You’re welcome! I’m so glad you like it!
Salty the Seal and her Little Pups are SO CUTE! My son loves seals and this one is so fluffy! Another stellar free crochet amigurumi pattern! Thank you for linking up at our Wednesday Link Party 349! Pop by tomorrow – you are being featured! https://oombawkadesigncrochet.com/category/crochet-other/link-parties ♥ Rhondda
Thank you so much Rhondda! I’ll definitely stop by tomorrow 🙂 <3